我们使用必要的cookie来使我们的网站正常运行。经您同意,我们还可能使用非必要的cookie来改善用户体验和分析网站流量。 点击“允许全部”,即表示您同意我们网站按照 Cookie政策.
您可以随时点击“偏好设置”来更改您的cookie设置。
偏好设置
允许我们使用所有 Cookie
Now that you know how to set up the microphone channels on your RØDECaster Pro, the next step is to get each guest connected on headphones and/or connect a pair of speakers.
Using headphones is important while podcasting as it allows you and your guests to distinctly hear what is being recorded so you can listen to and interact with each other clearly.
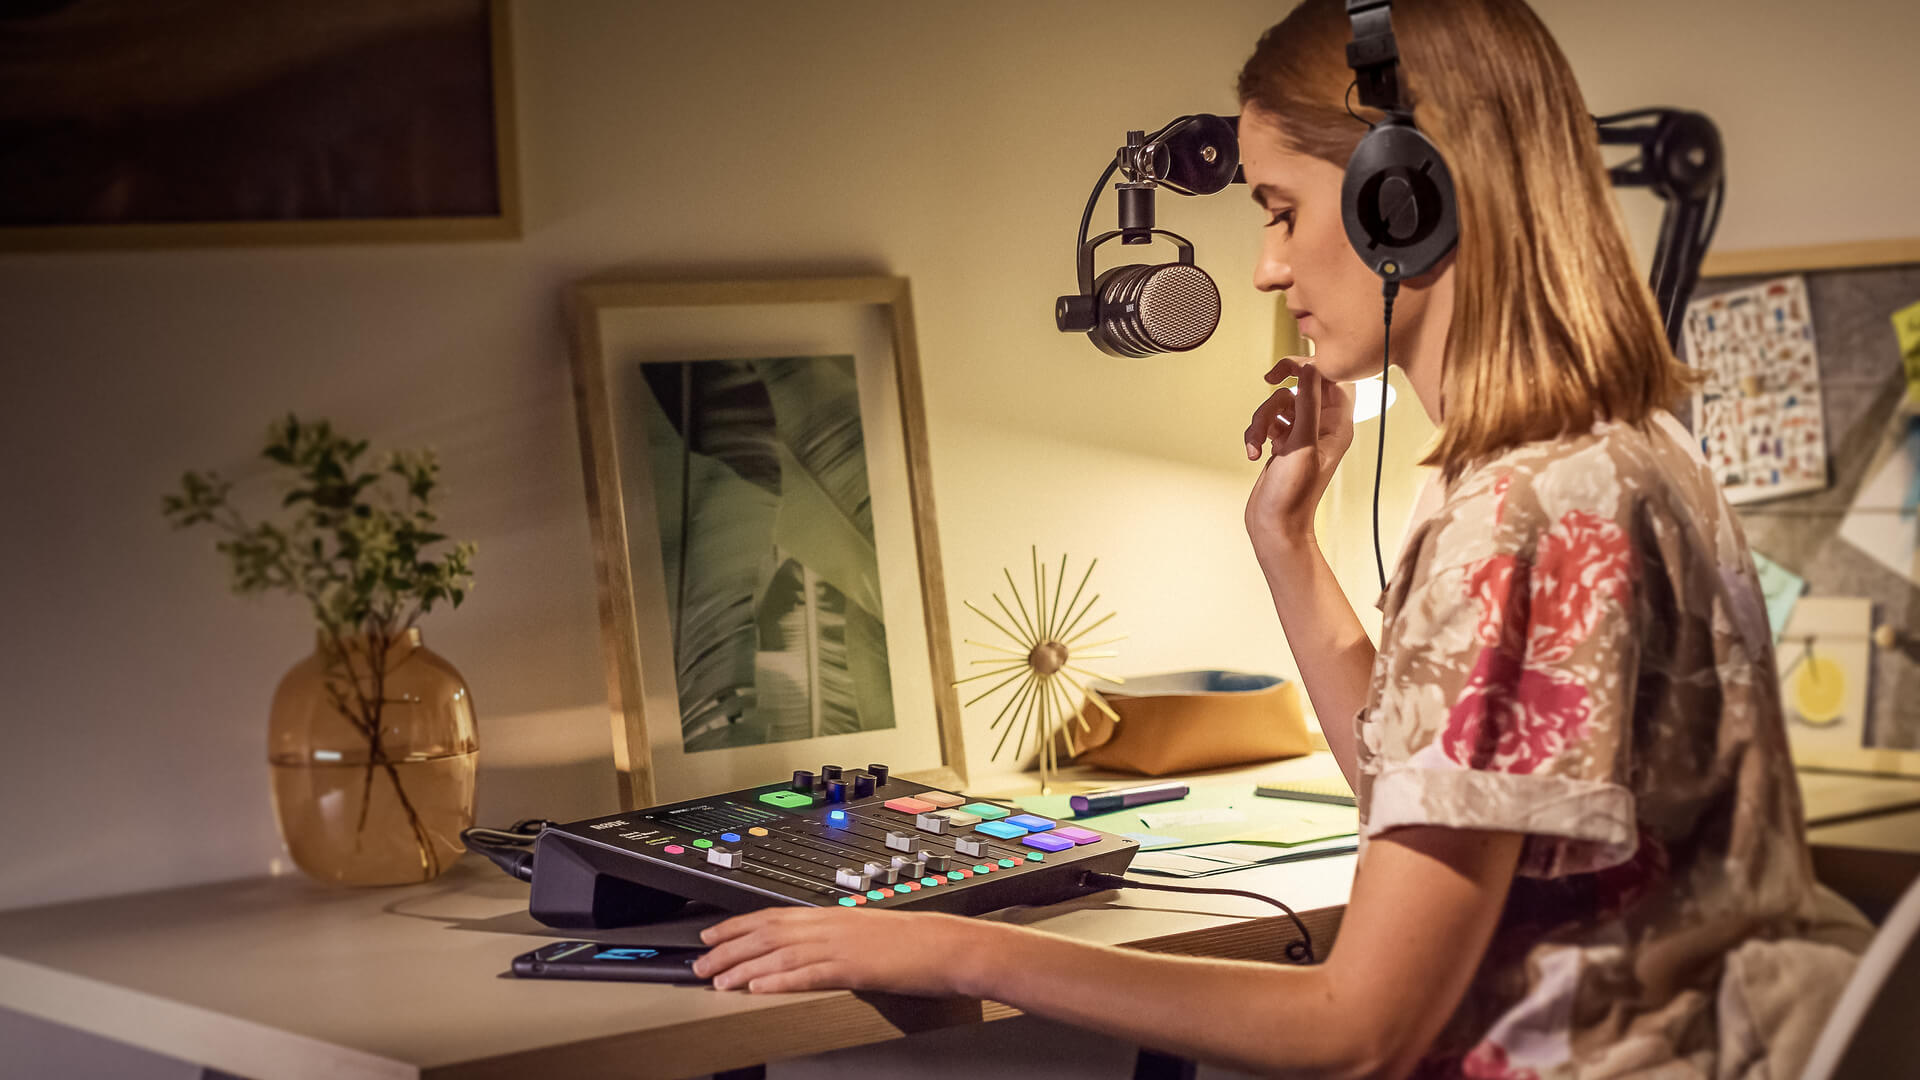
As the host, it’s particularly important for you to use headphones as you will be in charge of setting up and monitoring all the other channels, including other participants in the room, remote guests dialling in via the smartphone, Bluetooth or USB channels, as well as controlling the sound pads and external sound sources. All of this requires you to be able to hear exactly what is being fed into, and out of, the RØDECaster Pro.
We recommend using quality headphones that are comfortable to wear for long periods of time, though any headphones with either a 3.5mm or ¼-inch jack will work fine.
The monitor output is for plugging in speakers, which is handy if you’re in a live podcasting environment, as well as connecting the RØDECaster Pro to external equipment, such as an interface, recorder or broadcast gear.
The RØDECaster Pro features four headphone outputs – one for you and each guest that you might have in the room when you are recording your podcast. These are located on the back of the unit. There is also an extra headphone output on the front of the unit that shares the same headphone output as Channel 1.
If you are hosting the podcast, plug your headphones either into Output 1 on the back of the unit or use the headphone output on the front. The level for both of these outputs is controlled with the first headphone volume control.
Each headphone output has an independent volume control, which are located on the front of the unit and are clearly labelled 1-4. These allow you to precisely balance the output for you and your guests.
Before you start, ensure everyone is comfortable with their headphone levels so you don’t get distracted adjusting levels while recording.

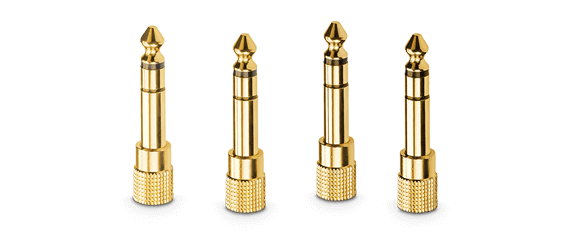
The outputs on the back of the unit have ¼-inch connectors, so you will need to use headphones with a ¼-inch jack or use adaptors like the HJA-4. The output on the front of the RØDECaster Pro has a standard 3.5mm headphone jack.
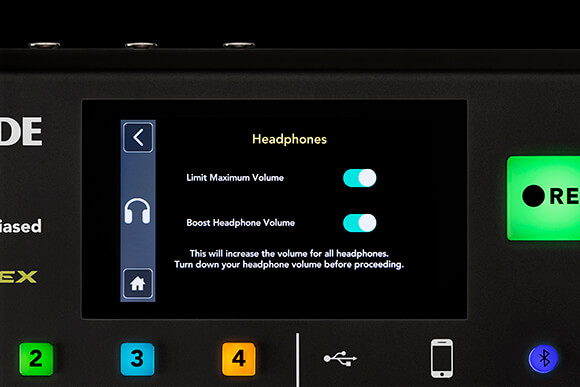
The RØDECaster Pro also allows you to boost and limit the volume for the headphone outputs. These are master controls that affect all of the headphone channels. To access them, tap the ‘Settings’ cog, then ‘Advanced’ > ‘Headphones’.
Limit Maximum Volume – This will set a maximum limit at a safe level for all audio going to the headphones or speakers. This helps to protect you and your guests’ ears in case you accidentally push up a channel slider while loud audio is playing.
While this feature is extremely useful for new users, it's not ideal for more experienced podcasters as it will change the character of the sound and make setting up advanced processing more difficult.
Boost Headphone Volume – This is handy if you are using high-impedance (250-600 ohm) headphones that require a little more output. This function will increase the volume for all headphone channels, so ensure you turn down all headphone outputs before switching it on. Once switched on, all headphone levels can be readjusted.
In addition to the four headphone outputs on the back of the RØDECaster Pro, there are two balanced monitor outputs for connecting a stereo pair of speakers. These are standard 1/4-inch stereo TRS outputs, like you'd find on most mixers and audio interfaces. There is a single volume control for the monitor output, located on the front of the unit.
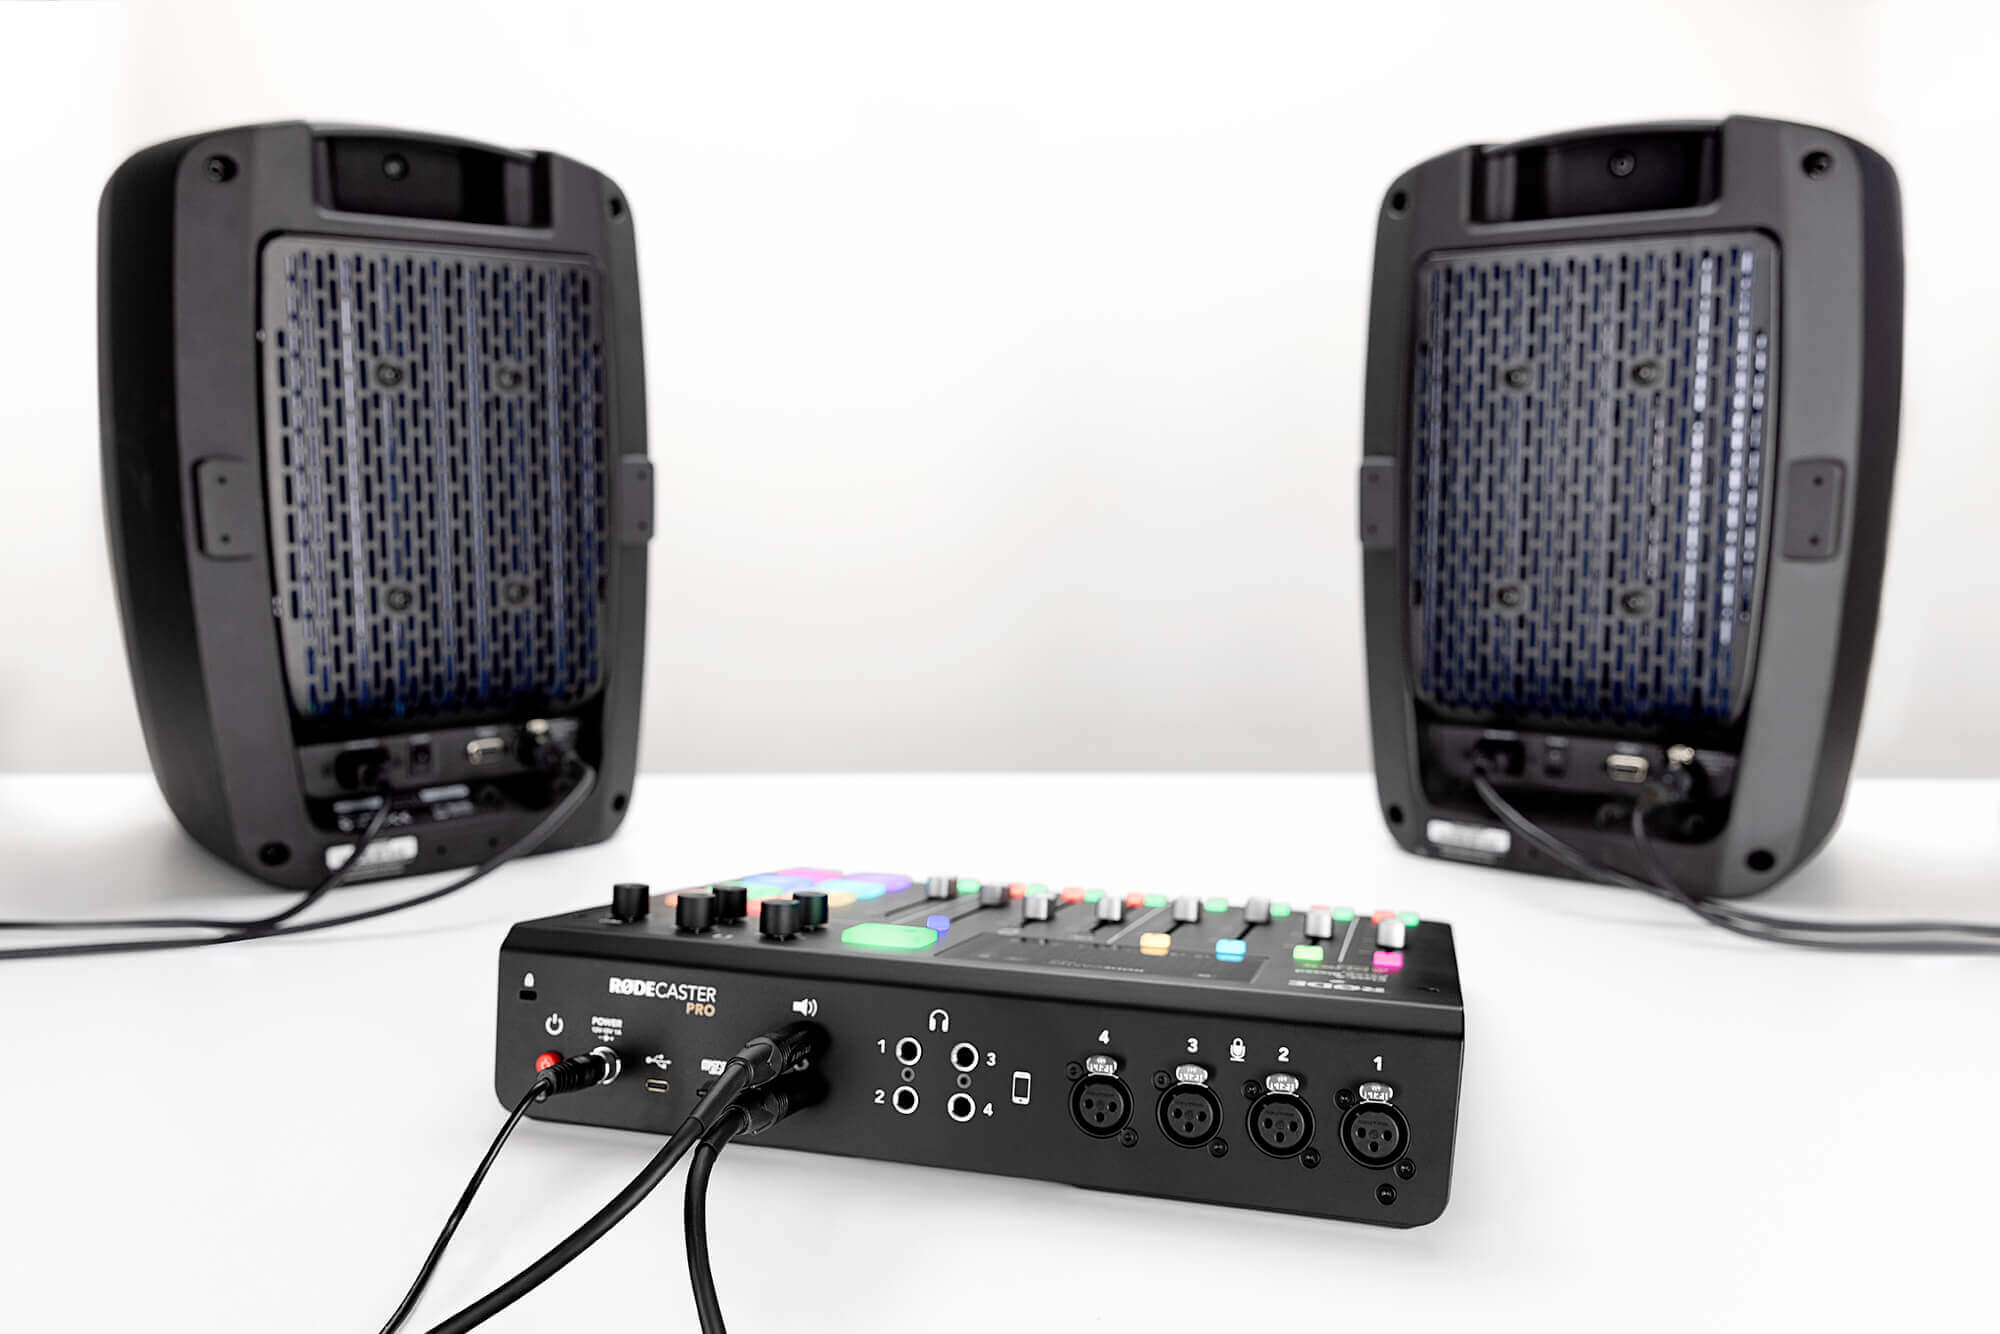
In order to avoid any electrical noise when connecting speakers, make sure to use balanced ¼ inch TRS cables.
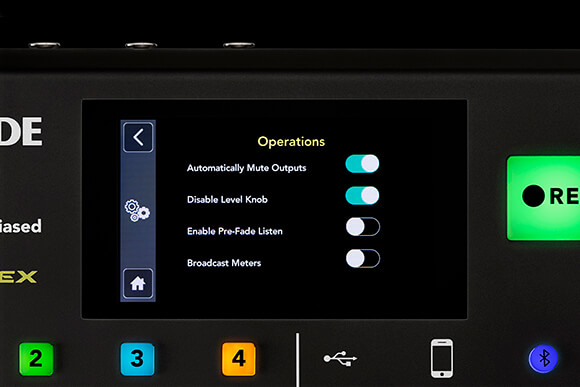
There are two additional settings for the monitor outputs, accessed by going to: ‘Settings’ > ‘Advanced’ > ‘Audio’ > 'Operations’.
Automatically Mute Outputs – This handy feature will automatically mute the output whenever a channel slider is turned up, ensuring you don’t experience feedback while using monitors.
Disable Level Knob – This switch bypasses the level control entirely, defaulting to a standard line level output regardless of the position of the control knob. This is particularly useful if you are using the monitor output to feed into a recorder, broadcast equipment, or livestream and want to make sure you don’t accidentally turn the output down too low or off completely.
The main reason that the host needs to connect their headphones to either of the Channel 1 outputs on the RØDECaster Pro is because these headphone outputs work slightly different to the other headphone outputs.
When any of the solo buttons are pressed, only the host will be able to hear the solo’d channel/s. All other guests and outputs will hear no difference. This is so the host can briefly listen to the audio on each channel on-the-fly without spoiling the flow of the podcast.