当サイトの機能を維持するために必要なクッキーを使用しています。お客様の同意があれば、ユーザーエクスペリエンスの向上やウェブサイトのトラフィック分析のために、必要不可欠でないクッキーも使用する場合があります。 「すべて許可」をクリックすると、当サイトのクッキー使用に同意したことになります。詳細は、当サイトの クッキーポリシー.
「設定」をクリックすることで、いつでもクッキー設定を変更できます。
設定
すべて許可する
Released 03 Oct 2023, Last Updated 05 Oct 2023
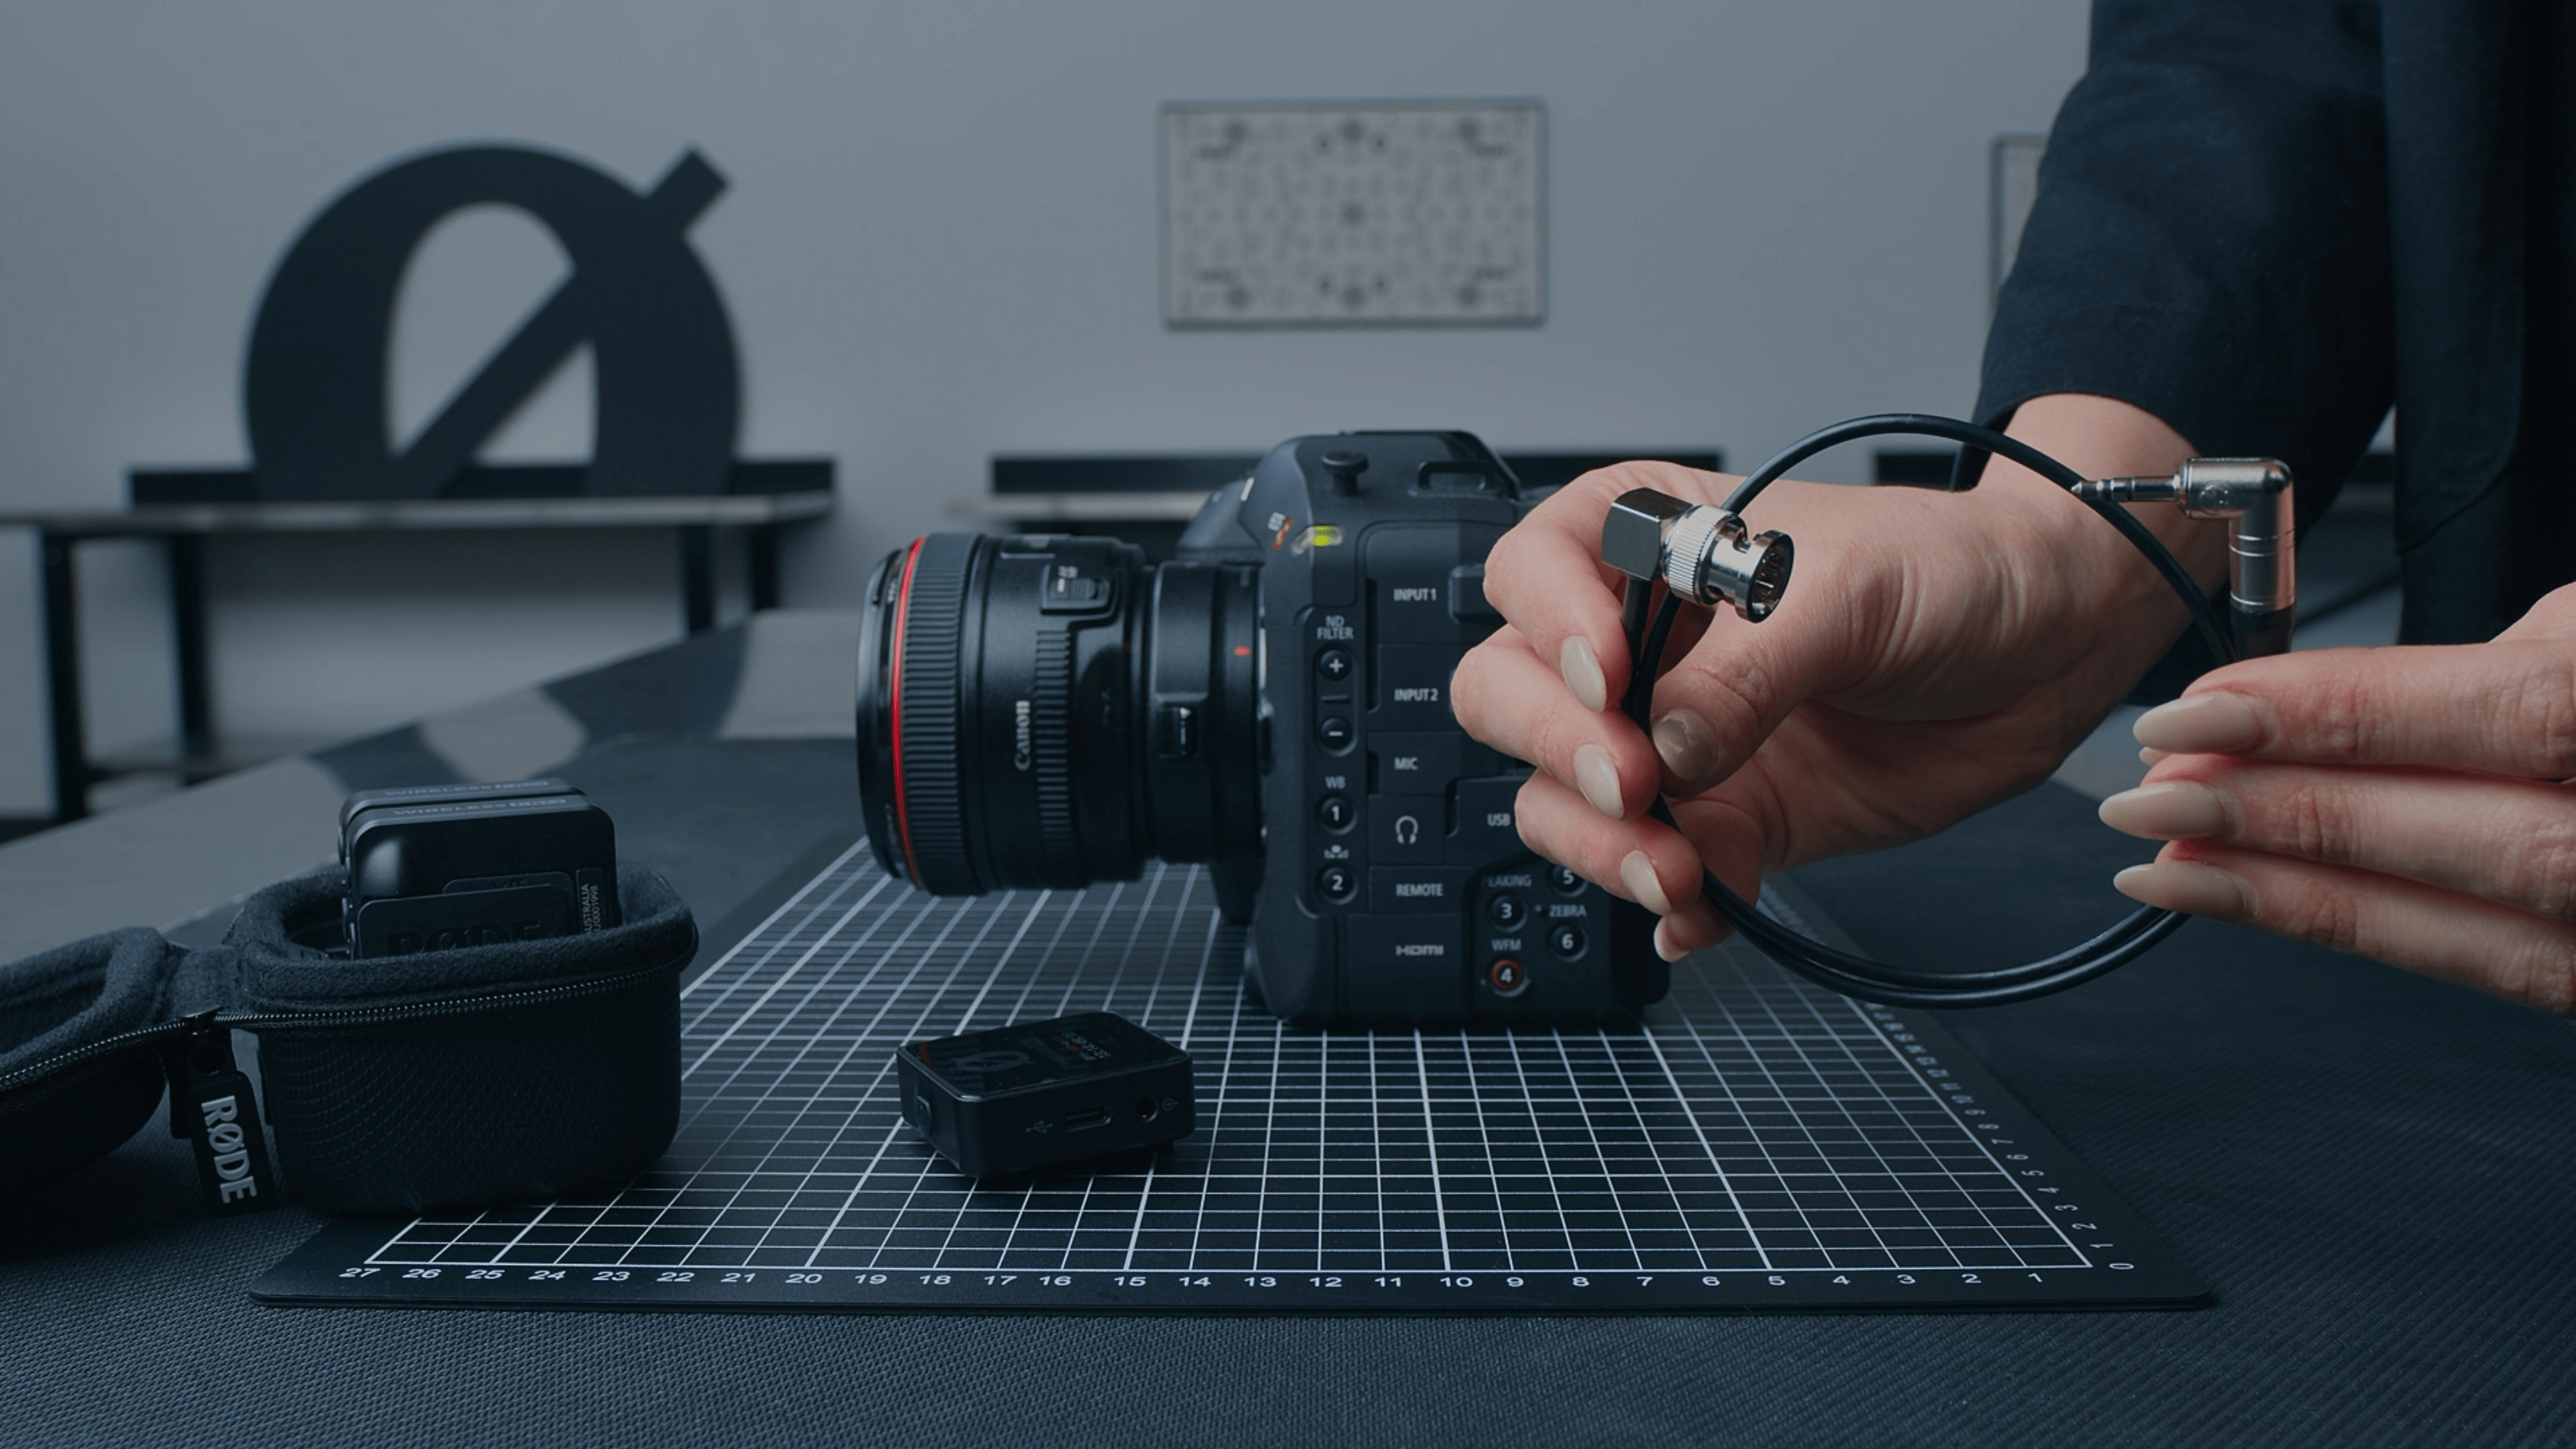
In this article, we’ll walk you through how to set up timecode on your Canon C70 with the Wireless PRO. You will need a 3.5mm-to-BNC adaptor cable to record timecode to the Canon C70.
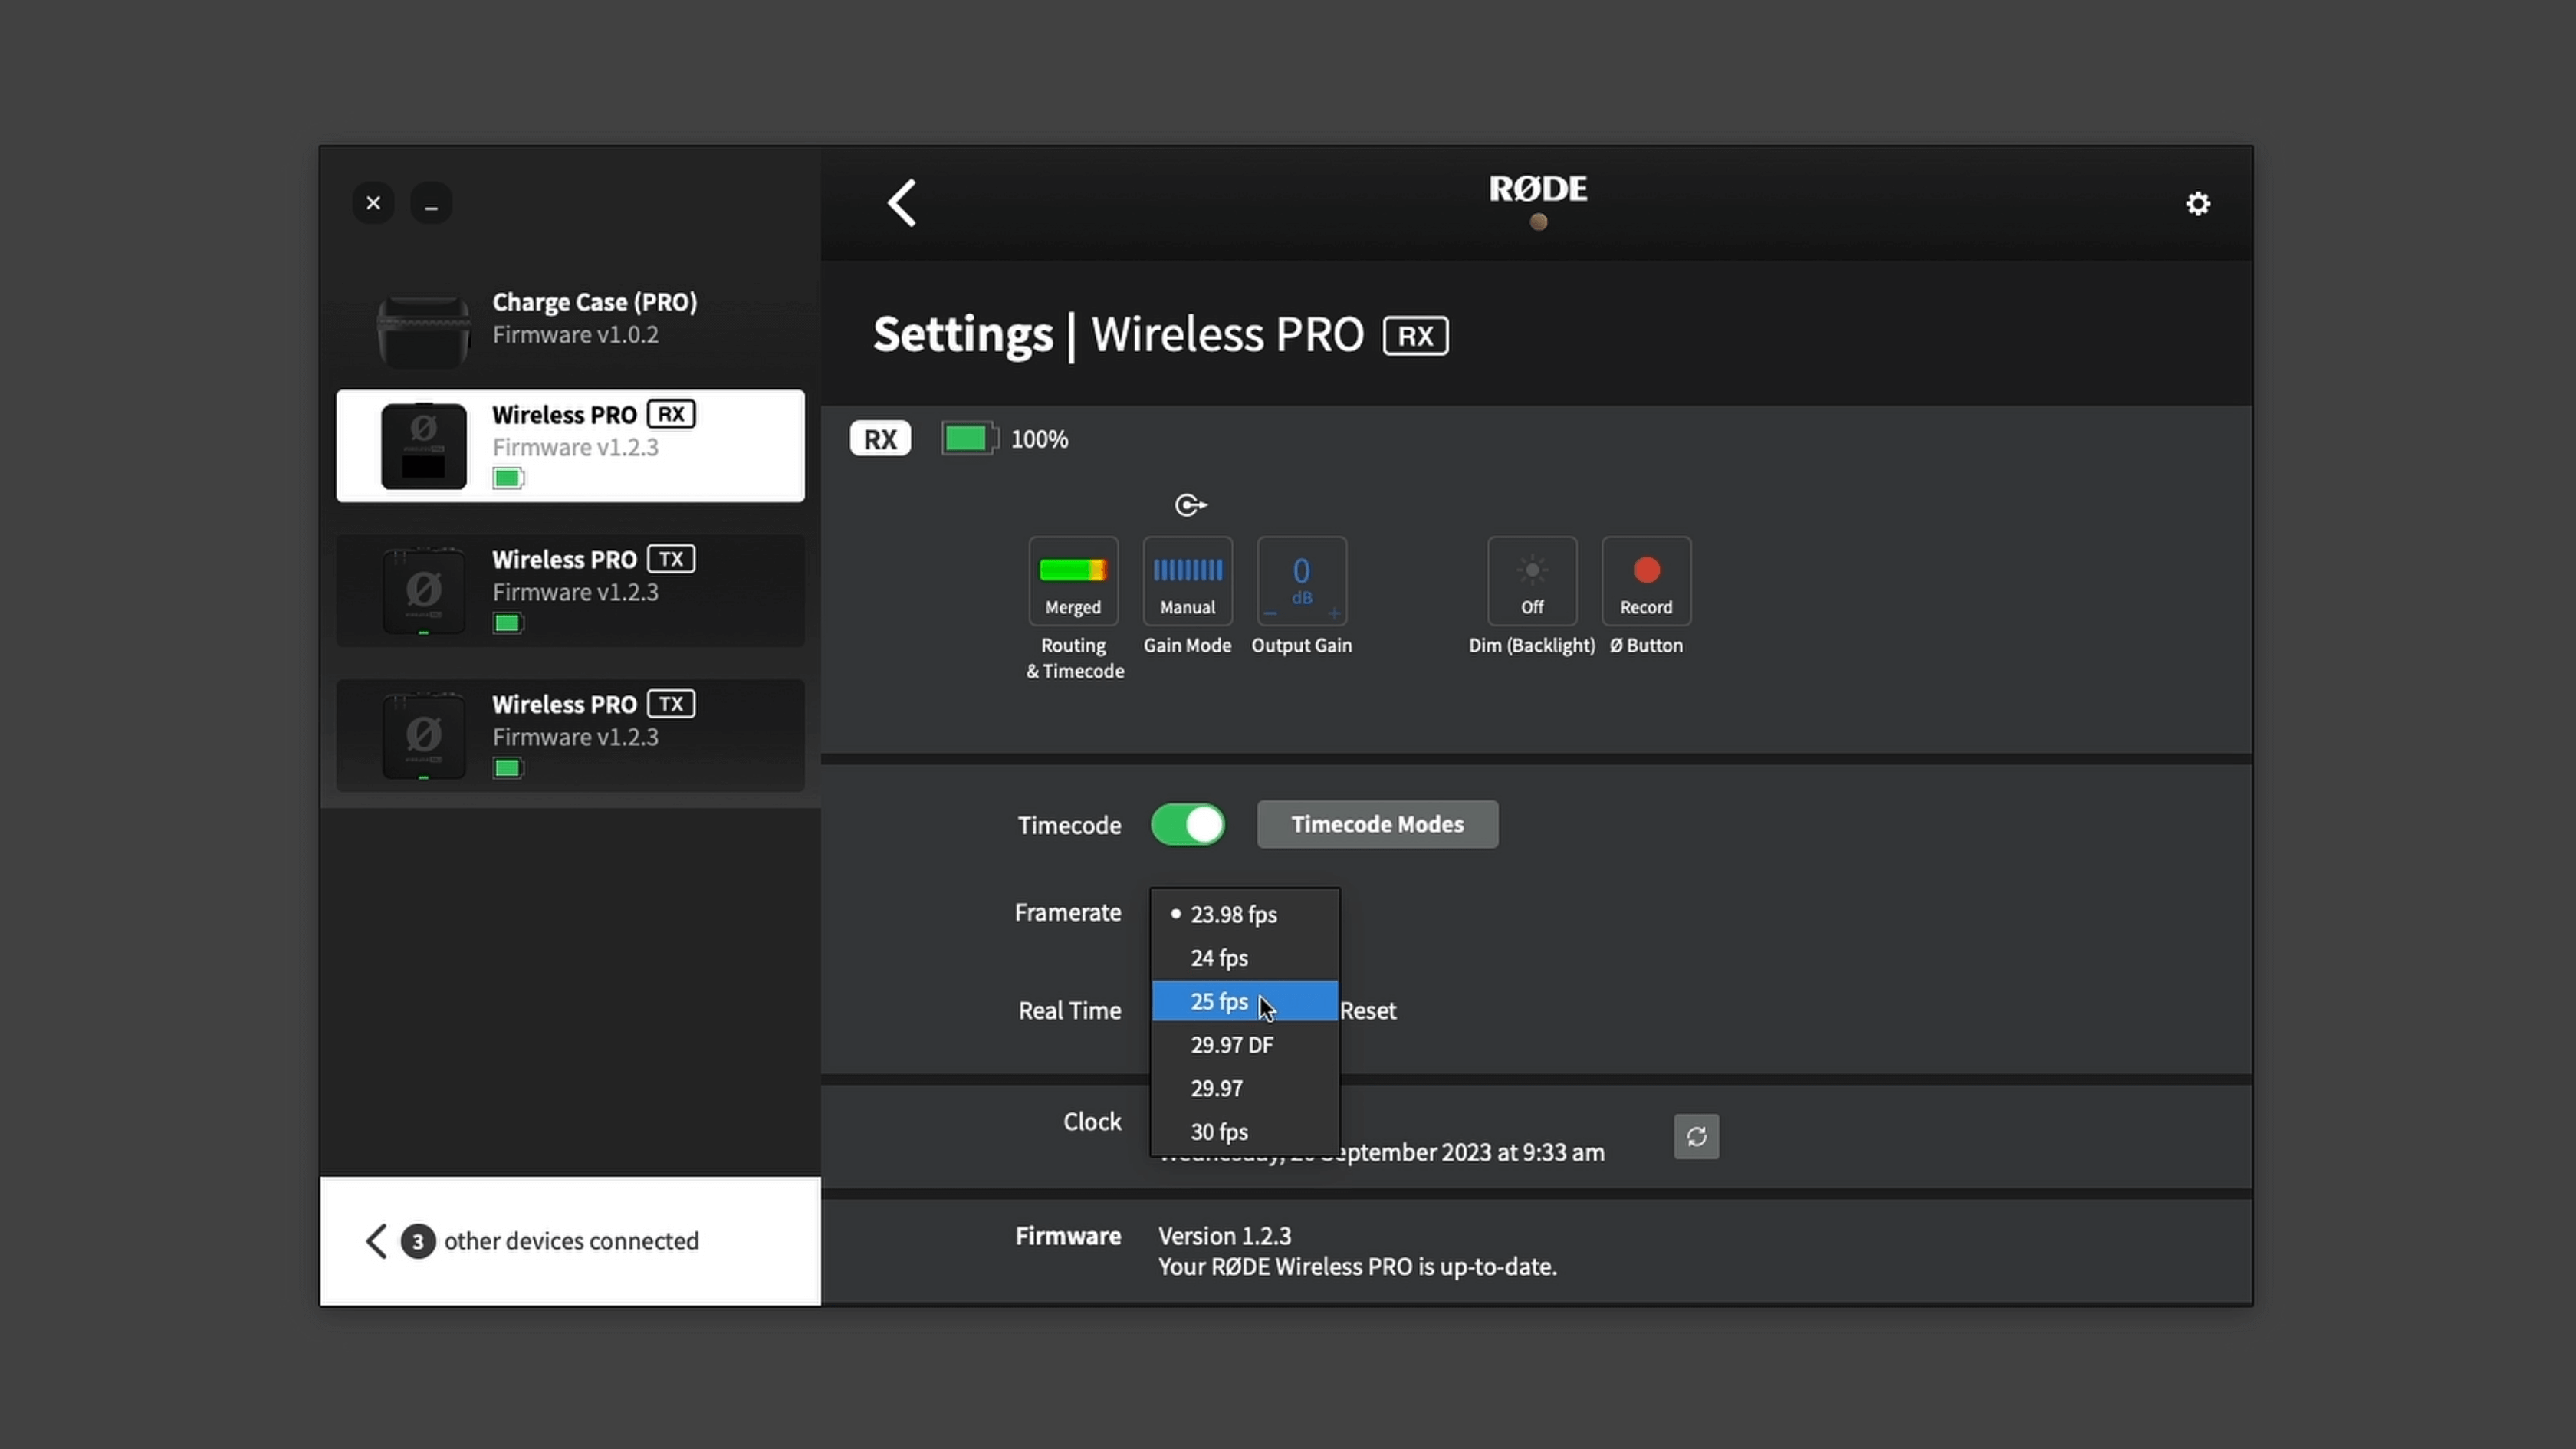
Connect your Wireless PRO receiver to a computer or phone running RØDE Central.
Enable timecode and select the framerate you’re shooting in. Toggle ‘Real time’ on or off, depending on which format you’d like your timecode to appear in, then click ‘Timecode Modes’, choose ‘Timecode 5’ and click ‘Apply’. Check that the output gain is set to 0dB to ensure your camera detects the timecode signal.
Ensure your camera’s framerate matches the one you just set for your timecode.
Go to the third page of the ‘System Setup’ menu, and under ‘TC InOut’, select ‘In’.
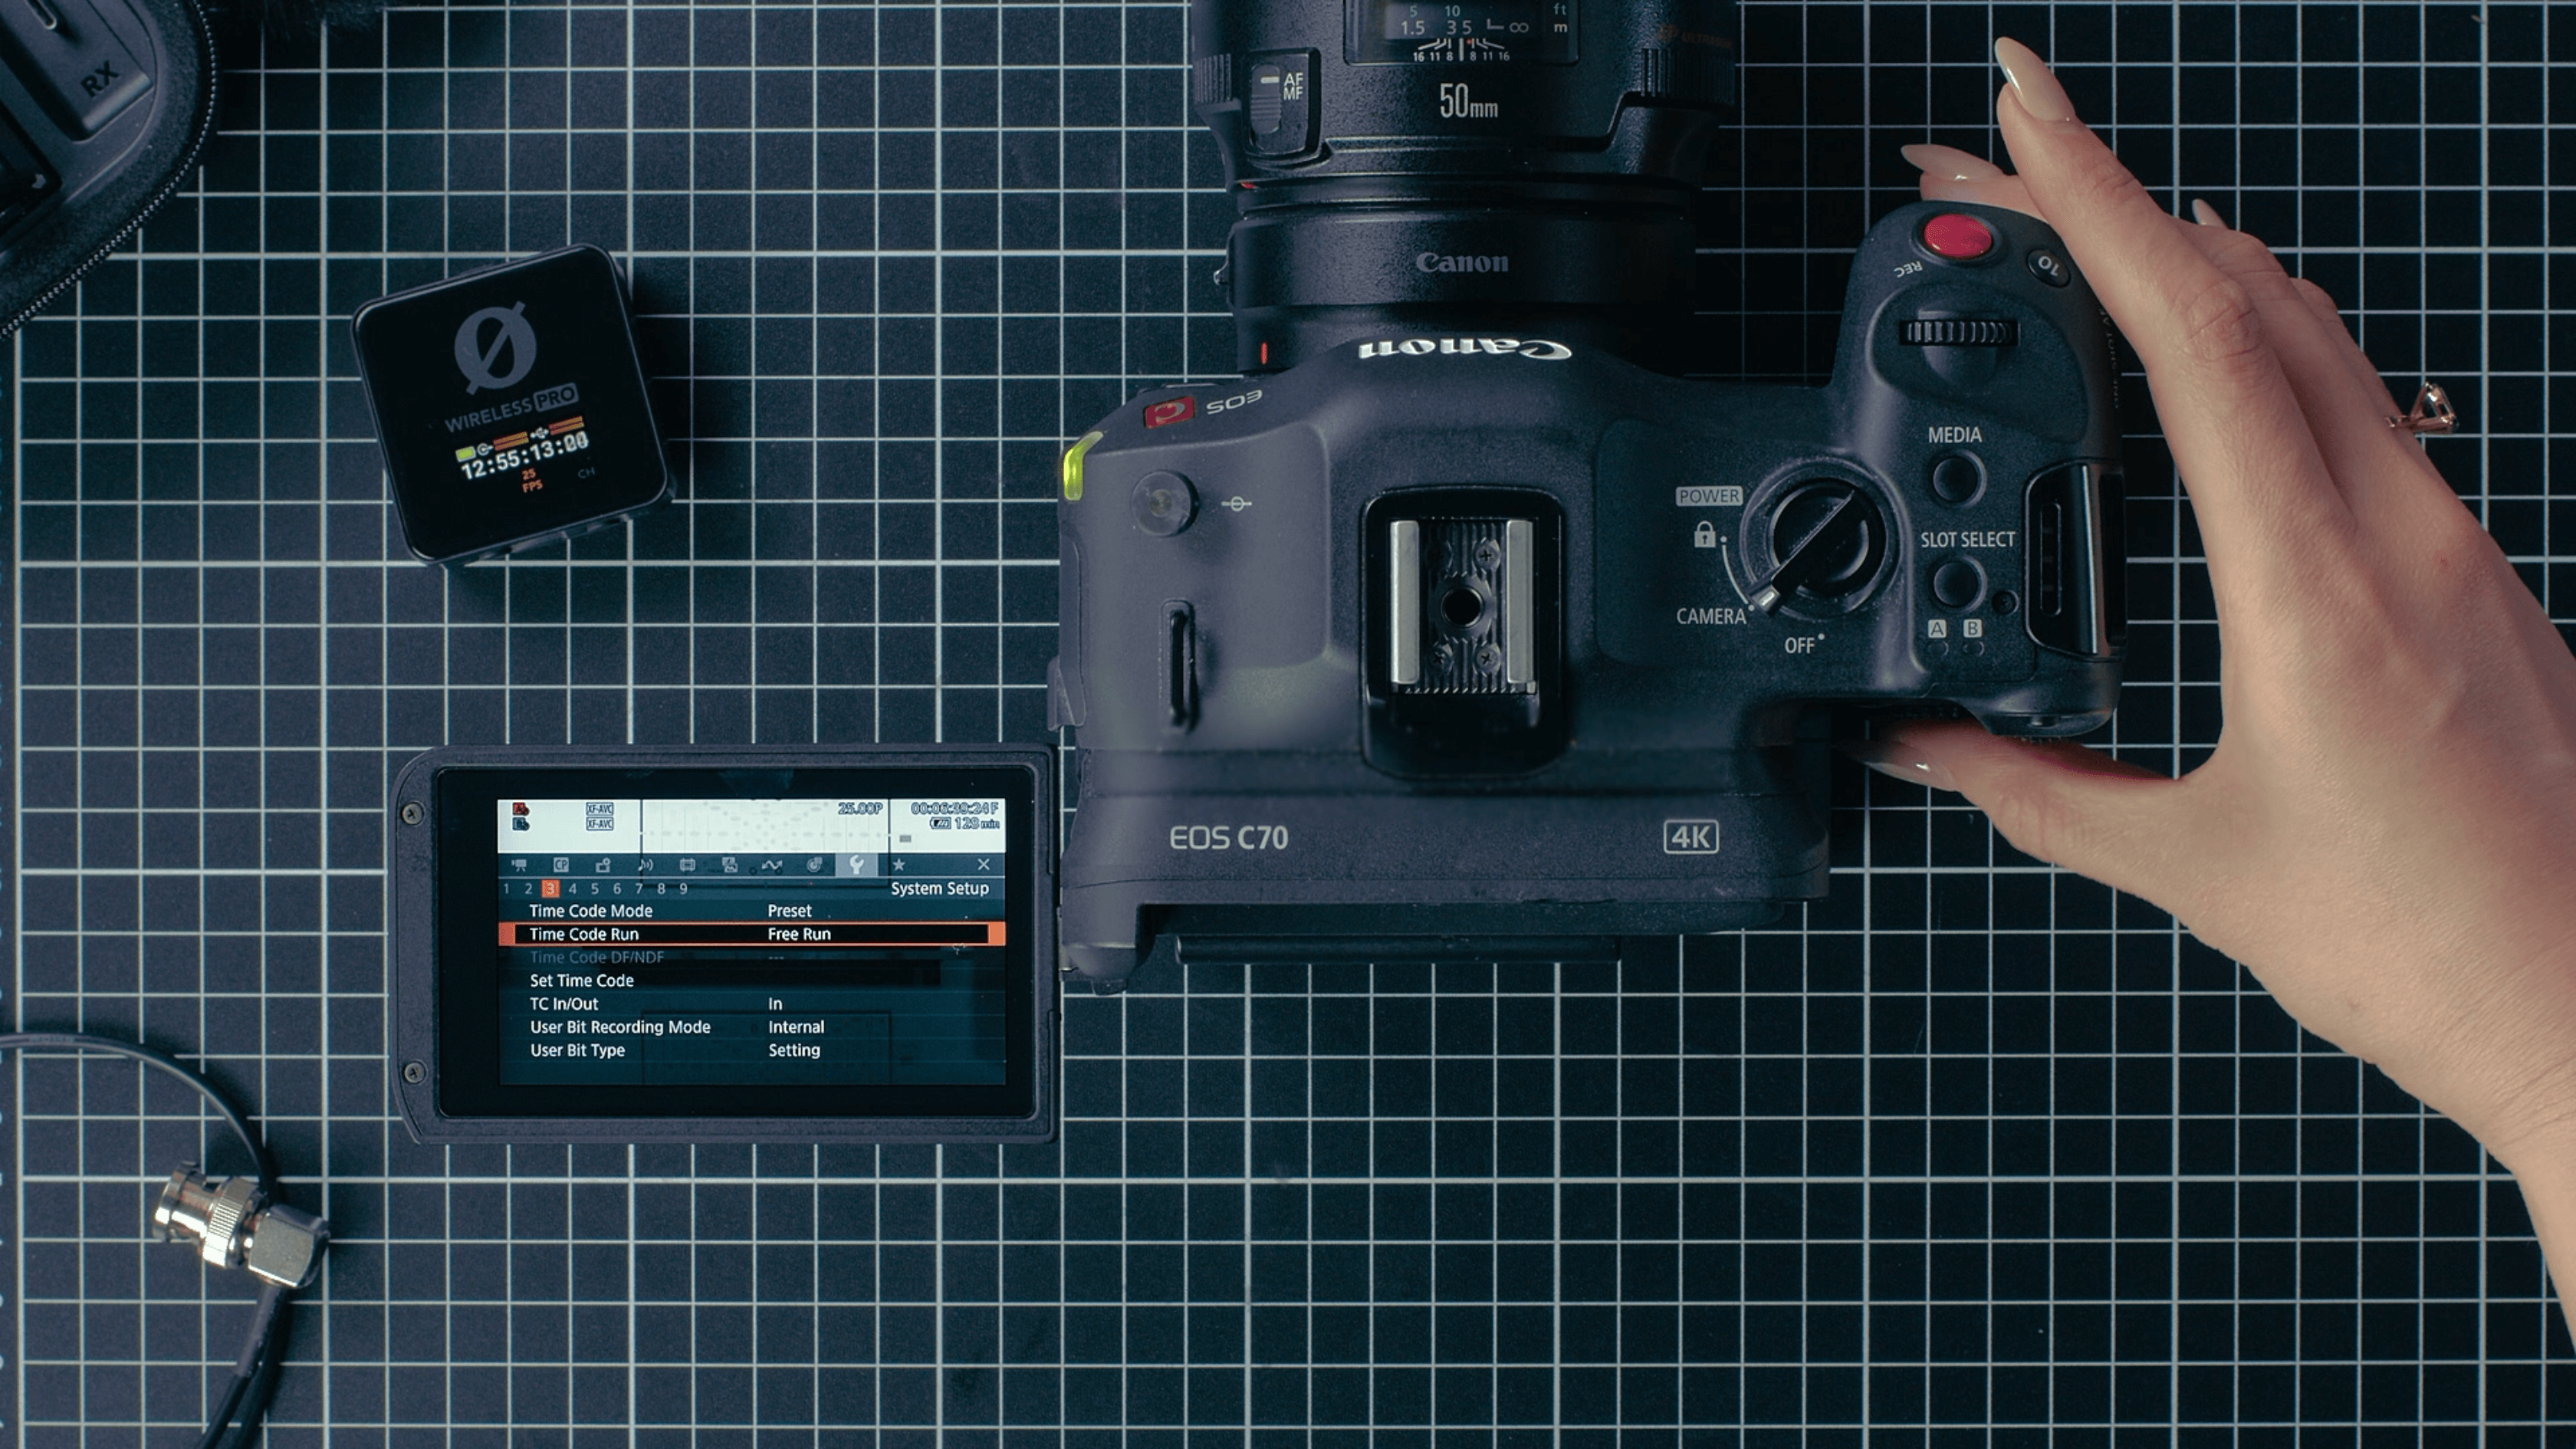
In the same page of the ‘System Setup’ menu, under ‘Time Code Run’, select ‘Free Run’.
Return to the viewfinder screen and connect the Wireless PRO to the Canon C70’s BNC port (labelled “TIMECODE”) using the 3.5mm-to-BNC adaptor cable.
As soon as it’s connected, you will see the timecode on your camera jump to match the timecode set by the Wireless PRO and your camera will now be recording timecode to the metadata of its video files. You can follow our guides linked in the description for how to use your editing software to synchronise your footage using timecode in post-production.
Check out our user guide for more information on Using Timecode with the Wireless PRO.