저희 사이트의 작동을 위해 필수적인 쿠키를 사용합니다. 귀하의 동의 하에, 사용자 경험을 개선하고 웹사이트 트래픽을 분석하기 위해 필수적이지 않은 쿠키도 사용할 수 있습니다. '모두 허용'을 클릭하면, 저희 사이트의 쿠키 사용에 동의하는 것입니다. 자세한 내용은 저희의 쿠키 정책.
'설정'을 클릭하여 언제든지 쿠키 설정을 변경할 수 있습니다.
설정
모두 허용
There are two options when recording with the RØDECaster Pro II. You can either record to a storage device that you connect directly to the unit (such as a microSD card or USB hard drive) or to a computer via USB. Using a storage device is very easy as you can record directly on-board, with little set-up required. Recording to a computer will require recording software (such as a DAW) on your computer and will require some set-up, though recording this way removes the need to transfer files if you plan to do further editing in post-production.
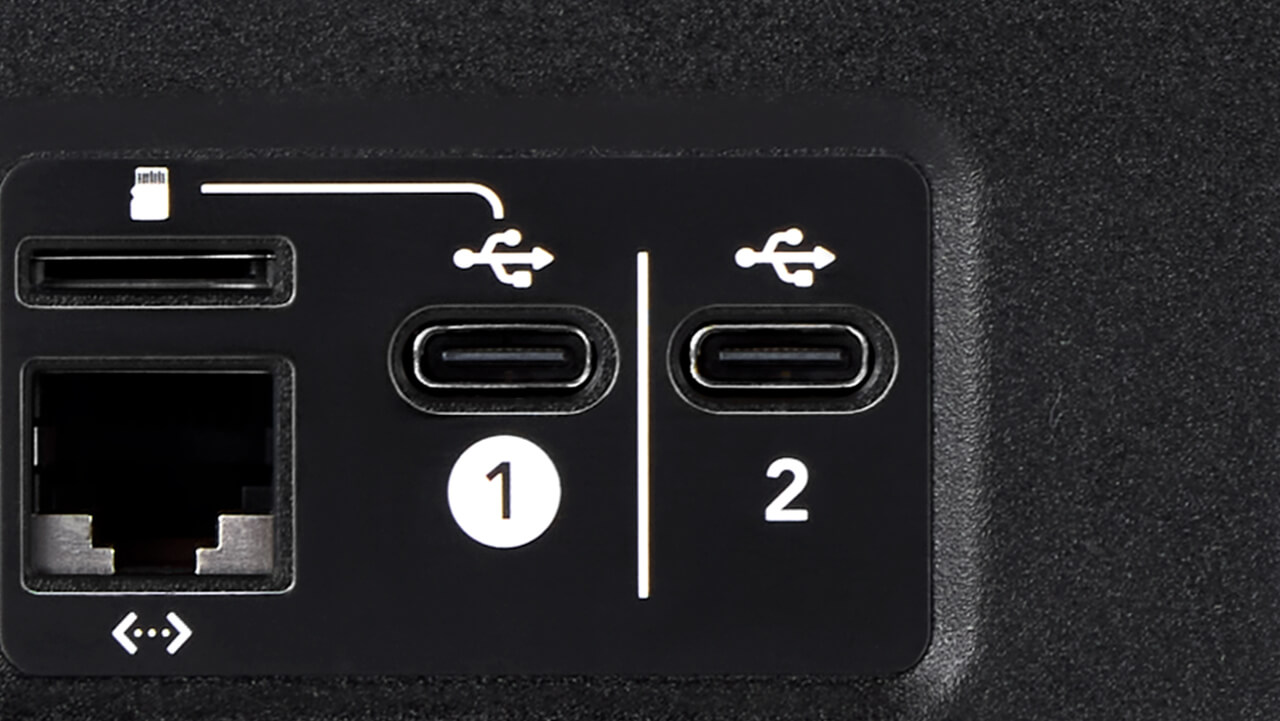
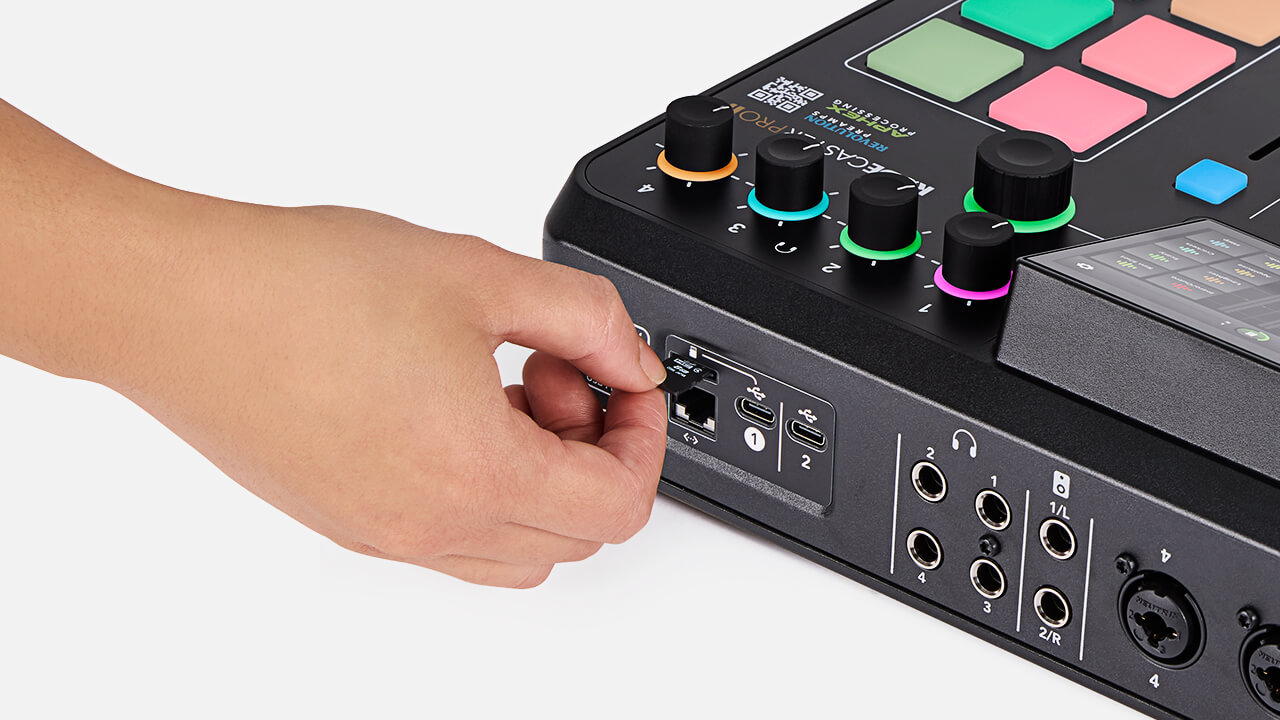
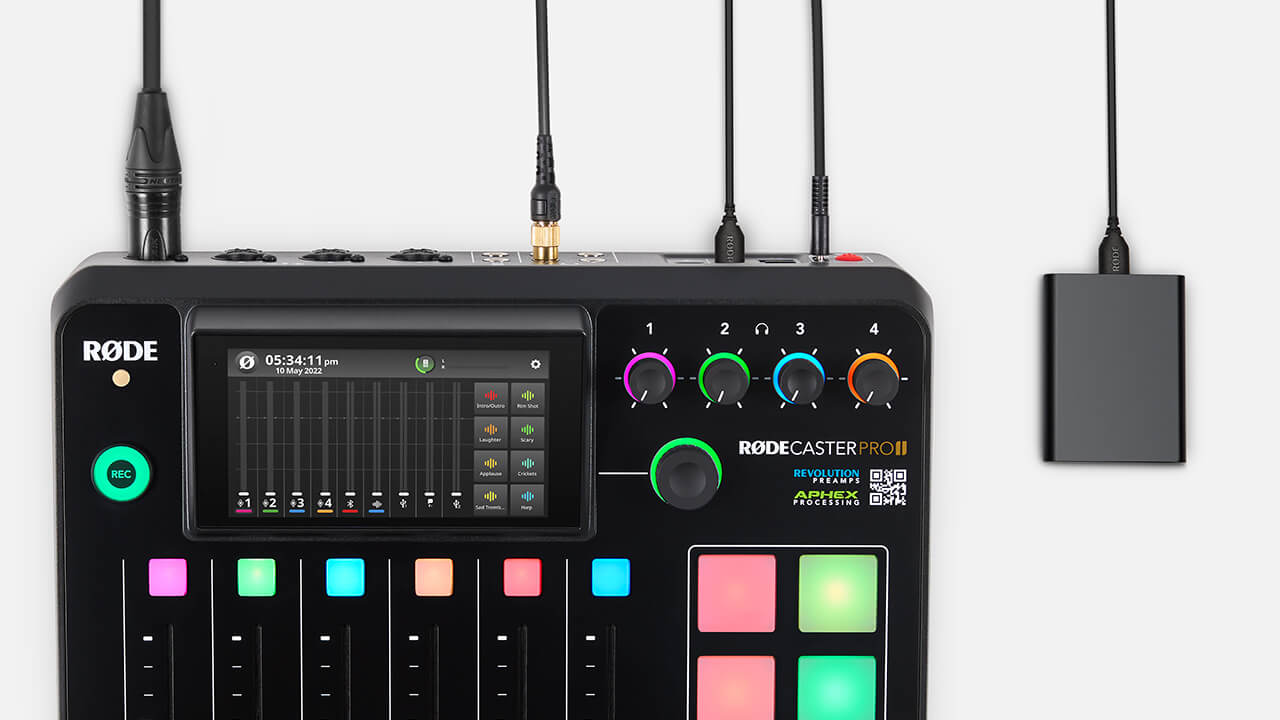
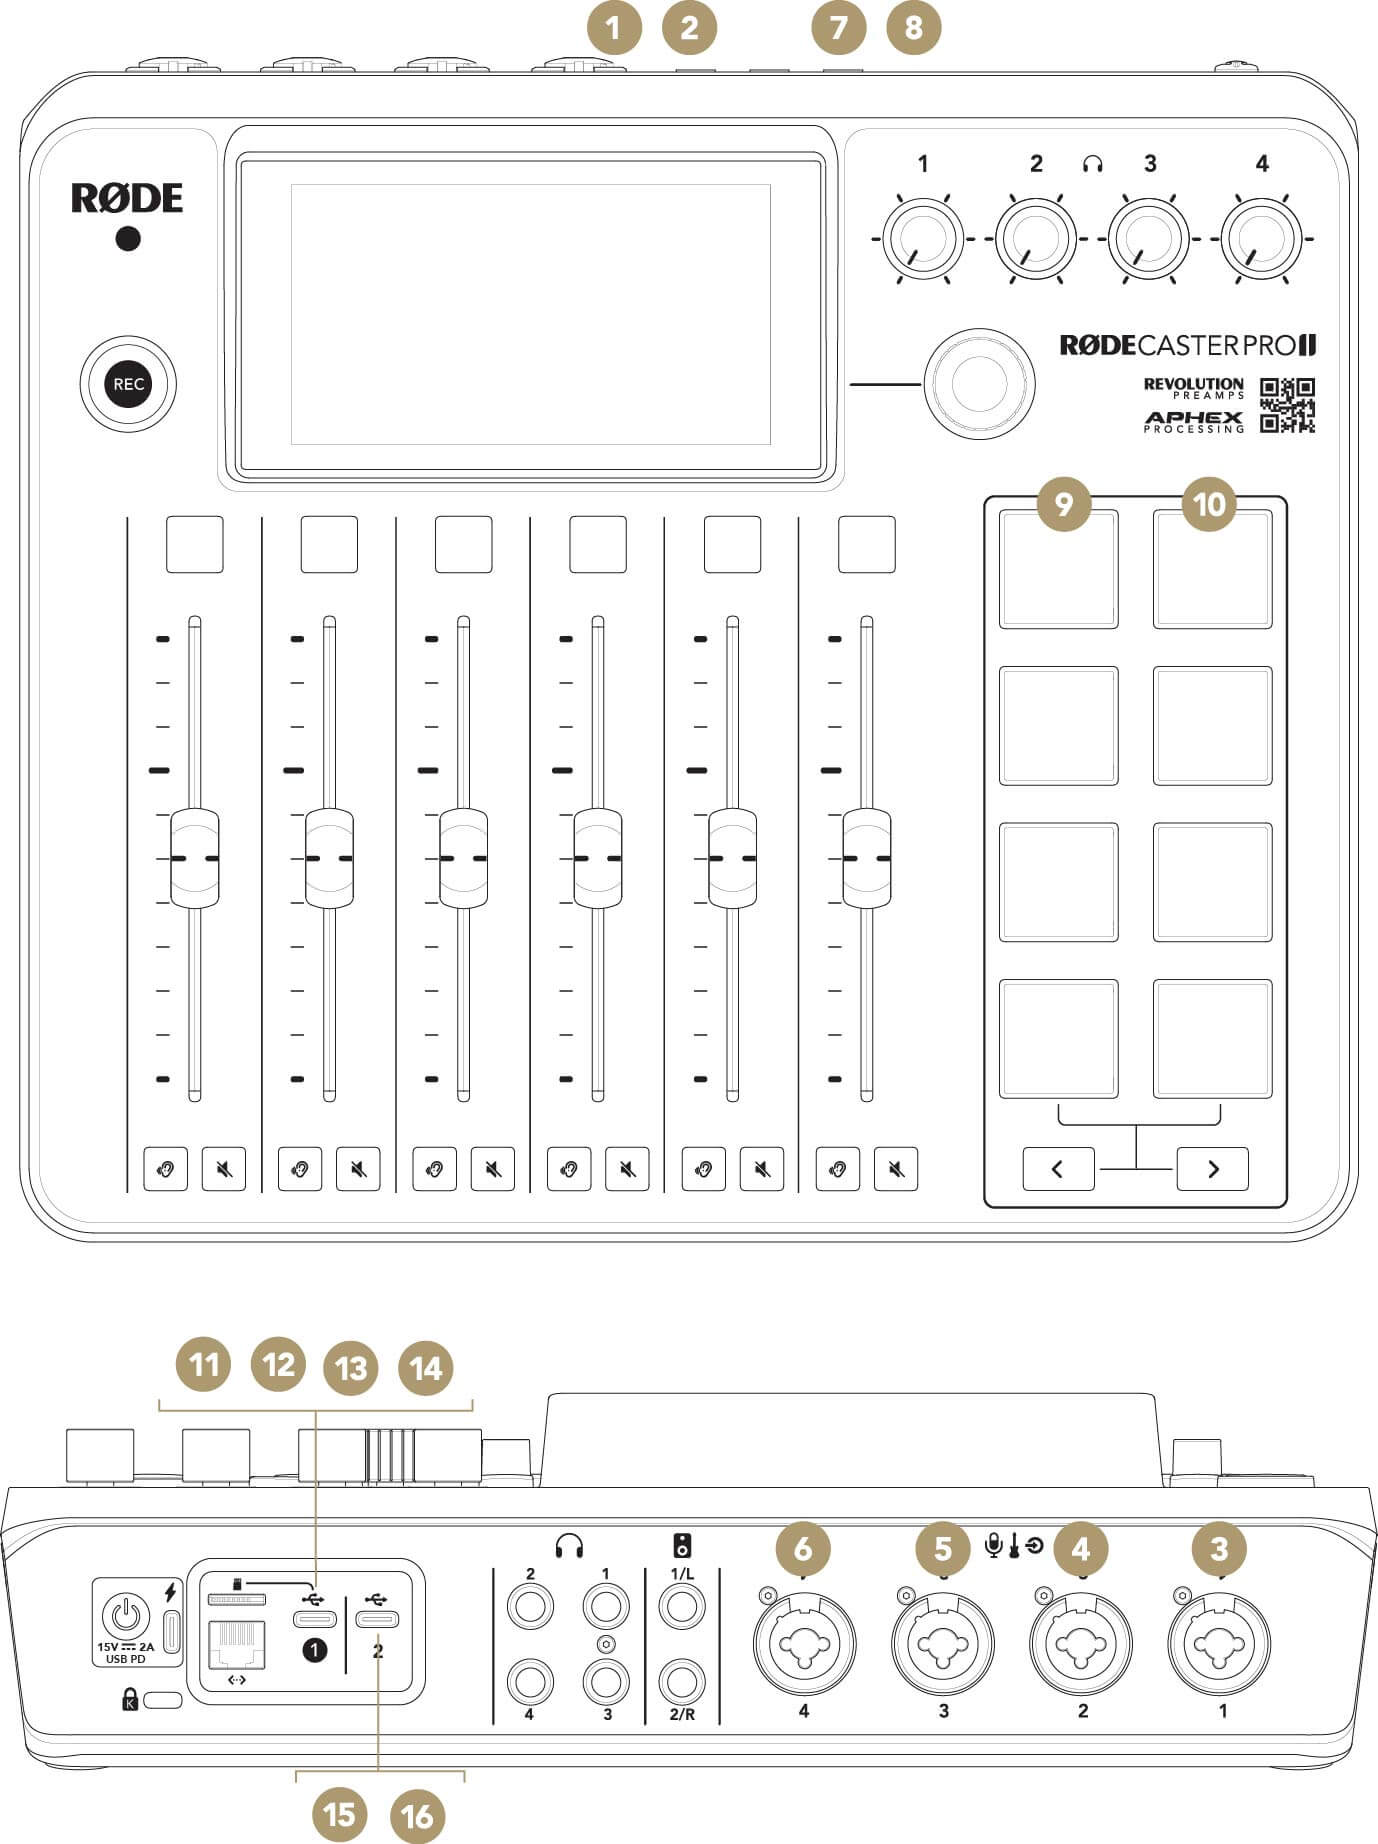
You can record your audio directly to a microSD card. You will need to use a high-quality microSD card that supports data rates of at least 100MB/s. Most quality microSD cards labelled 'microSDHC', and all cards labelled 'microSDXC' will work well. Cards without these standards or low-quality unbranded cards are not recommended and may cause glitches or other recording issues. Insert the microSD into the slot on the rear of the RØDECaster Pro II and click it into place.
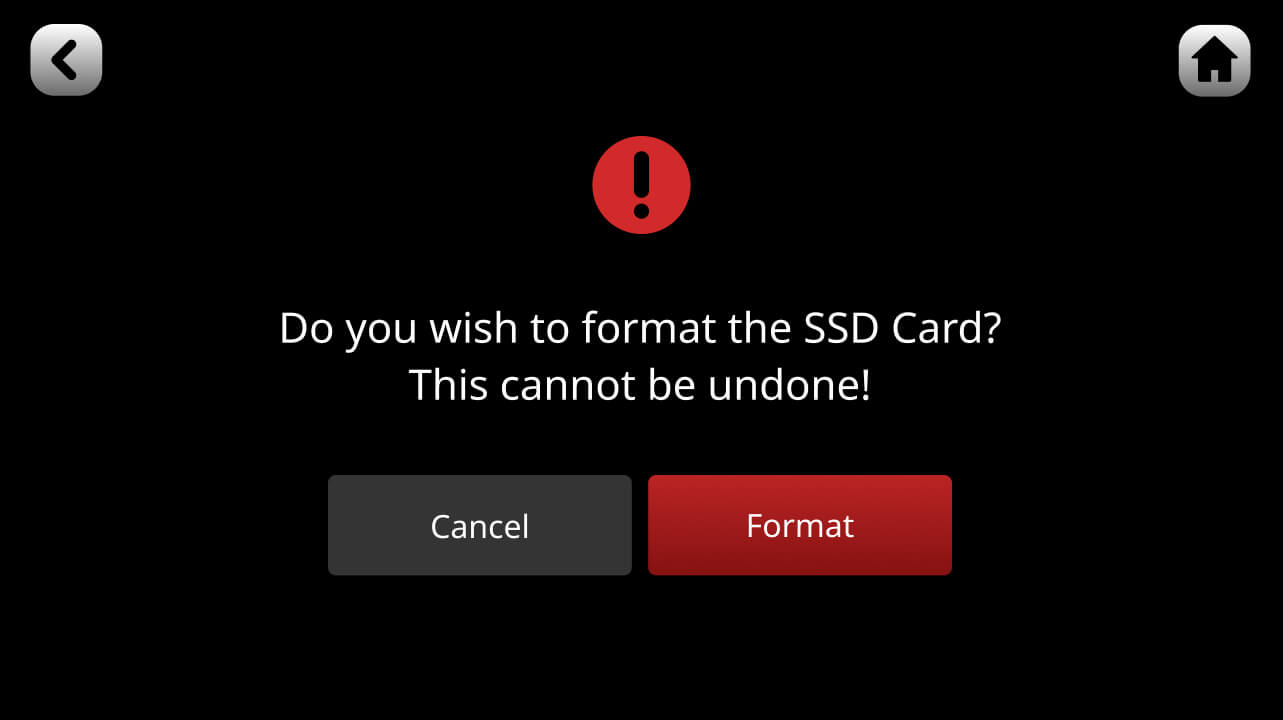
If the card is already formatted, after being inserted an icon will appear on the home screen of the unit showing the available recording time, and the ‘REC’ button will turn green. If the card is not formatted (or is not formatted using a file system recognised by the RØDECaster Pro II), a dialog box will appear asking you to format the card.
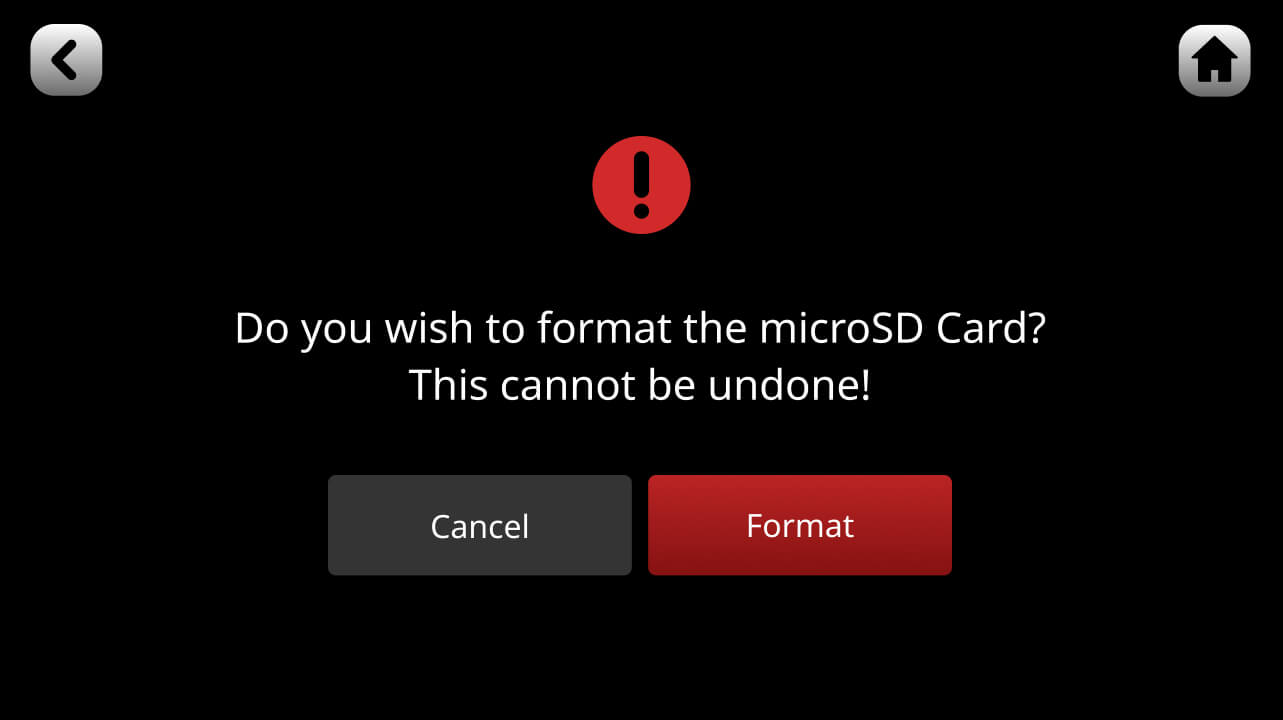
Formatting will delete all files on the card. You can also format the card manually by clicking on the card icon on the main screen, and then selecting ‘Erase’.
You can record your audio directly to a USB storage device (for example a hard drive or SSD) via the RØDECaster Pro II’s USB audio interfaces. You will need to use a high-quality device that supports data rates of at least 100MB/s and has a USB-C connection. Low-quality or unbranded devices are not recommended as they may affect performance or cause glitches and other recording issues. You can connect a USB storage device to either of the USB inputs to suit your setup.
If the device is already formatted, after being inserted an icon will appear on the home screen of the unit showing the available recording time. If the device is not formatted (or is not formatted using a file system recognised by the RØDECaster Pro II), a dialog will appear asking you to format the device. Formatting will delete all files on the device. You can also format the card manually by clicking on the storage icon on the main screen, and then selecting ‘Erase’.
You can record to both a microSD card and hard drive simultaneously.
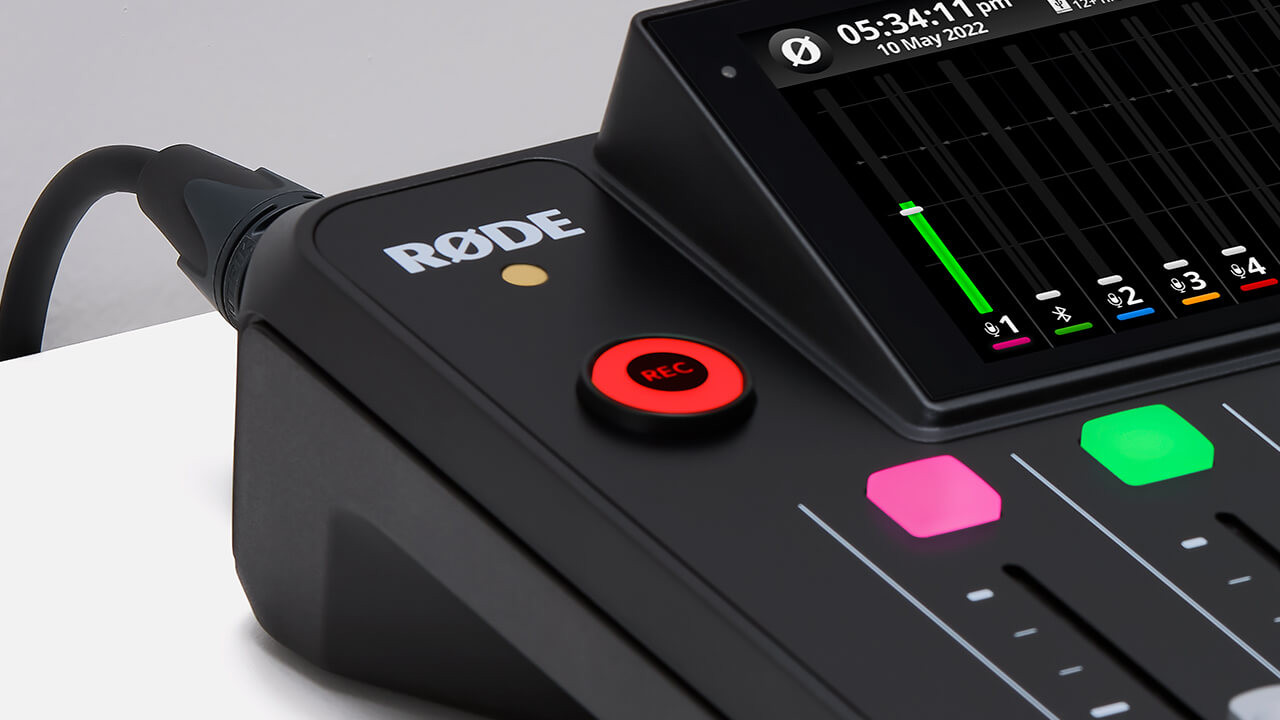
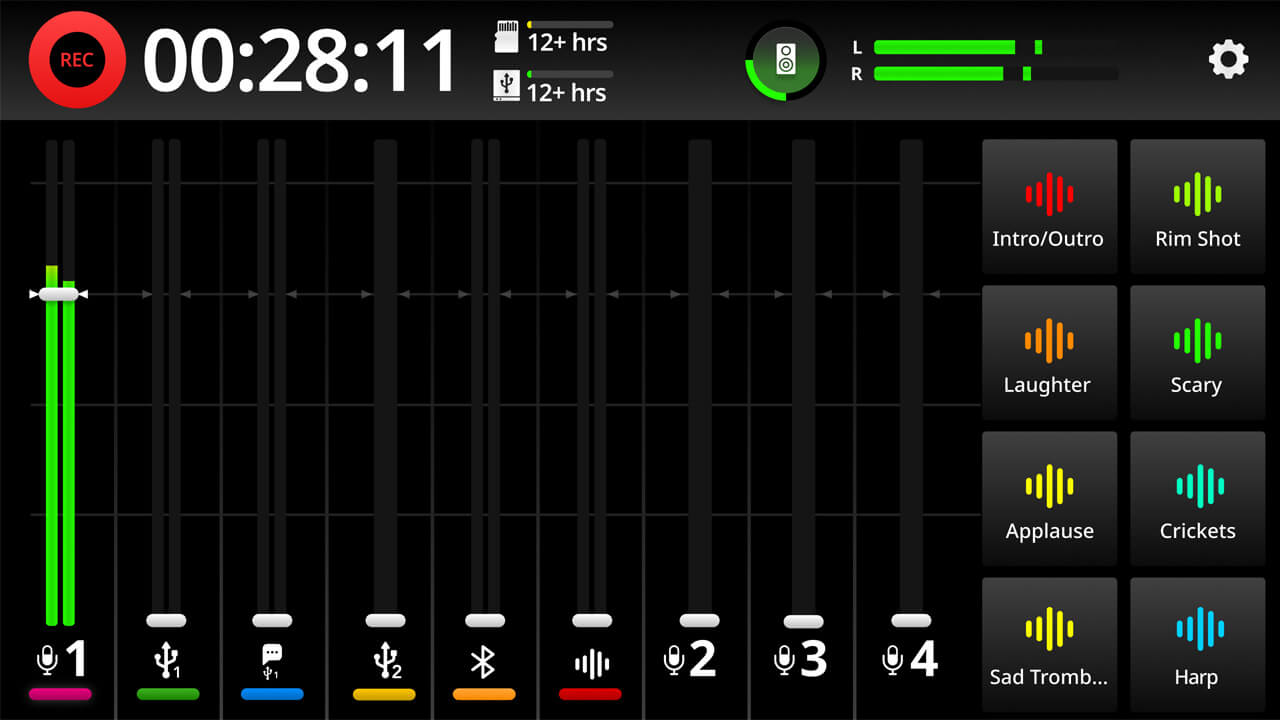
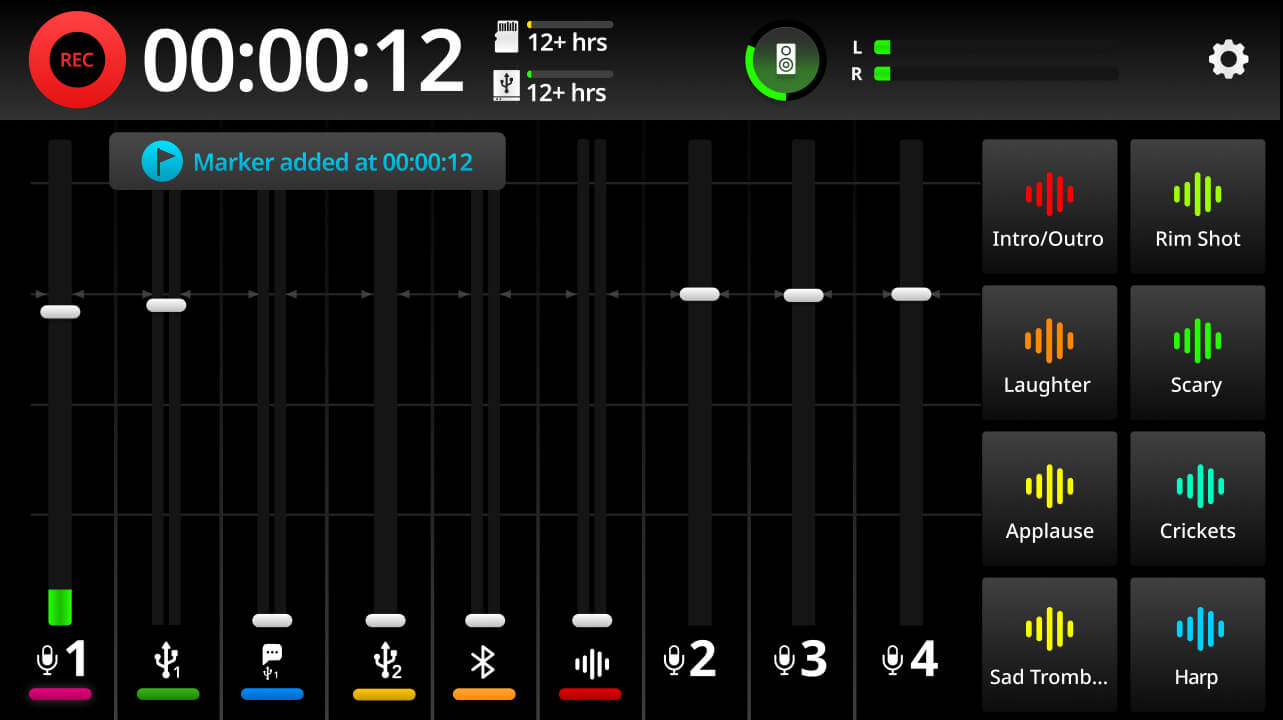
To start a recording, press the ‘REC’ button to the left of the screen. The ‘REC’ button will turn red, and a timer will indicate how long your elapsed recording time is. To stop recording, press and hold the ‘REC’ button.
The above method is called ‘Press to Pause Recording Mode’, which is activated by default. In this mode, a short press will pause the recording. You can switch to ‘Press to Stop Recording Mode’ by going to settings, then ‘Display’ > ‘REC Button’. In this mode, a short press will stop the recording and a press and hold will pause the recording (see below for more info).
The minimum record time is three seconds. Once recording has started, you will not be able to stop the recording until at least three seconds have elapsed.
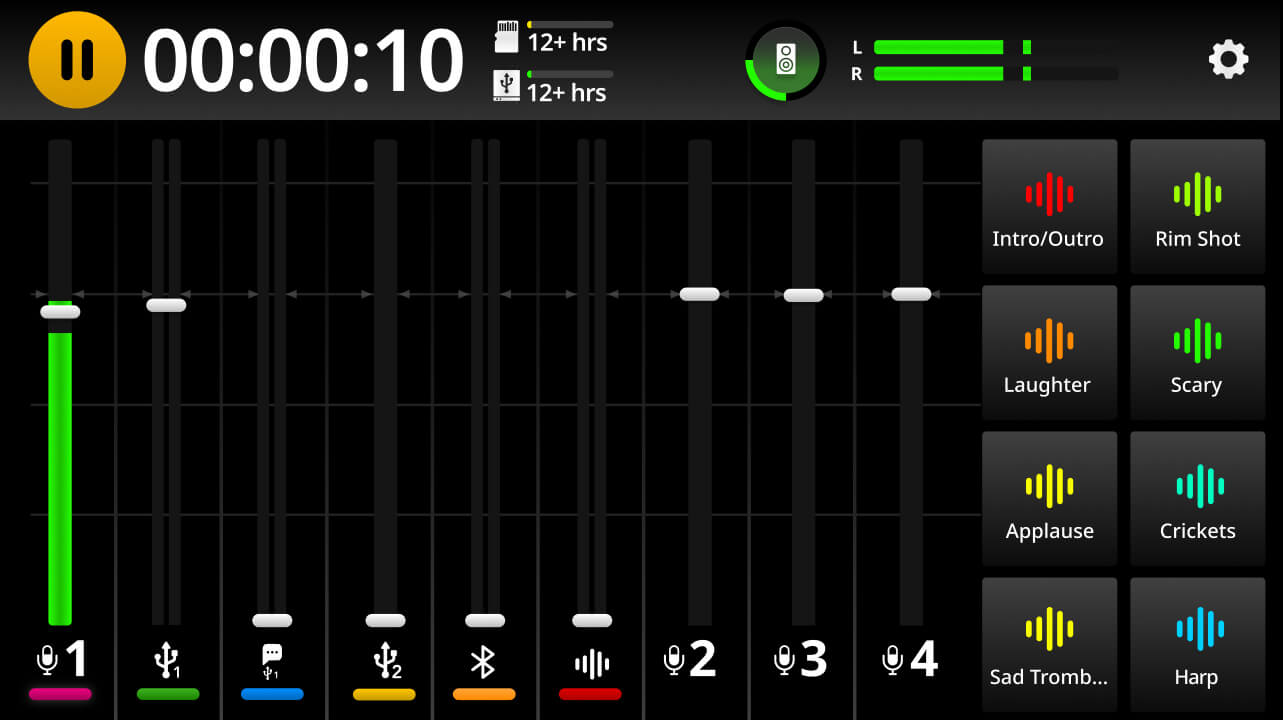
To pause a recording, short press the ‘REC’ button. The button will turn orange, and the recording will pause. To resume the recording, press ‘REC’ again. To stop the recording while in the paused state, press and hold ‘REC’ again. You can also pause the recording by long-pressing the ‘REC’ icon at the top left of the home screen.
The above method is called ‘Press to Pause Recording Mode’, which is activated by default. You can switch to ‘Press to Stop Recording Mode’ by going to settings, then ‘Display’ > ‘REC Button’. In this mode, a short press will stop the recording and a press and hold will pause the recording.
You can place a marker at any point during recording. These can be used to locate sections of your recording when playing them back or when they are imported into a DAW. To place a marker, simply tap the recording timer whilst recording.
Not all DAWs are able to read marker information in audio files; check the documentation for your DAW for more information.
When recording on the RØDECaster Pro II, you can select to record either the full stereo mix or each track individually (plus the full stereo mix). The latter is called multitrack recording and allows you to edit your tracks individually in post-production if needed.
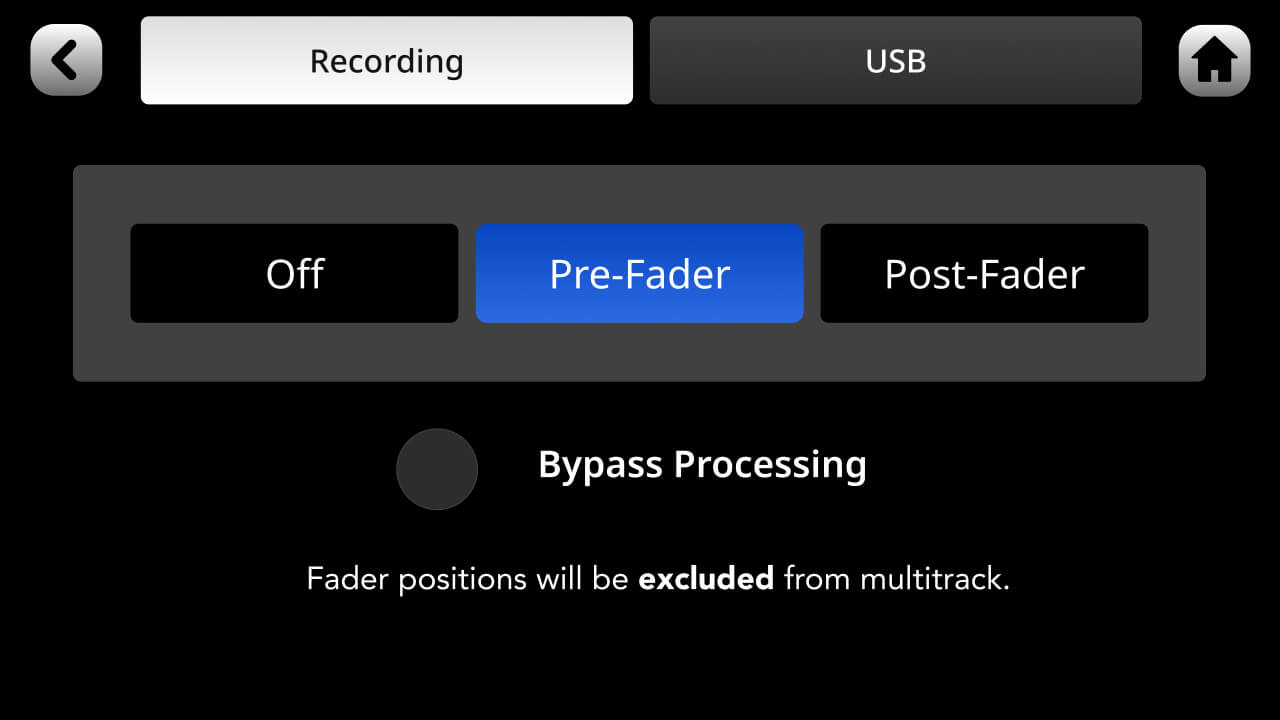
To activate multitrack recording, tap the settings cog then ‘Outputs’ > ‘Multitrack’ (by default, multitrack is set to ‘off’). From this page you can either set it to ‘Pre-fader’ or ‘Post-fader’. Recording pre-fader means that the position of the fader will have no effect on the audio being recorded – i.e., even if the source is faded down, it will still be recorded at unity gain. Post-fader means that the audio will be recorded at the level set by the fader – i.e., if a source is faded right down, nothing will be recorded.
The ‘mix’ output will not be affected by this setting and will always reflect the final mix output, including fader positions.
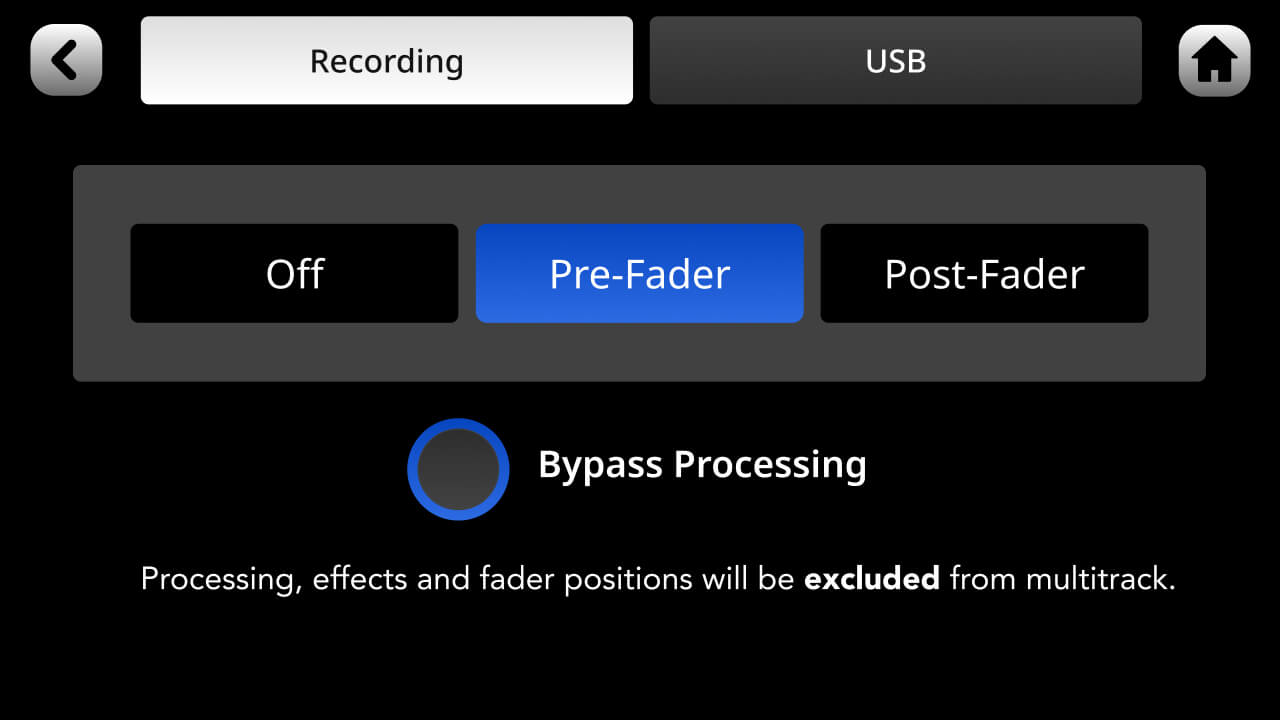
When recording in multitrack, you can choose to exclude processing from your recordings. This means that the raw audio will be recorded without any of the channel processing applied (i.e., the APHEX processing or effects). The ‘mix’ output will not be affected by this setting and will always reflect the final mix output including all processing.
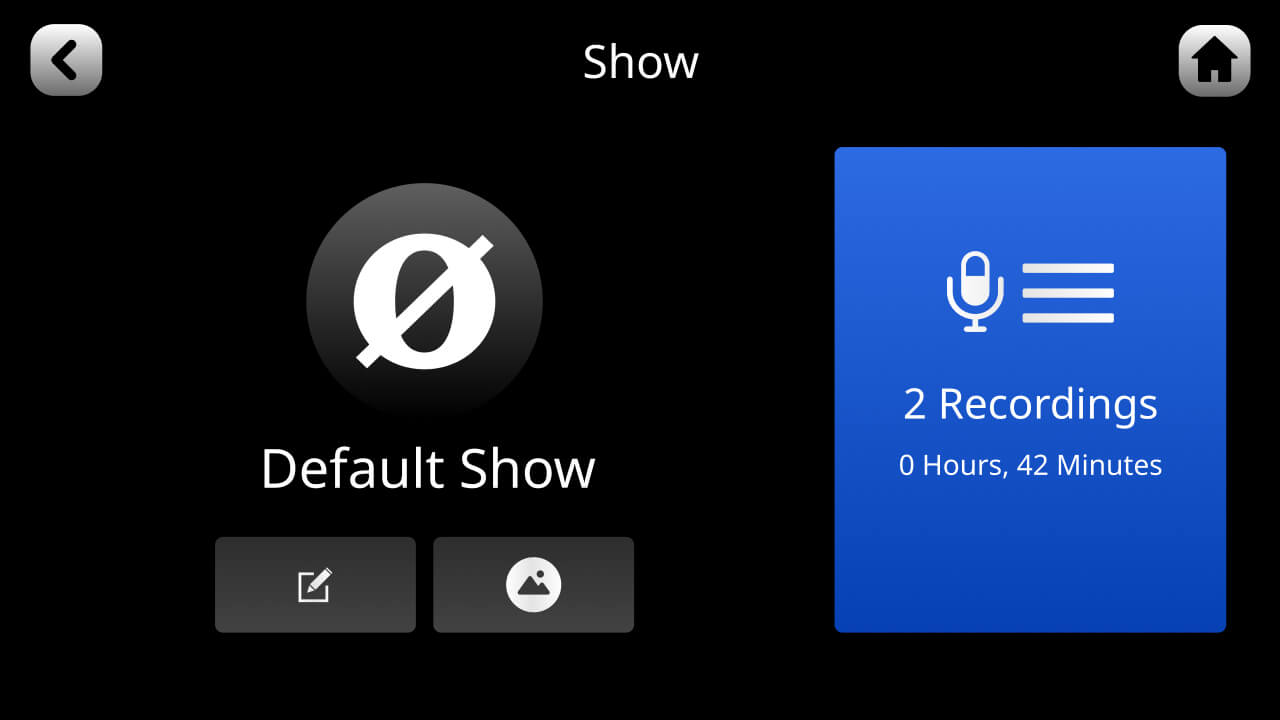
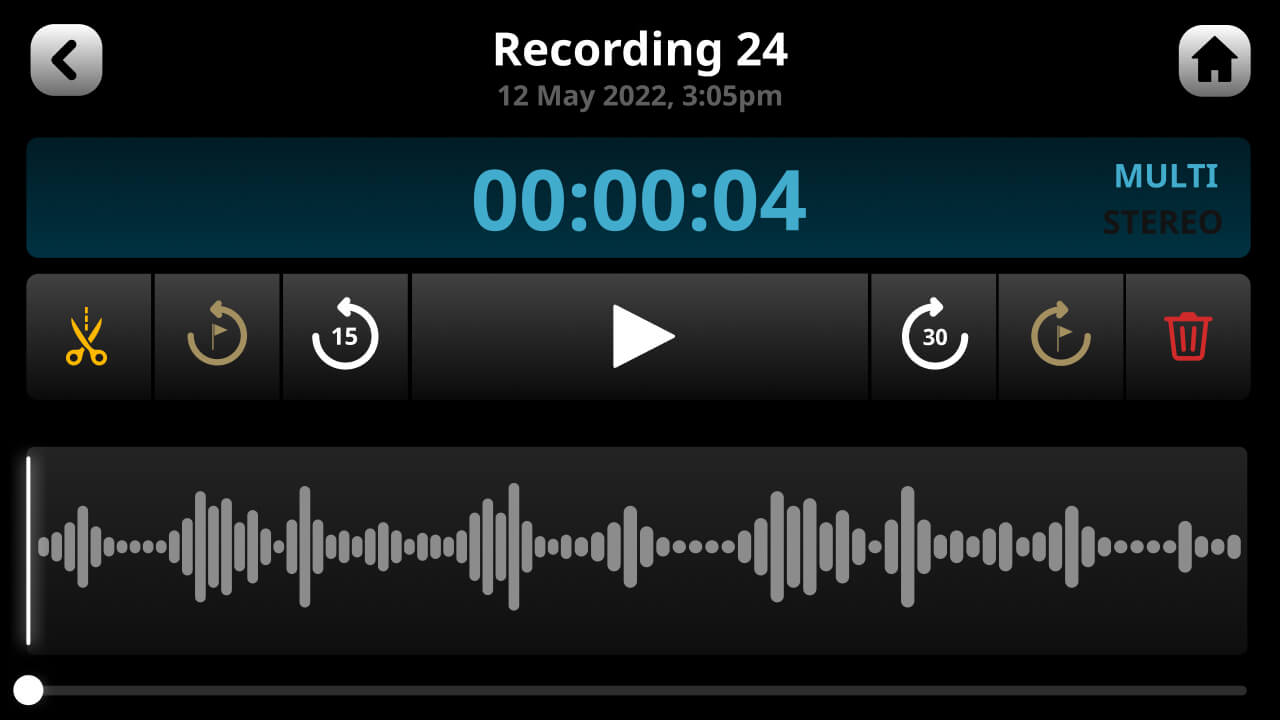
You can play back your recordings directly from the RØDECaster Pro II. To access your recordings, press the ‘Show’ icon at the top left of the home screen, then click the ‘Recordings’ icon. A list of your recordings will be displayed. To access a recording, tap on it. To play back your recording, tap on the ‘play’ icon.
All other audio functions on the RØDECaster Pro II will be muted when the playback screen is open.
There are two ways to navigate through your recording list: either scroll using the touchscreen or use the rotary encoder to scroll up and down.
There are several ways to navigate through the file when playing back audio. You can use the slider at the bottom of the screen, the ‘jump’ icons to move back and forward through the audio in 15 second or 30 second increments, or advance through any markers you may have placed in the recording.
You can trim the start and end points of a recording as well as adding in a fade in and fade out. To do this, activate edit mode in the playback screen by tapping on the scissor icon. You can now drag the corners of the waveform to trim the audio and create a fade in or fade out. To preview your edit, use the play controls. Press the green tick in the top right corner of the screen to save the edit and exit edit mode.
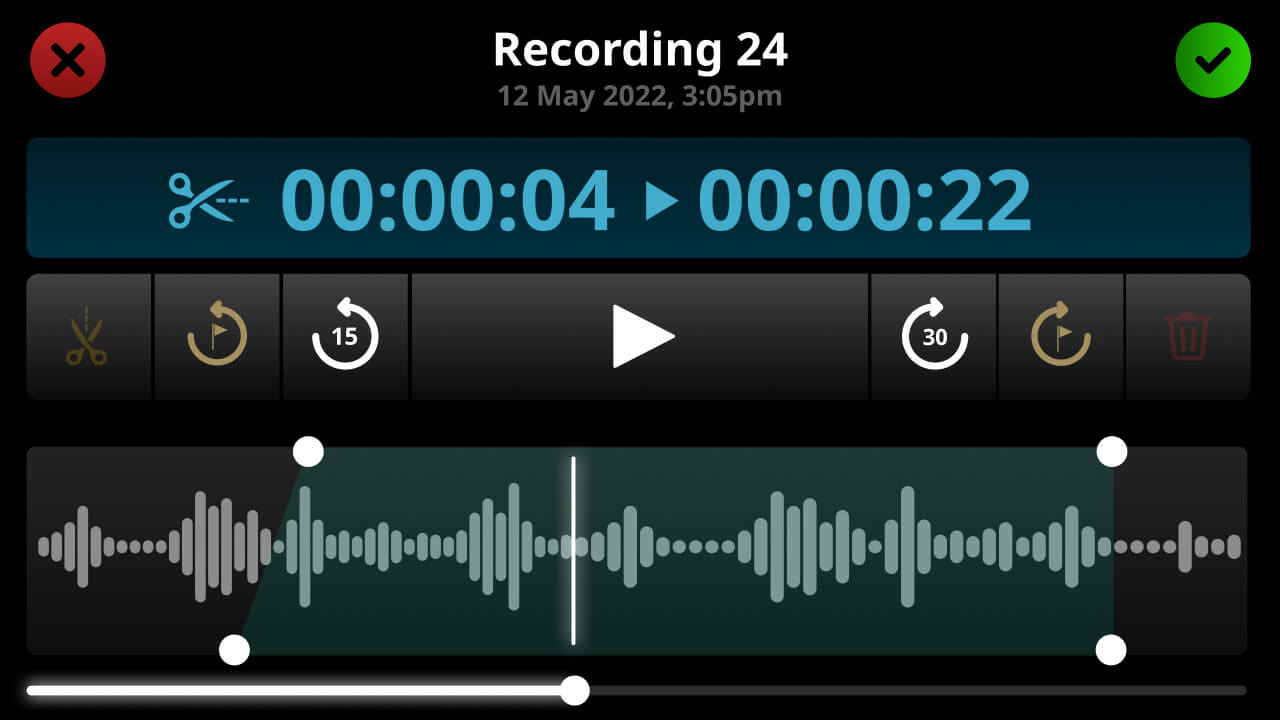
Editing in the playback window is non-destructive and will not alter the recorded files. You can choose to export the edited audio to a new file using the RØDE Central app. Click here for more information on using RØDE Central with the RØDECaster Pro II.
The RØDECaster Pro II features three USB audio devices that your computer will recognise. The USB 1 output has two USB devices called ‘RØDECaster Pro II Main’ and ‘RØDECaster Pro II Chat’. The USB 2 output will be recognised as ‘RØDECaster Pro II Secondary’.
We recommend using the ‘RØDECaster Pro II Main’ (USB 1) for recording your production, as this is the only device that can be configured as a multitrack device. Make sure you select the ‘RØDECaster Pro II Main’ device as your input either in your computer control panel or in the devices section of you recording software or DAW.

By default, ‘RØDECaster Pro II Main’ (USB 1) is configured to output the main stereo mix (all of your audio inputs mixed together). To activate multitrack recording via USB, go to settings then ‘Outputs’ > ‘Multitrack’ > ‘USB’ and deselect ‘Off’.
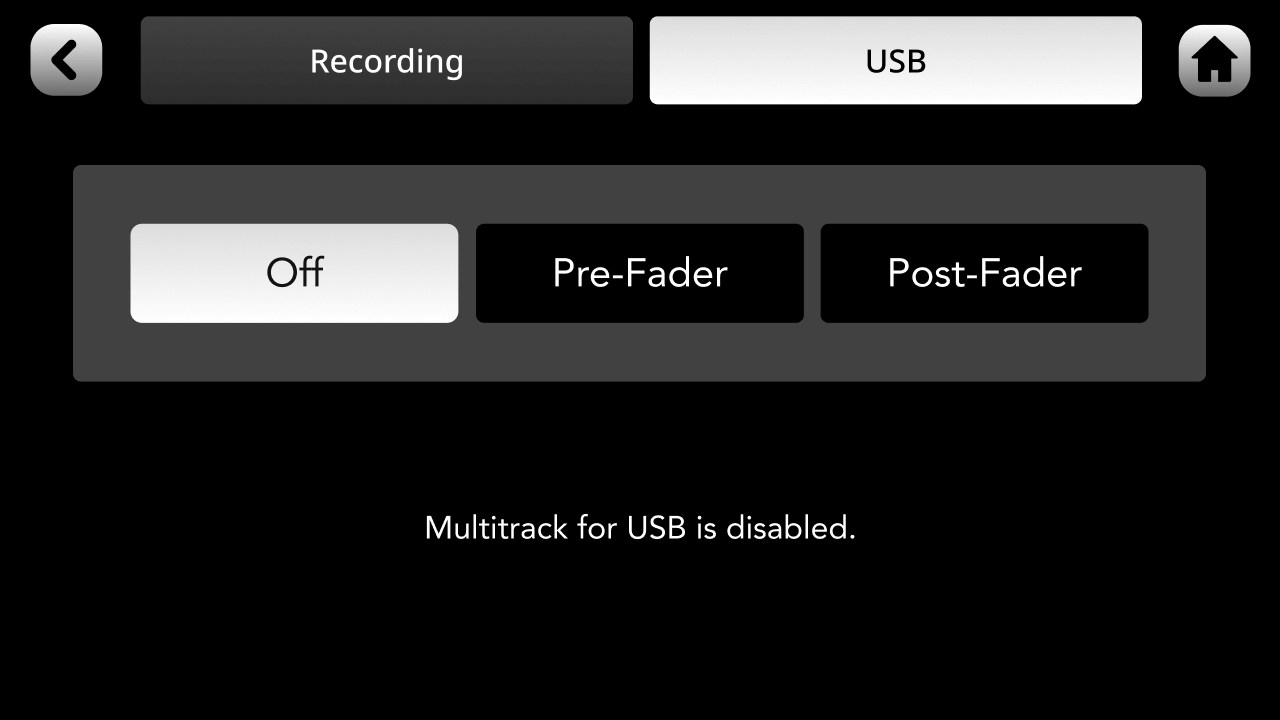
USB 2 and USB Chat cannot be configured as multitrack outputs.
When in multitrack mode, the RØDECaster Pro II Main output features 16 different audio outputs, as follows:
1Mix L
2Mix R
3XLR/TRS 1
4XLR/TRS 2
5XLR/TRS 3
6XLR/TRS 4
7Bluetooth L
8Bluetooth R
9SMART Pads L
10SMART Pads R
11USB Main L
12USB Main R
13USB Chat L
14USB Chat R
15USB Secondary L
16USB Secondary R
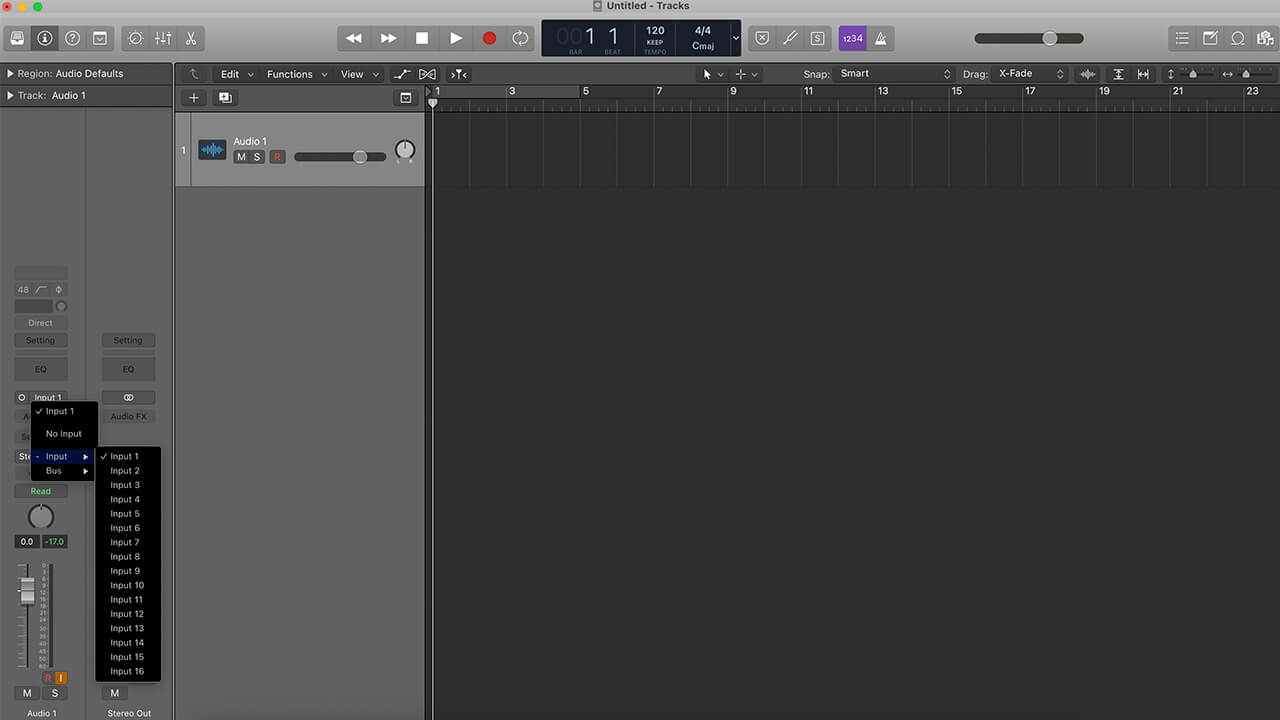
You can select any of these as the input source for each track on your DAW. Usually tracks in your DAW can be configured as stereo, to accept a pair of inputs, or mono, for a single input. Set up the tracks in your DAW to match the channels you wish to record, with the appropriate output from the RØDECaster Pro II selected for each track.
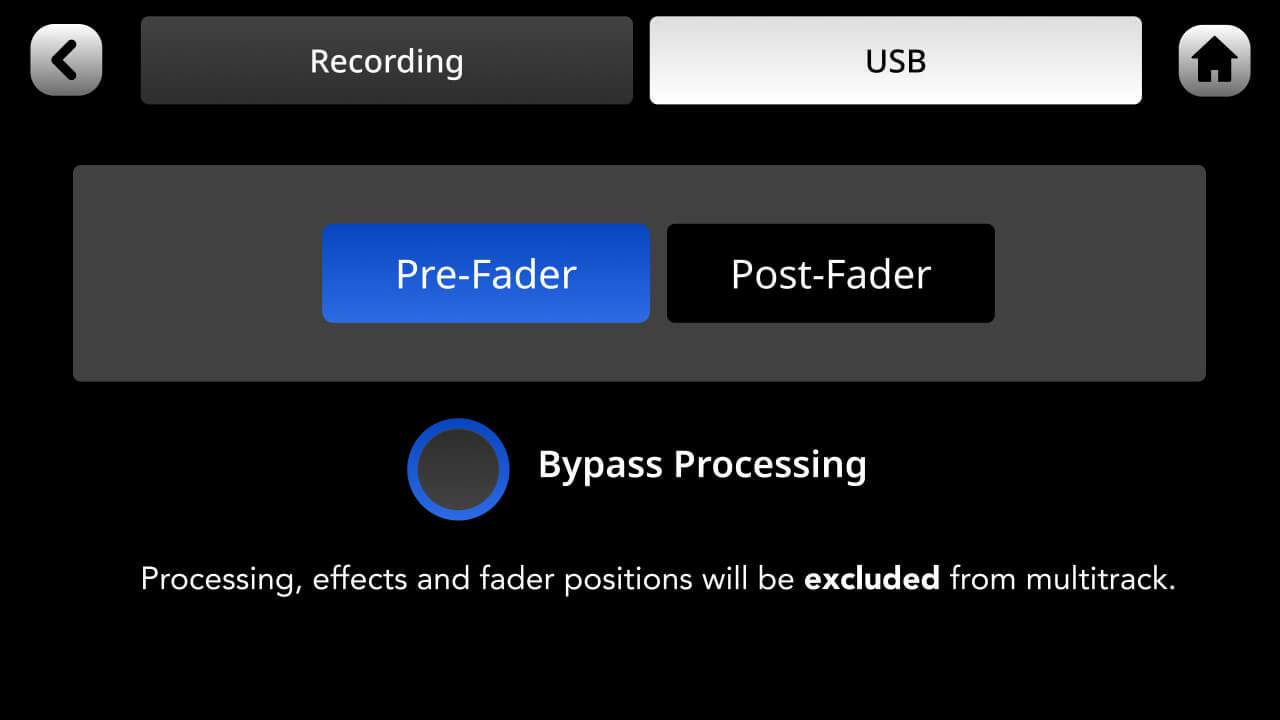
When recording individual tracks to your DAW (see ‘Multitrack Recording via USB’ above), you can select to record the audio either pre- or post-fader. Recording pre-fader means that the position of the fader will have no effect on the audio being recorded – i.e., even if the source is faded down, it will still be recorded at unity gain. Post-fader means that the audio will be recorded at the level set by the fader – i.e., if a source is faded right down, nothing will be recorded. You can select pre- or post-fader recording by tapping the settings cog then ‘Outputs’ > ‘Multitrack’. The ‘mix’ output will not be affected by this setting and will always reflect the final mix output, including fader positions.
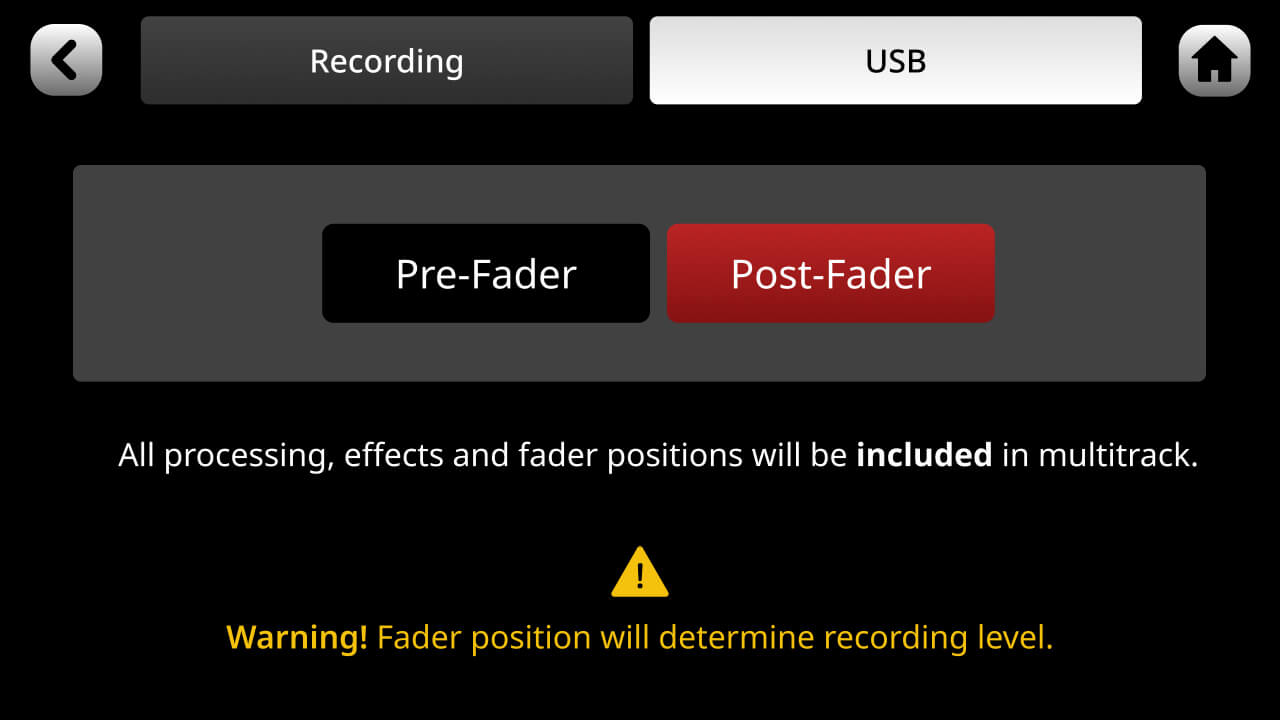
When recording in multitrack, you can choose to exclude processing from your recordings. This means that the raw audio will be recorded without any of the channel processing applied (i.e., the APHEX processing or effects). The ‘mix’ output will not be affected by this setting and will always reflect the final mix output including all processing.
In its default configuration, the RØDECaster Pro II’s ‘REC’ button will not start the recording in your DAW or recording software. To start recording, check your track(s) are armed, and that the input is set to ‘RØDECaster Pro II Main’. You can then start recording in your DAW.
It is possible to use MIDI to control your DAW from the RØDECaster Pro II. For example, you can map the ‘REC’ button to the record function in your DAW, so you can start your DAW recording directly from your unit. How you do this will depend on your DAW. By default, the ‘REC’ button sends the MIDI CC#17 on MIDI channel 1 with a value of 1 for ‘On’, and 0 for ‘Off’. If your DAW supports MIDI control, you can map this value to the record function on your DAW via the ‘RØDECaster Pro MIDI’ device that is available on USB 1.
Some software, including DAWs like Adobe Audition, will benefit from using an ASIO driver with the RØDECaster Pro II.
Click the link below to download the RØDECaster Pro II ASIO driver.

Learn more about the RØDECaster Pro II’s USB interfaces, including how they work, what they should be used for, and how they can help you improve your workflow.