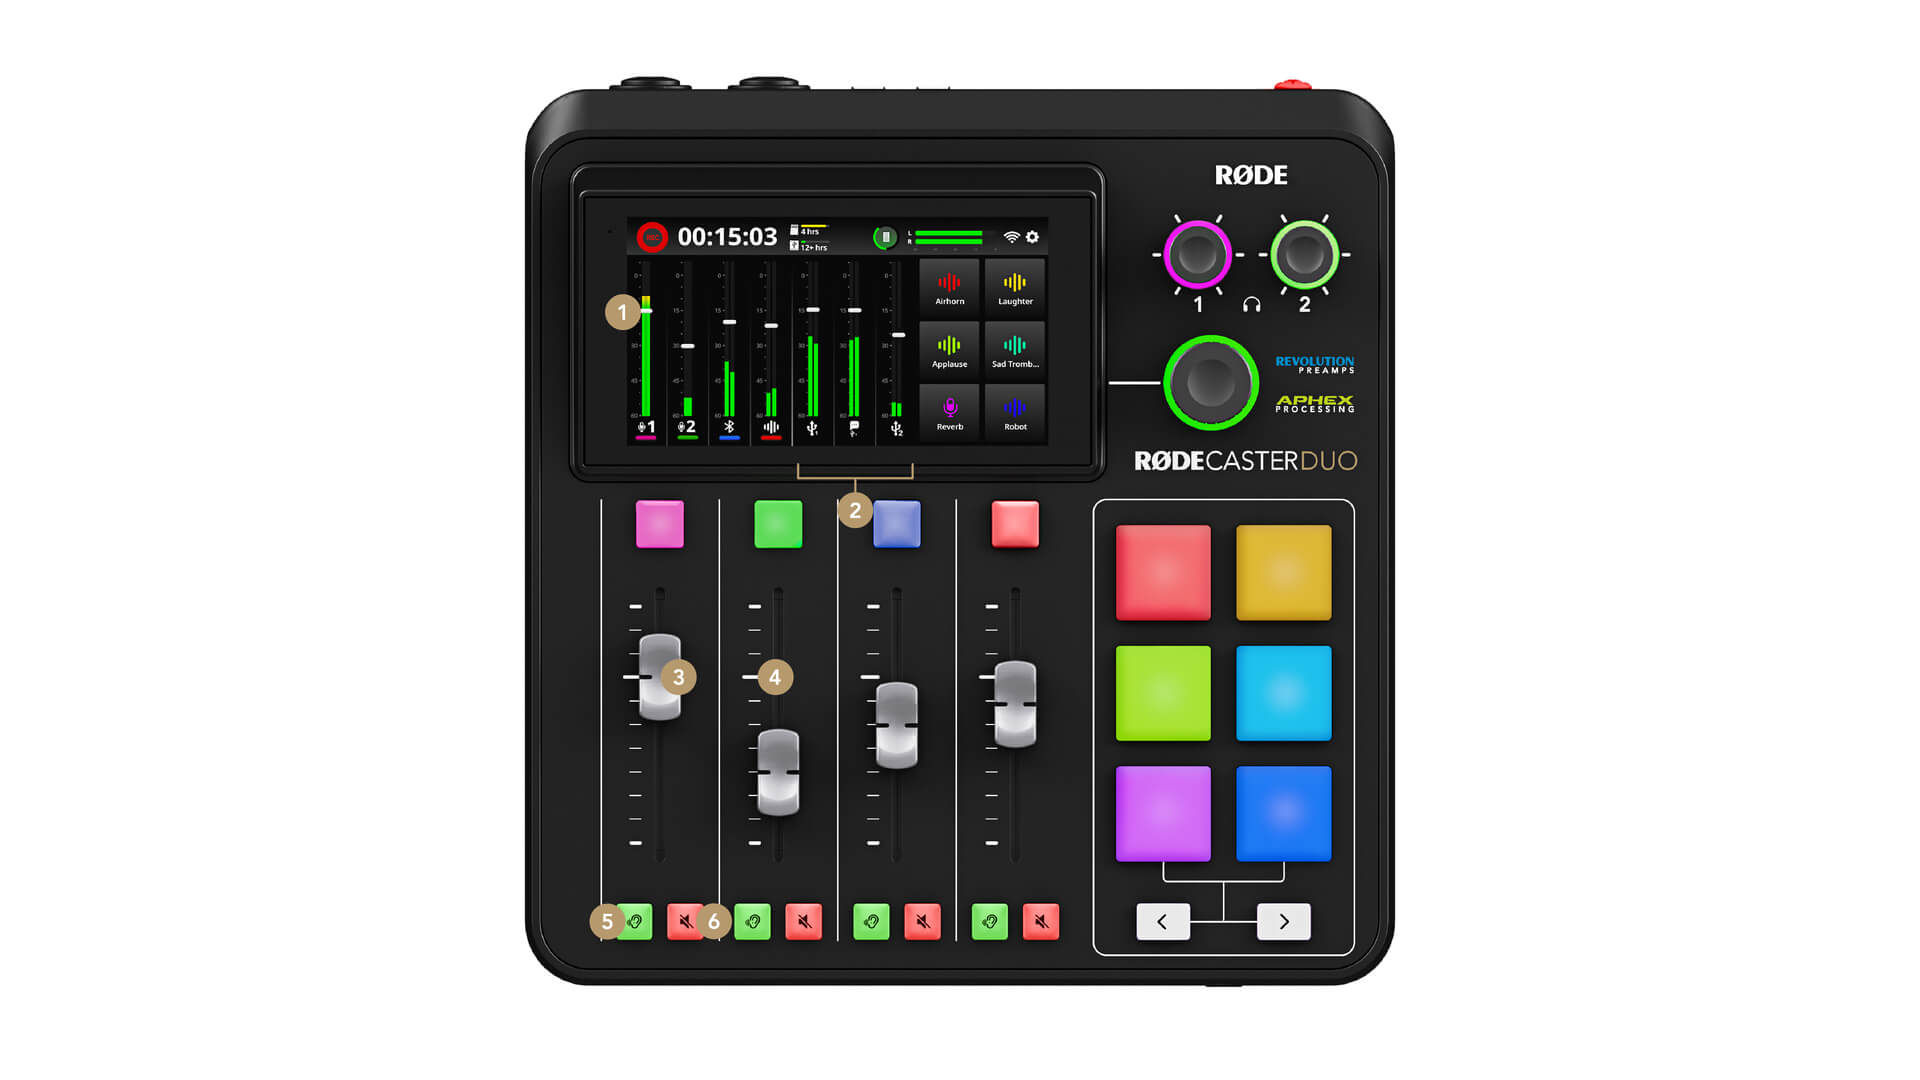
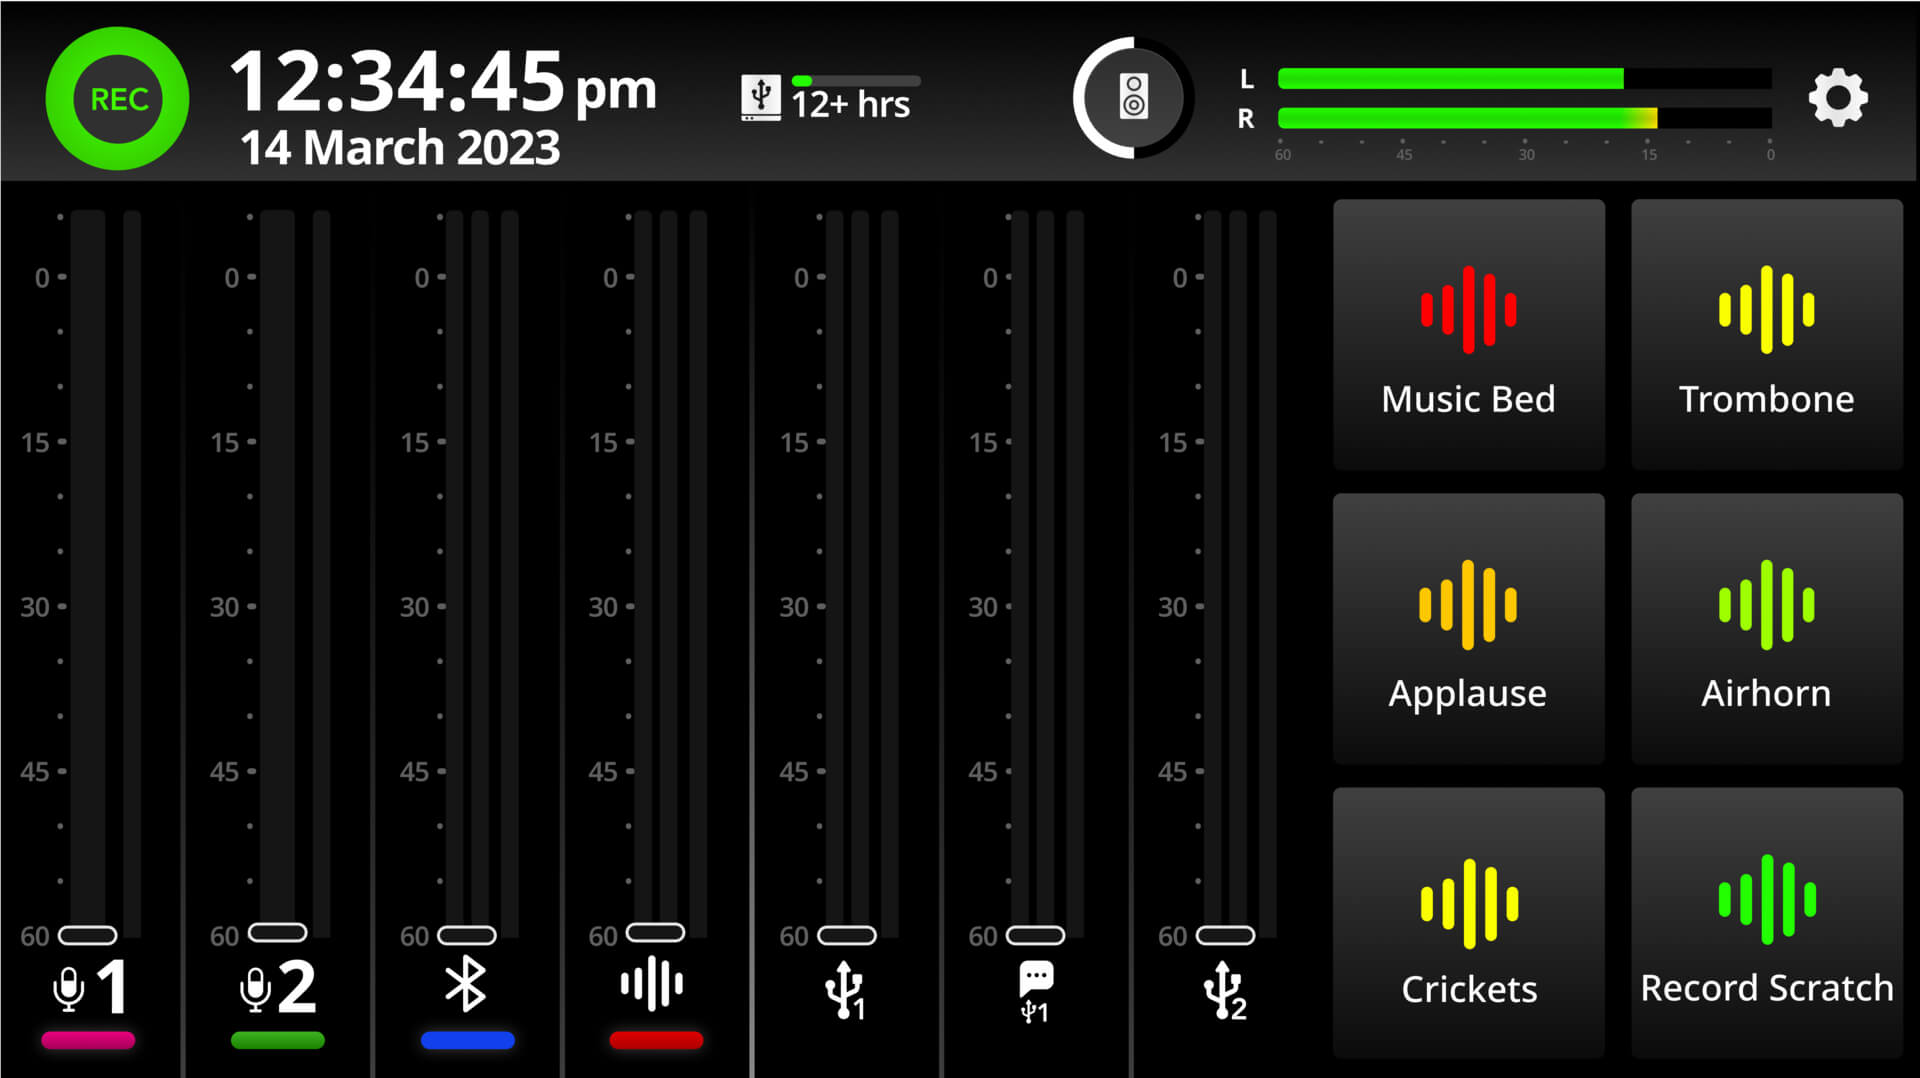
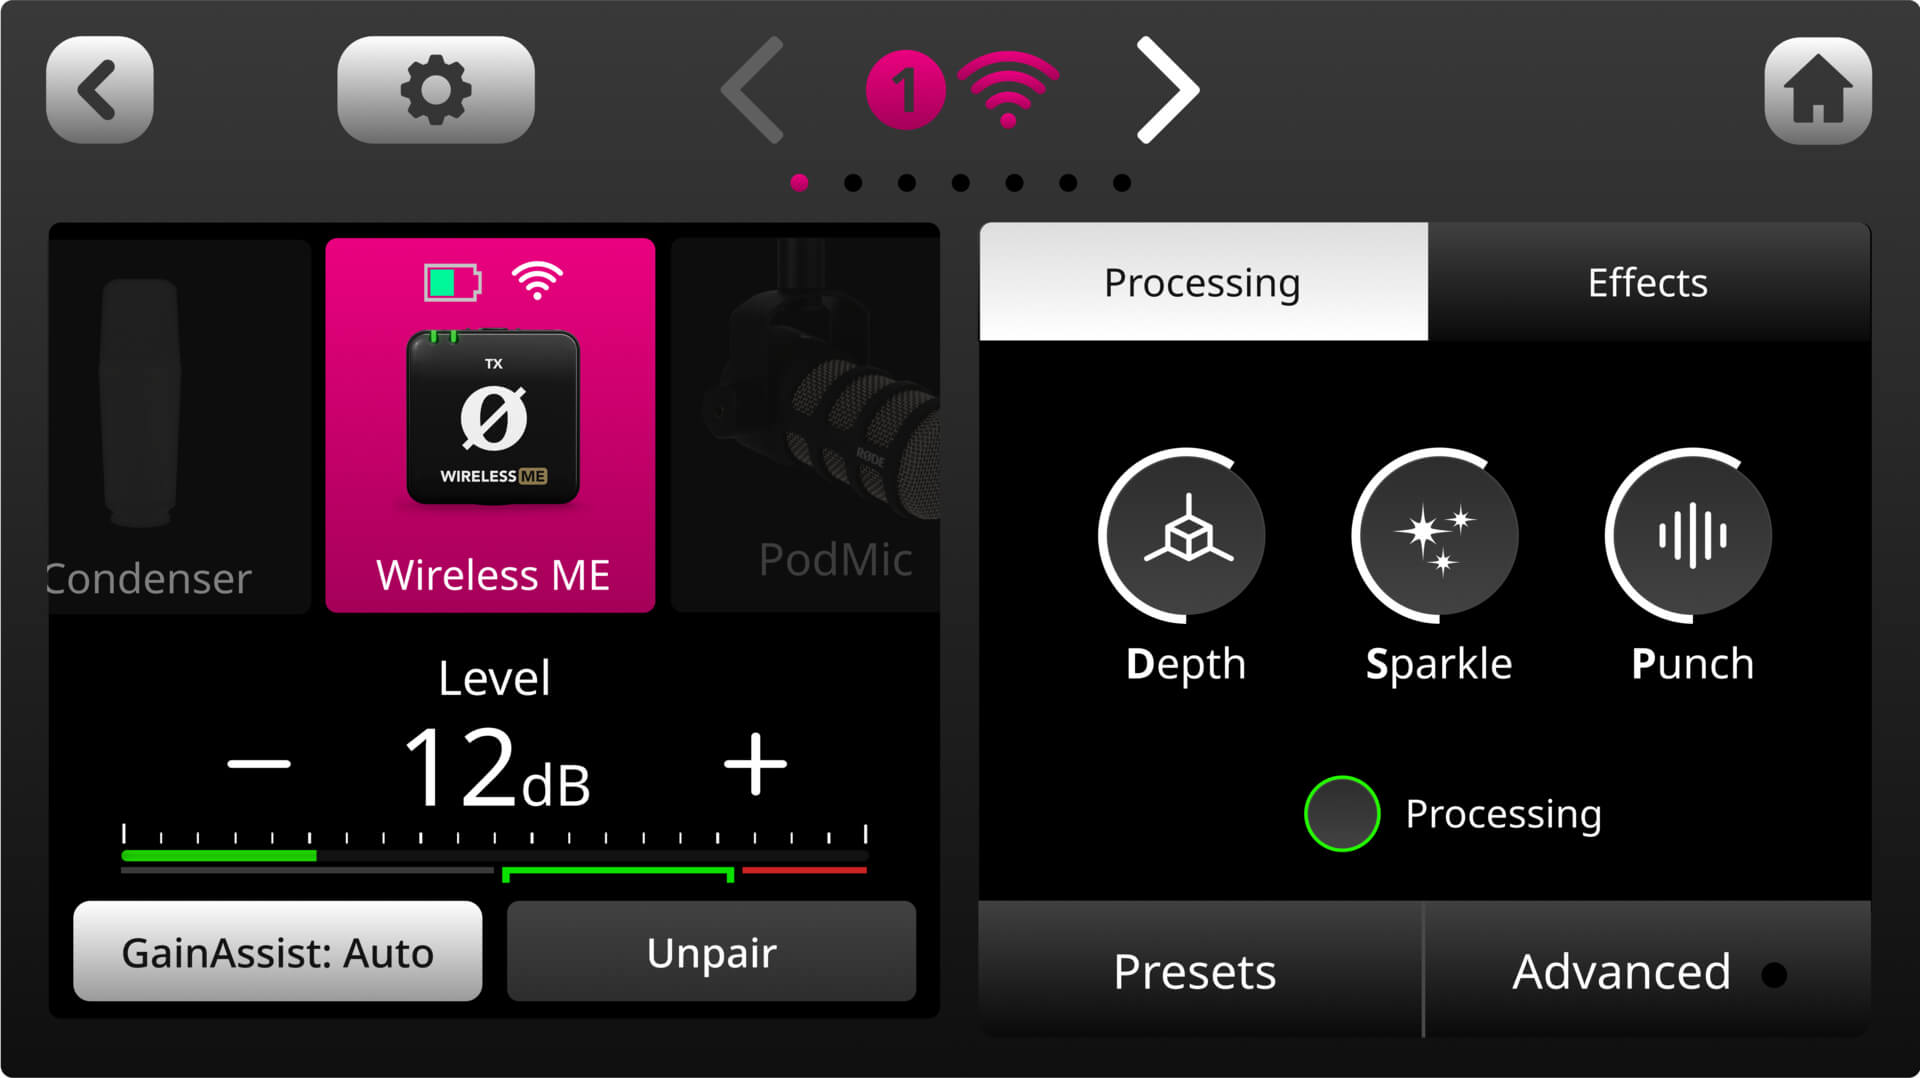
Creación de Submezclas Personalizadas
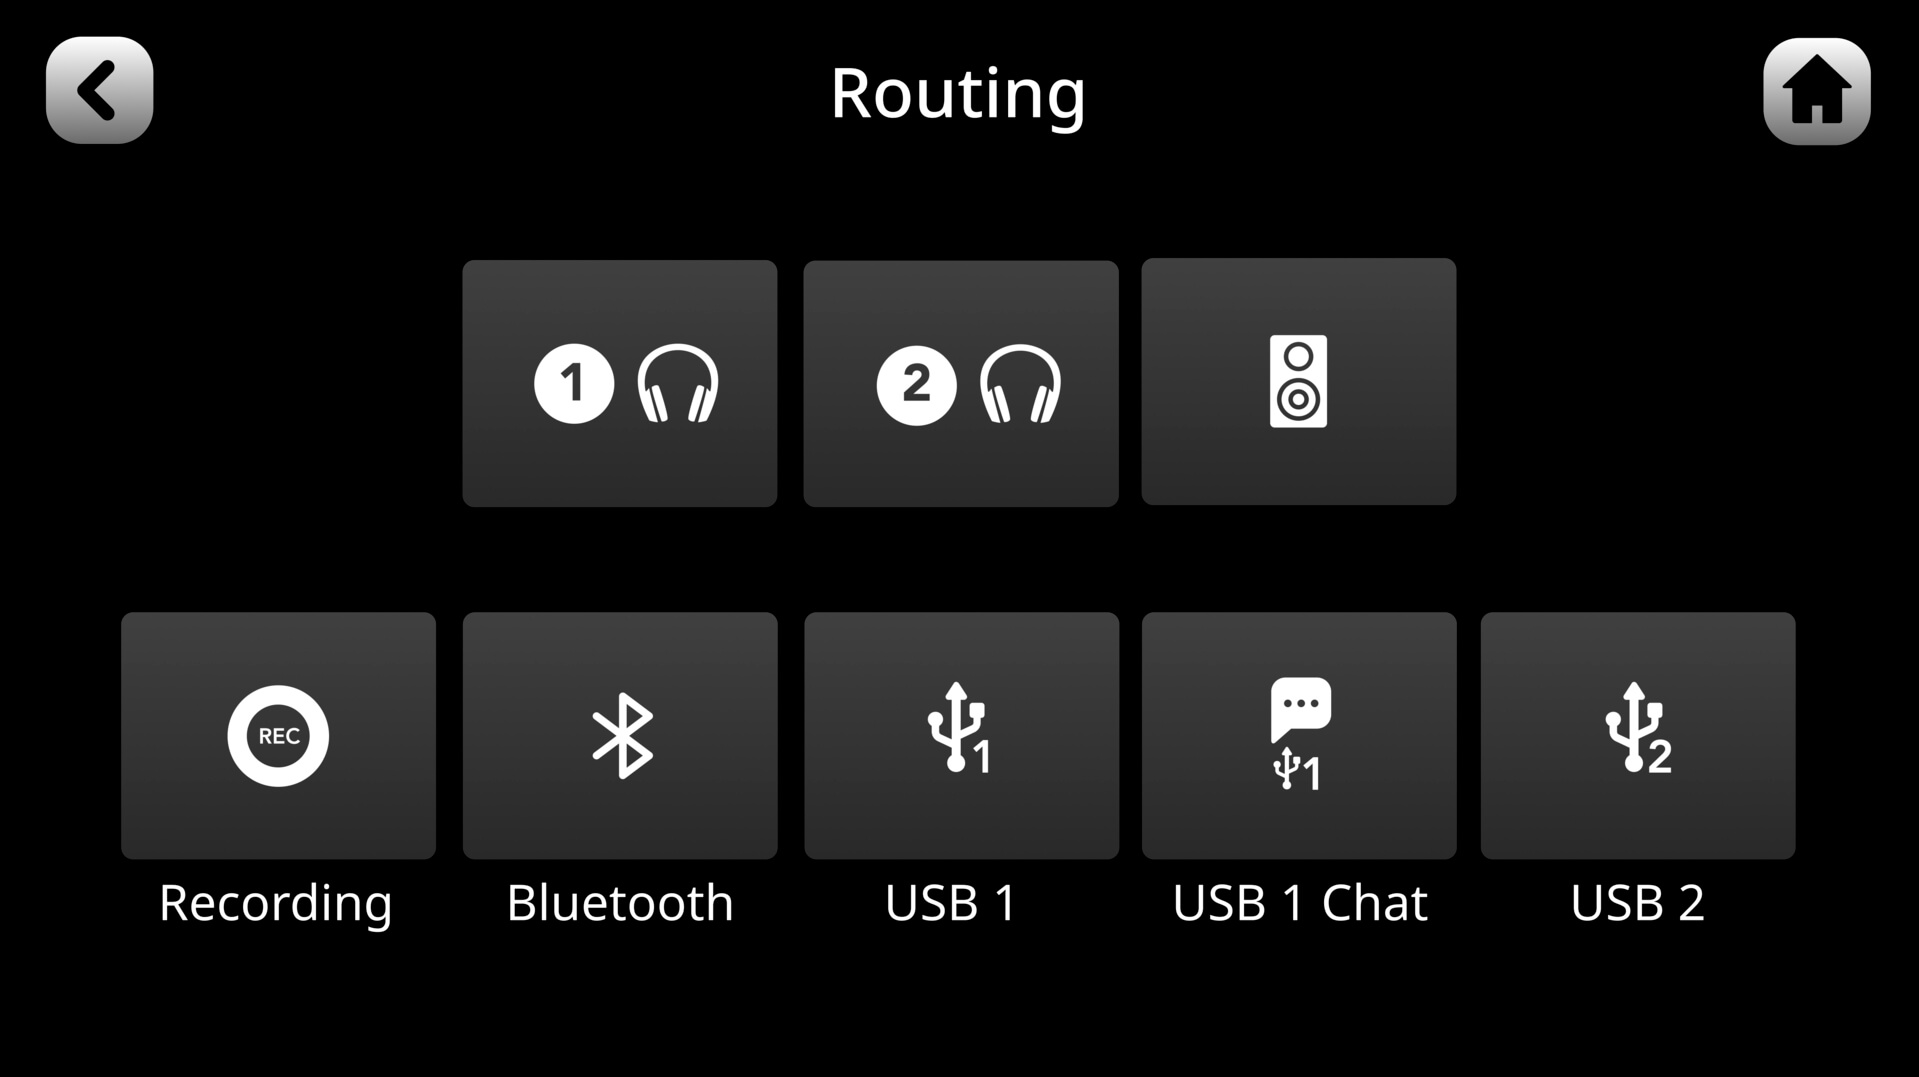
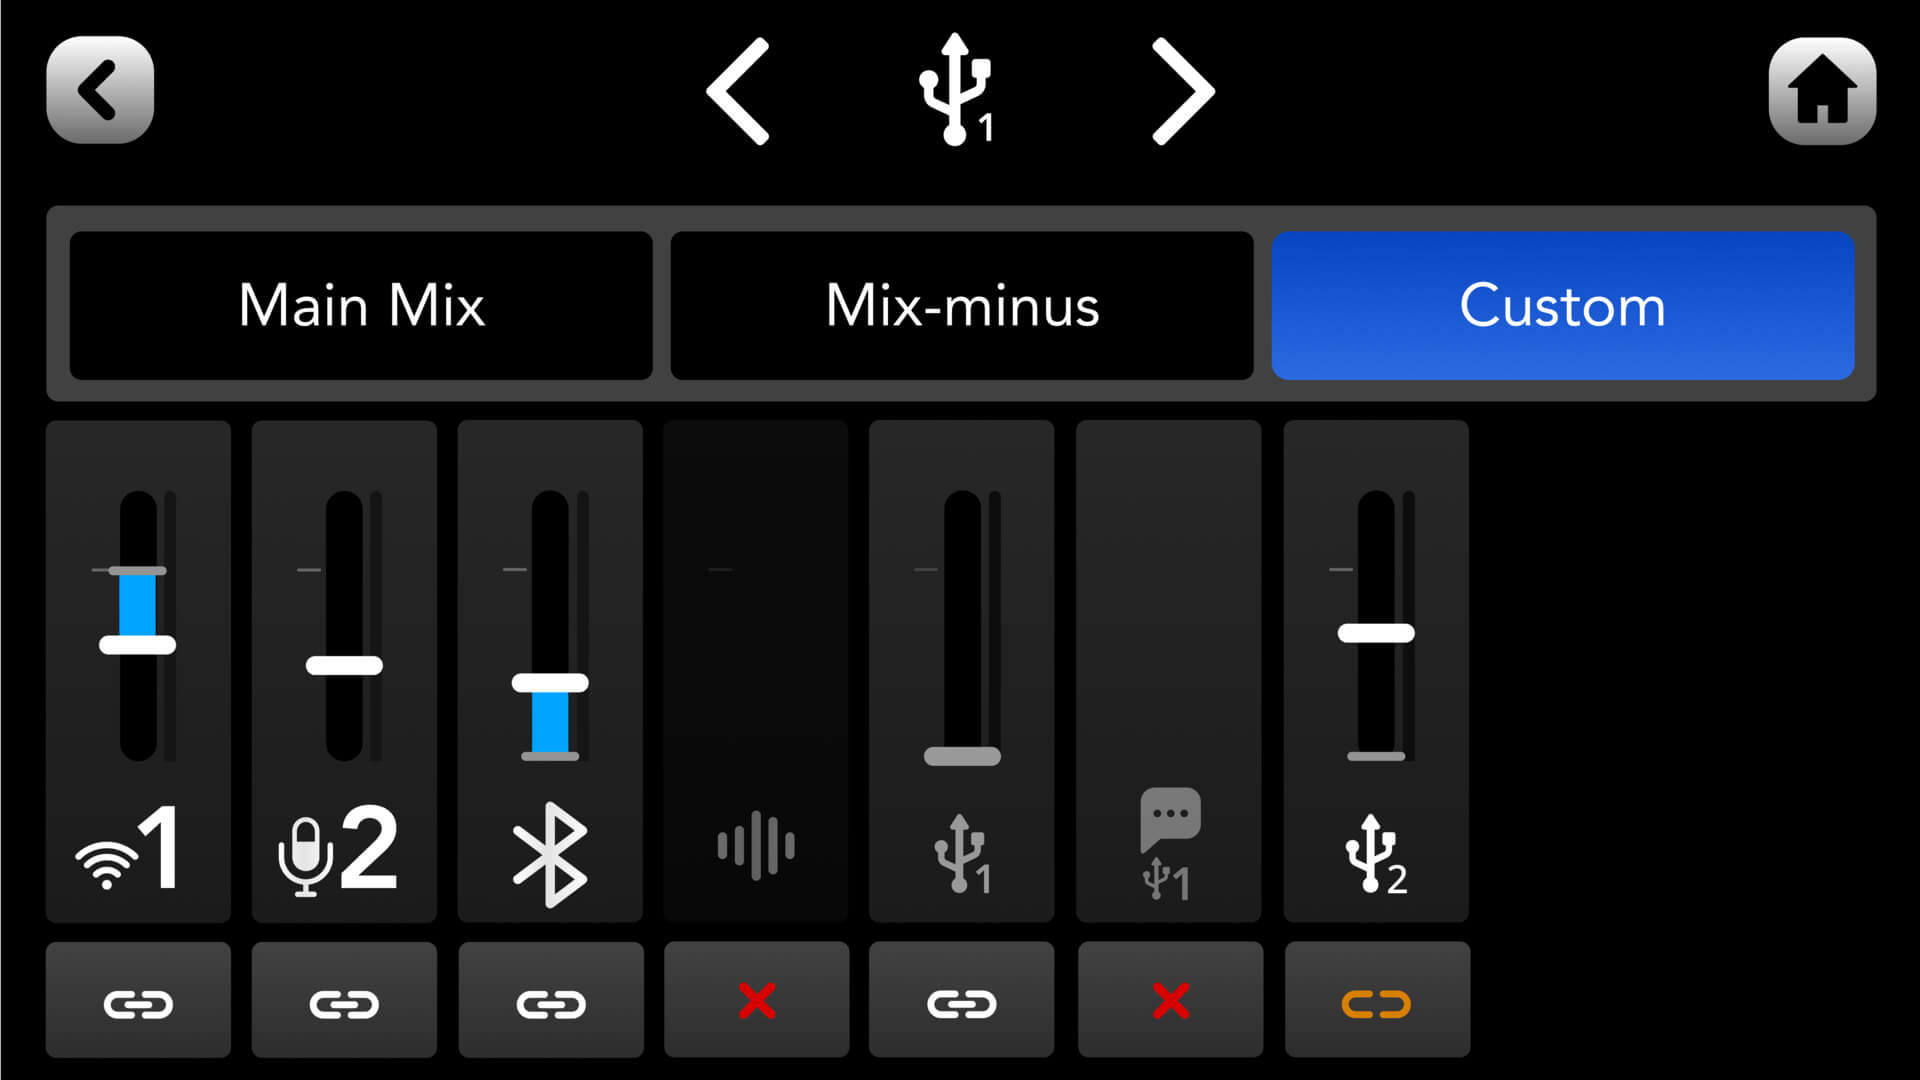
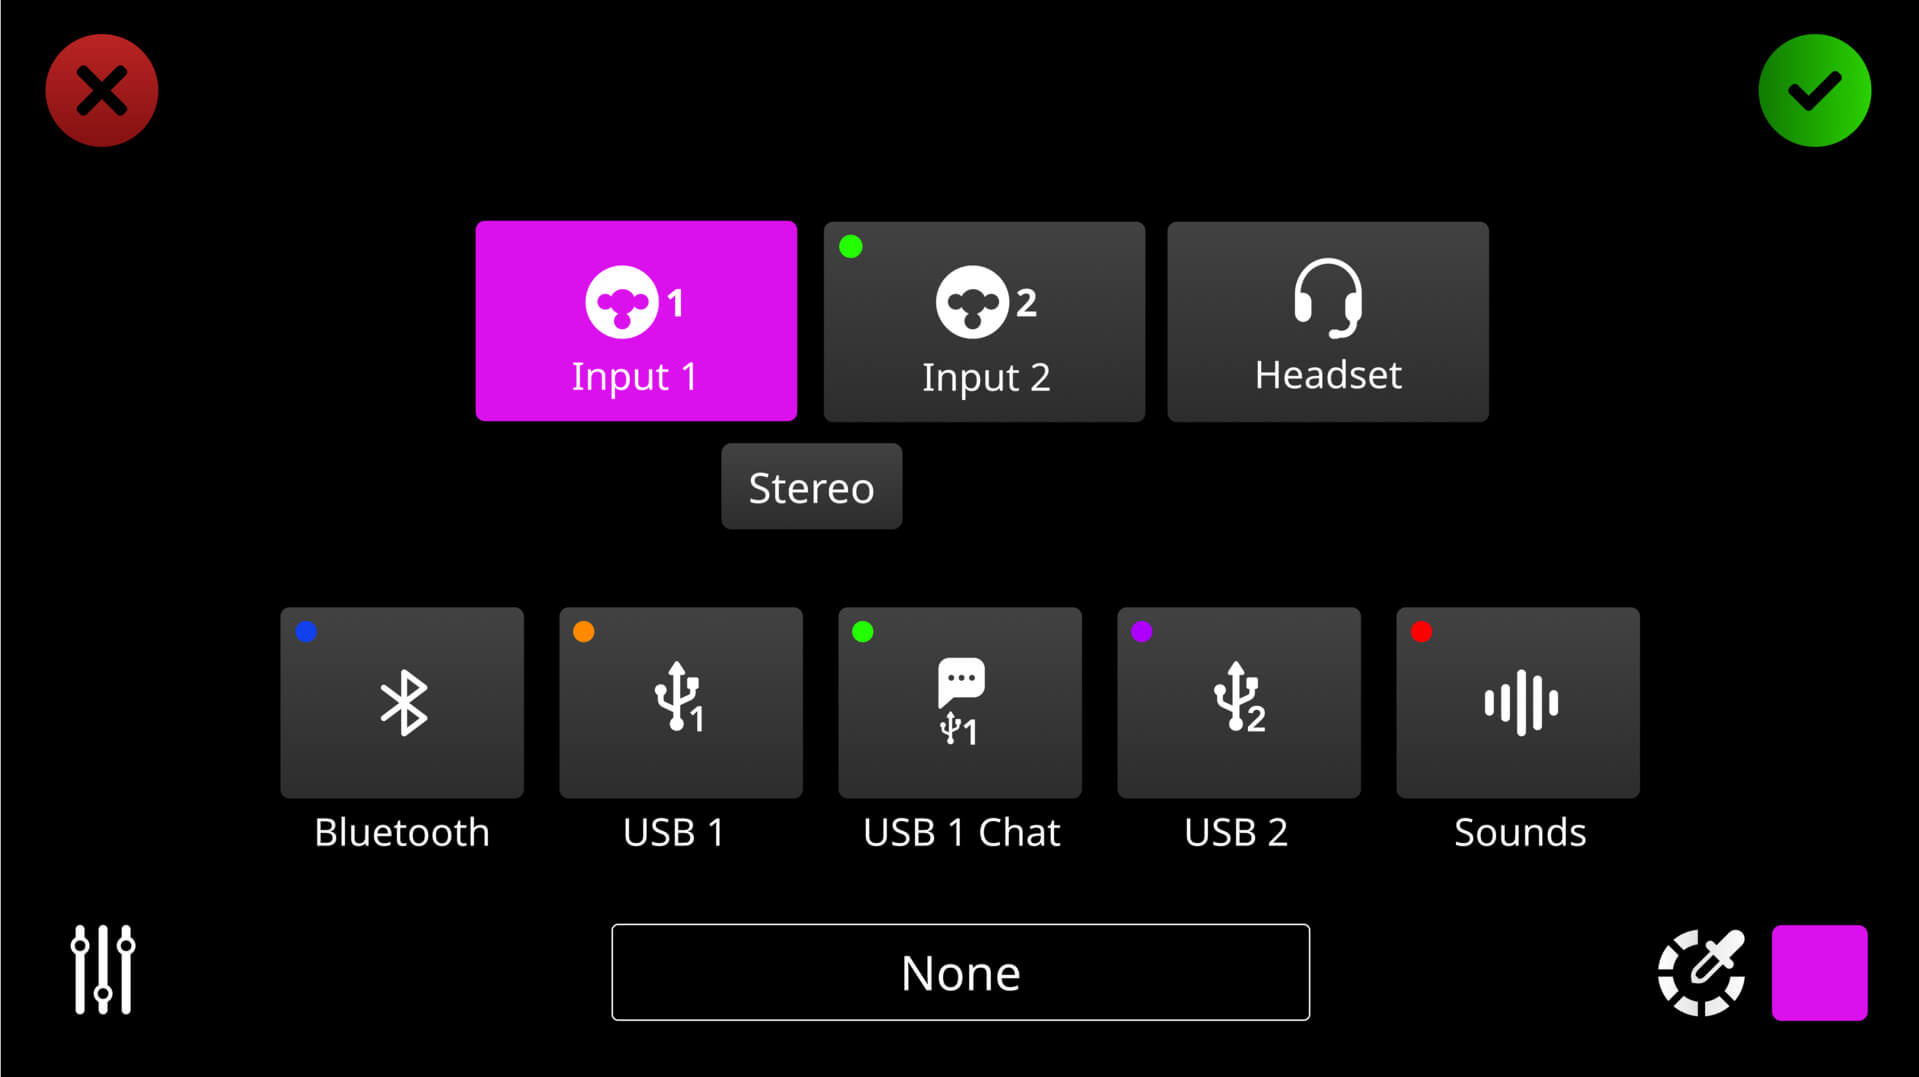
Para crear una submezcla para cualquier salida, toca el engranaje de configuración en la esquina superior derecha de la pantalla principal del mezclador y luego navega a ‘Salidas’ > ‘Enrutamiento’. Aquí verás un menú con cada una de tus ocho salidas de audio diferentes. Toca la salida que deseas configurar y selecciona ‘Personalizado’ en la parte superior de la pantalla.
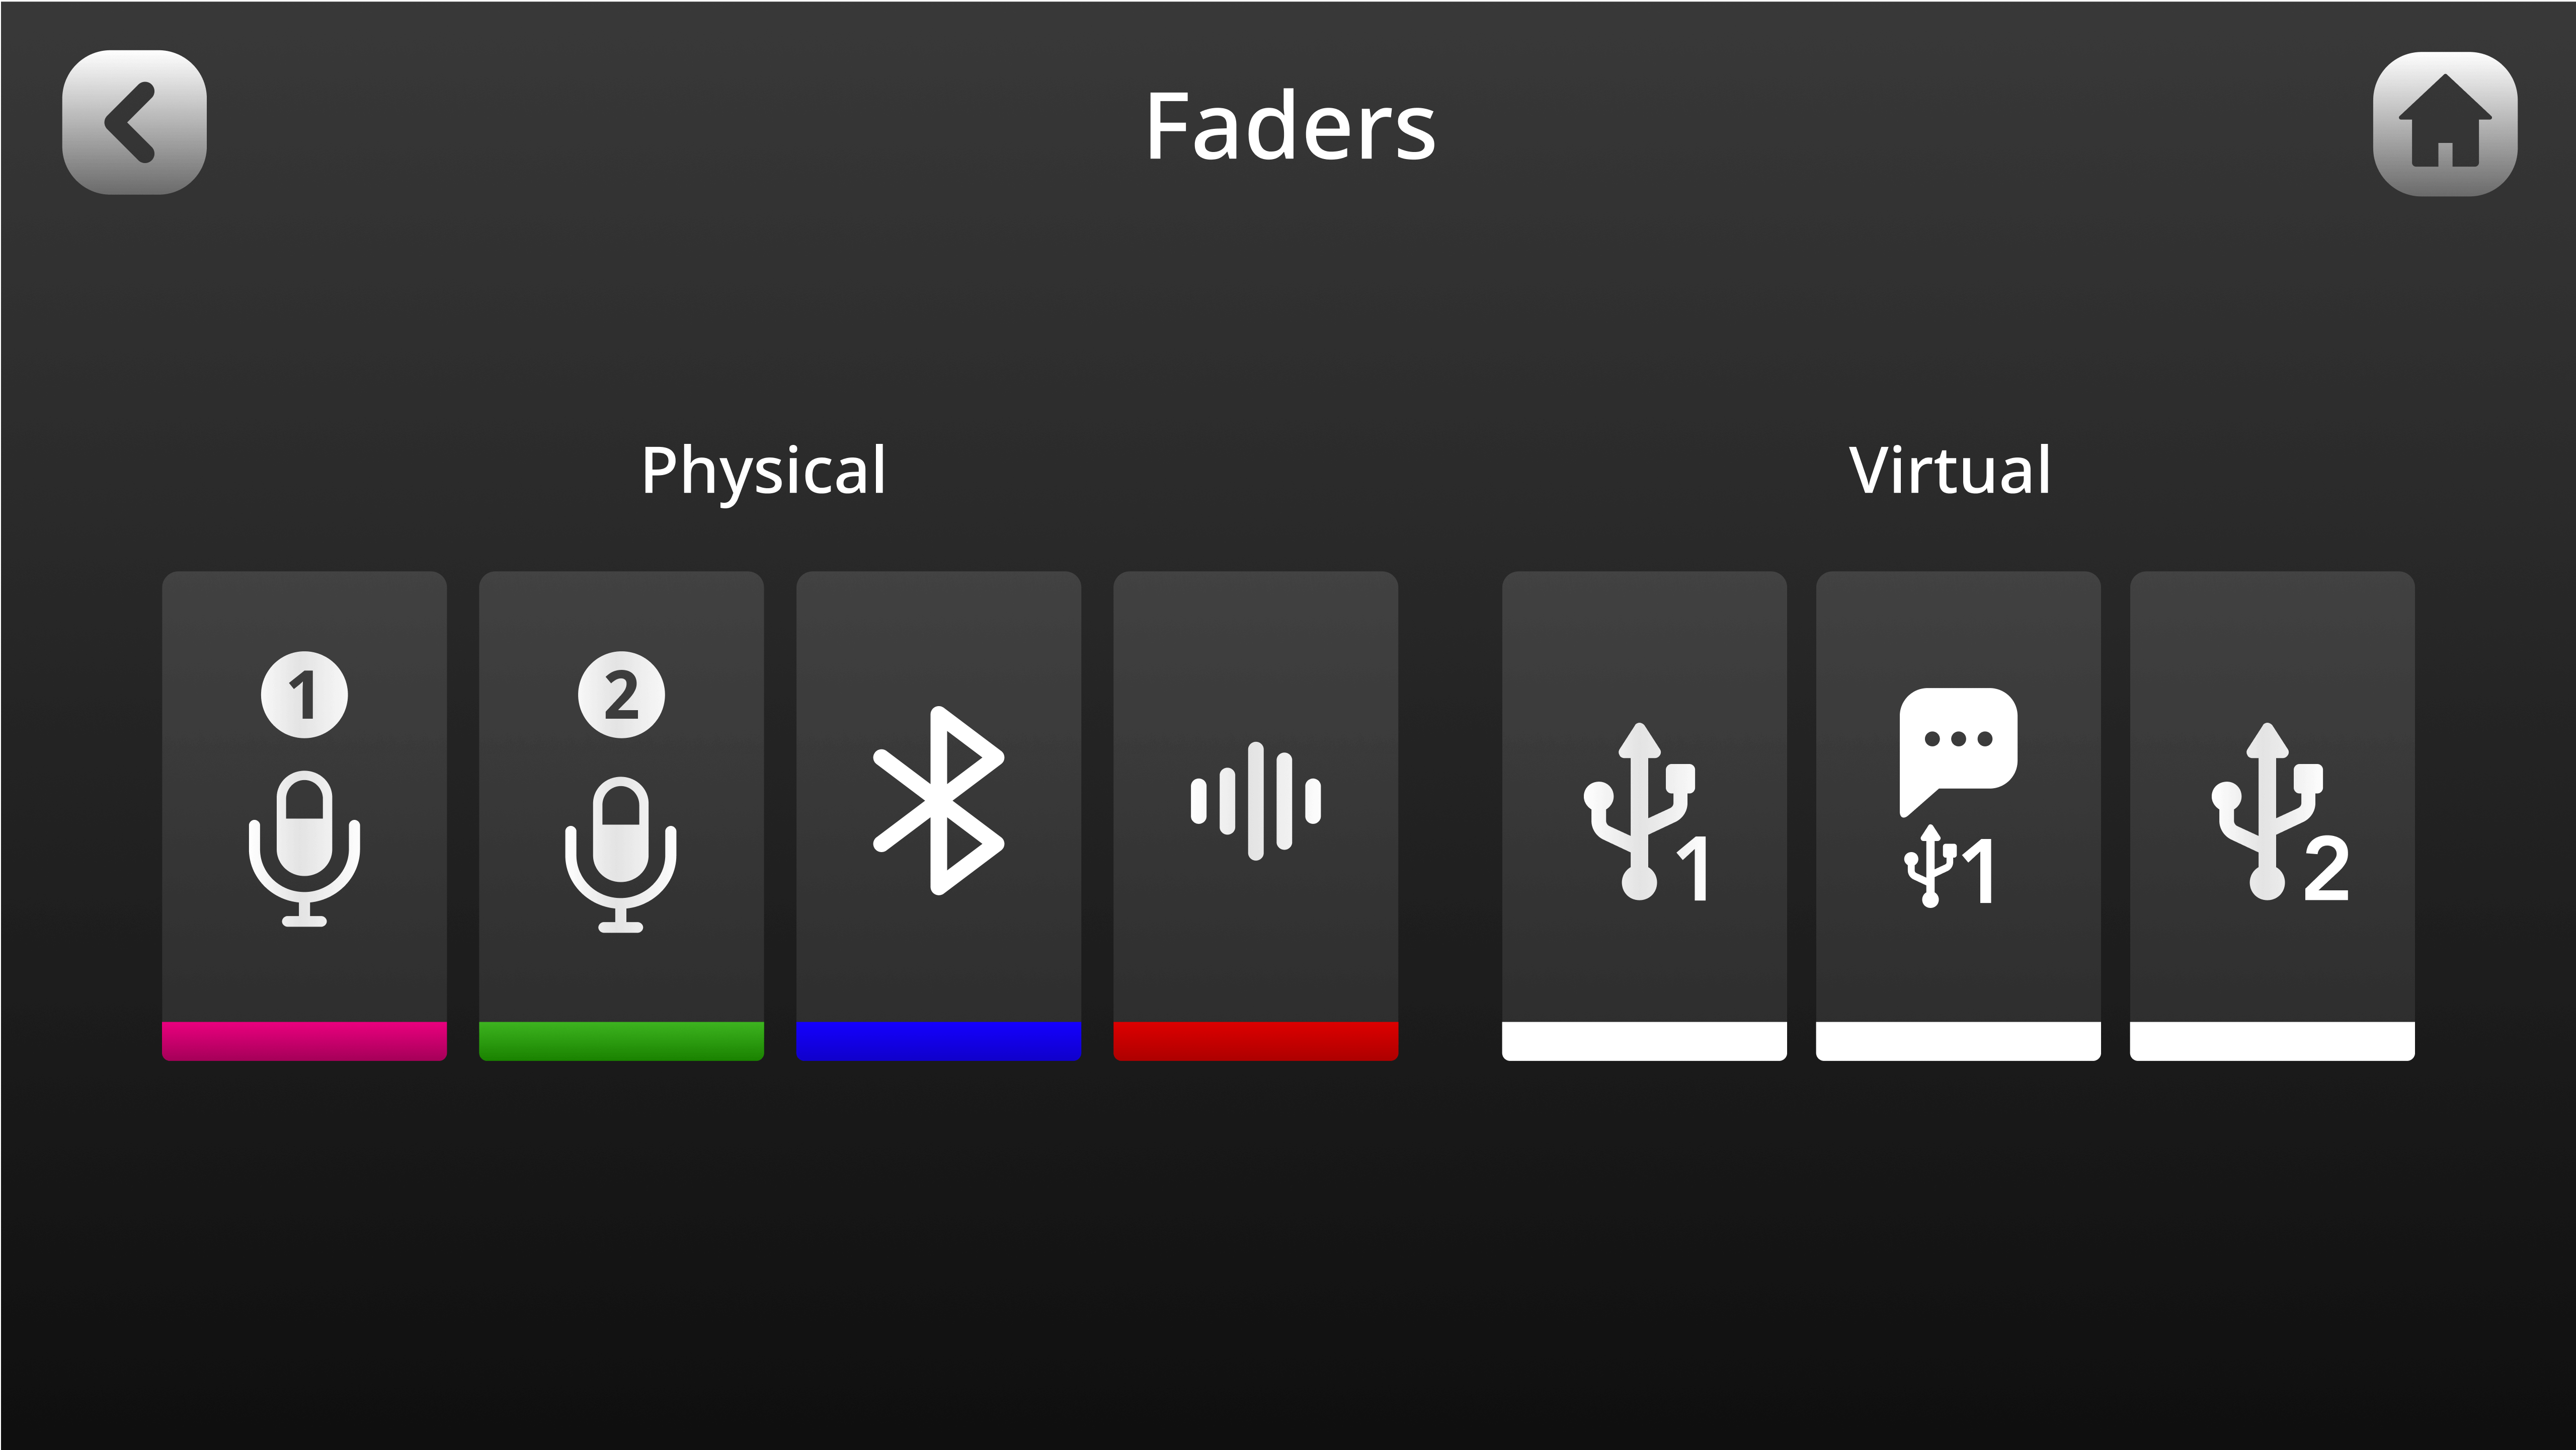
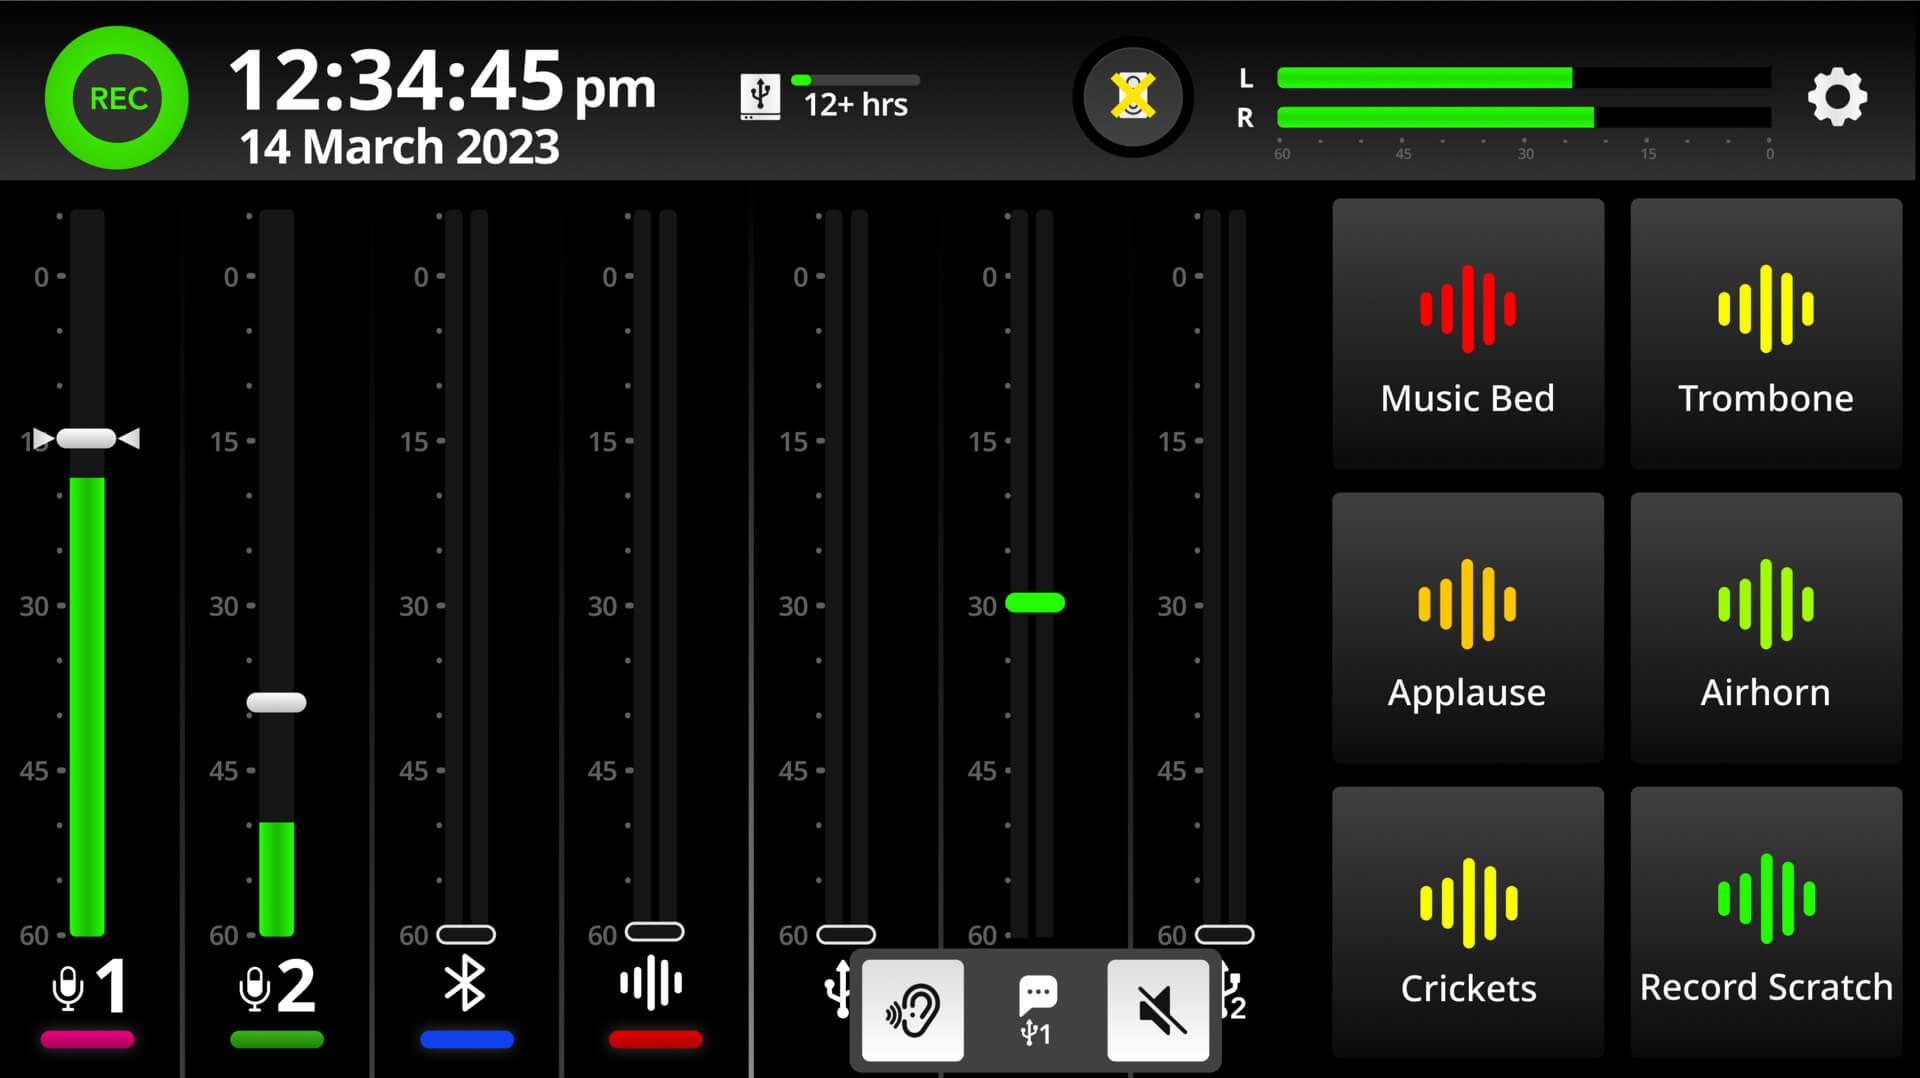
Niveles: Toca uno de los deslizadores y usa el codificador rotatorio para ajustar el nivel de un canal de entrada individual hacia arriba o hacia abajo para la submezcla de salida seleccionada.
Enlaces: El botón ‘enlace’ debajo de cada fader te permite vincular el nivel de volumen de ese canal al nivel de mezcla principal, que se establece mediante los faders físicos y virtuales en la pantalla principal del mezclador. Por defecto, todos los canales están vinculados (indicado por el icono de enlace blanco con el guion en el centro), pero al tocar este botón se desvincula el fader en la submezcla (icono amarillo sin guion en el centro).
Cuando están vinculados, ajustar los niveles individuales en una submezcla creará niveles de compensación que son relativos al fader de la mezcla principal, indicado por la barra azul en el fader. Esto significa que cualquier ajuste de fader en la mezcla principal aumentará o disminuirá el nivel de la submezcla pero manteniendo esta compensación. Cuando están desvinculados, los niveles de fader en una submezcla no cambiarán cuando se ajuste el canal asociado en la mezcla principal.
Silencios: La tercera opción en el botón de enlace (una ‘x’ roja) silencia el canal asociado en esta submezcla.
.jpg)