NTH-100M
The NTH-100M is a professional over-ear headset that combines the exceptional sonic performance and incredible comfort of the award-winning NTH-100 headphones with a broadcast-quality headset microphone (the NTH-Mic), making it ideal for media, broadcast, podcasting, streaming, gaming and working from home or in the office.
Find out all you need to know about using your NTH-100M & NTH-Mic here.
Features
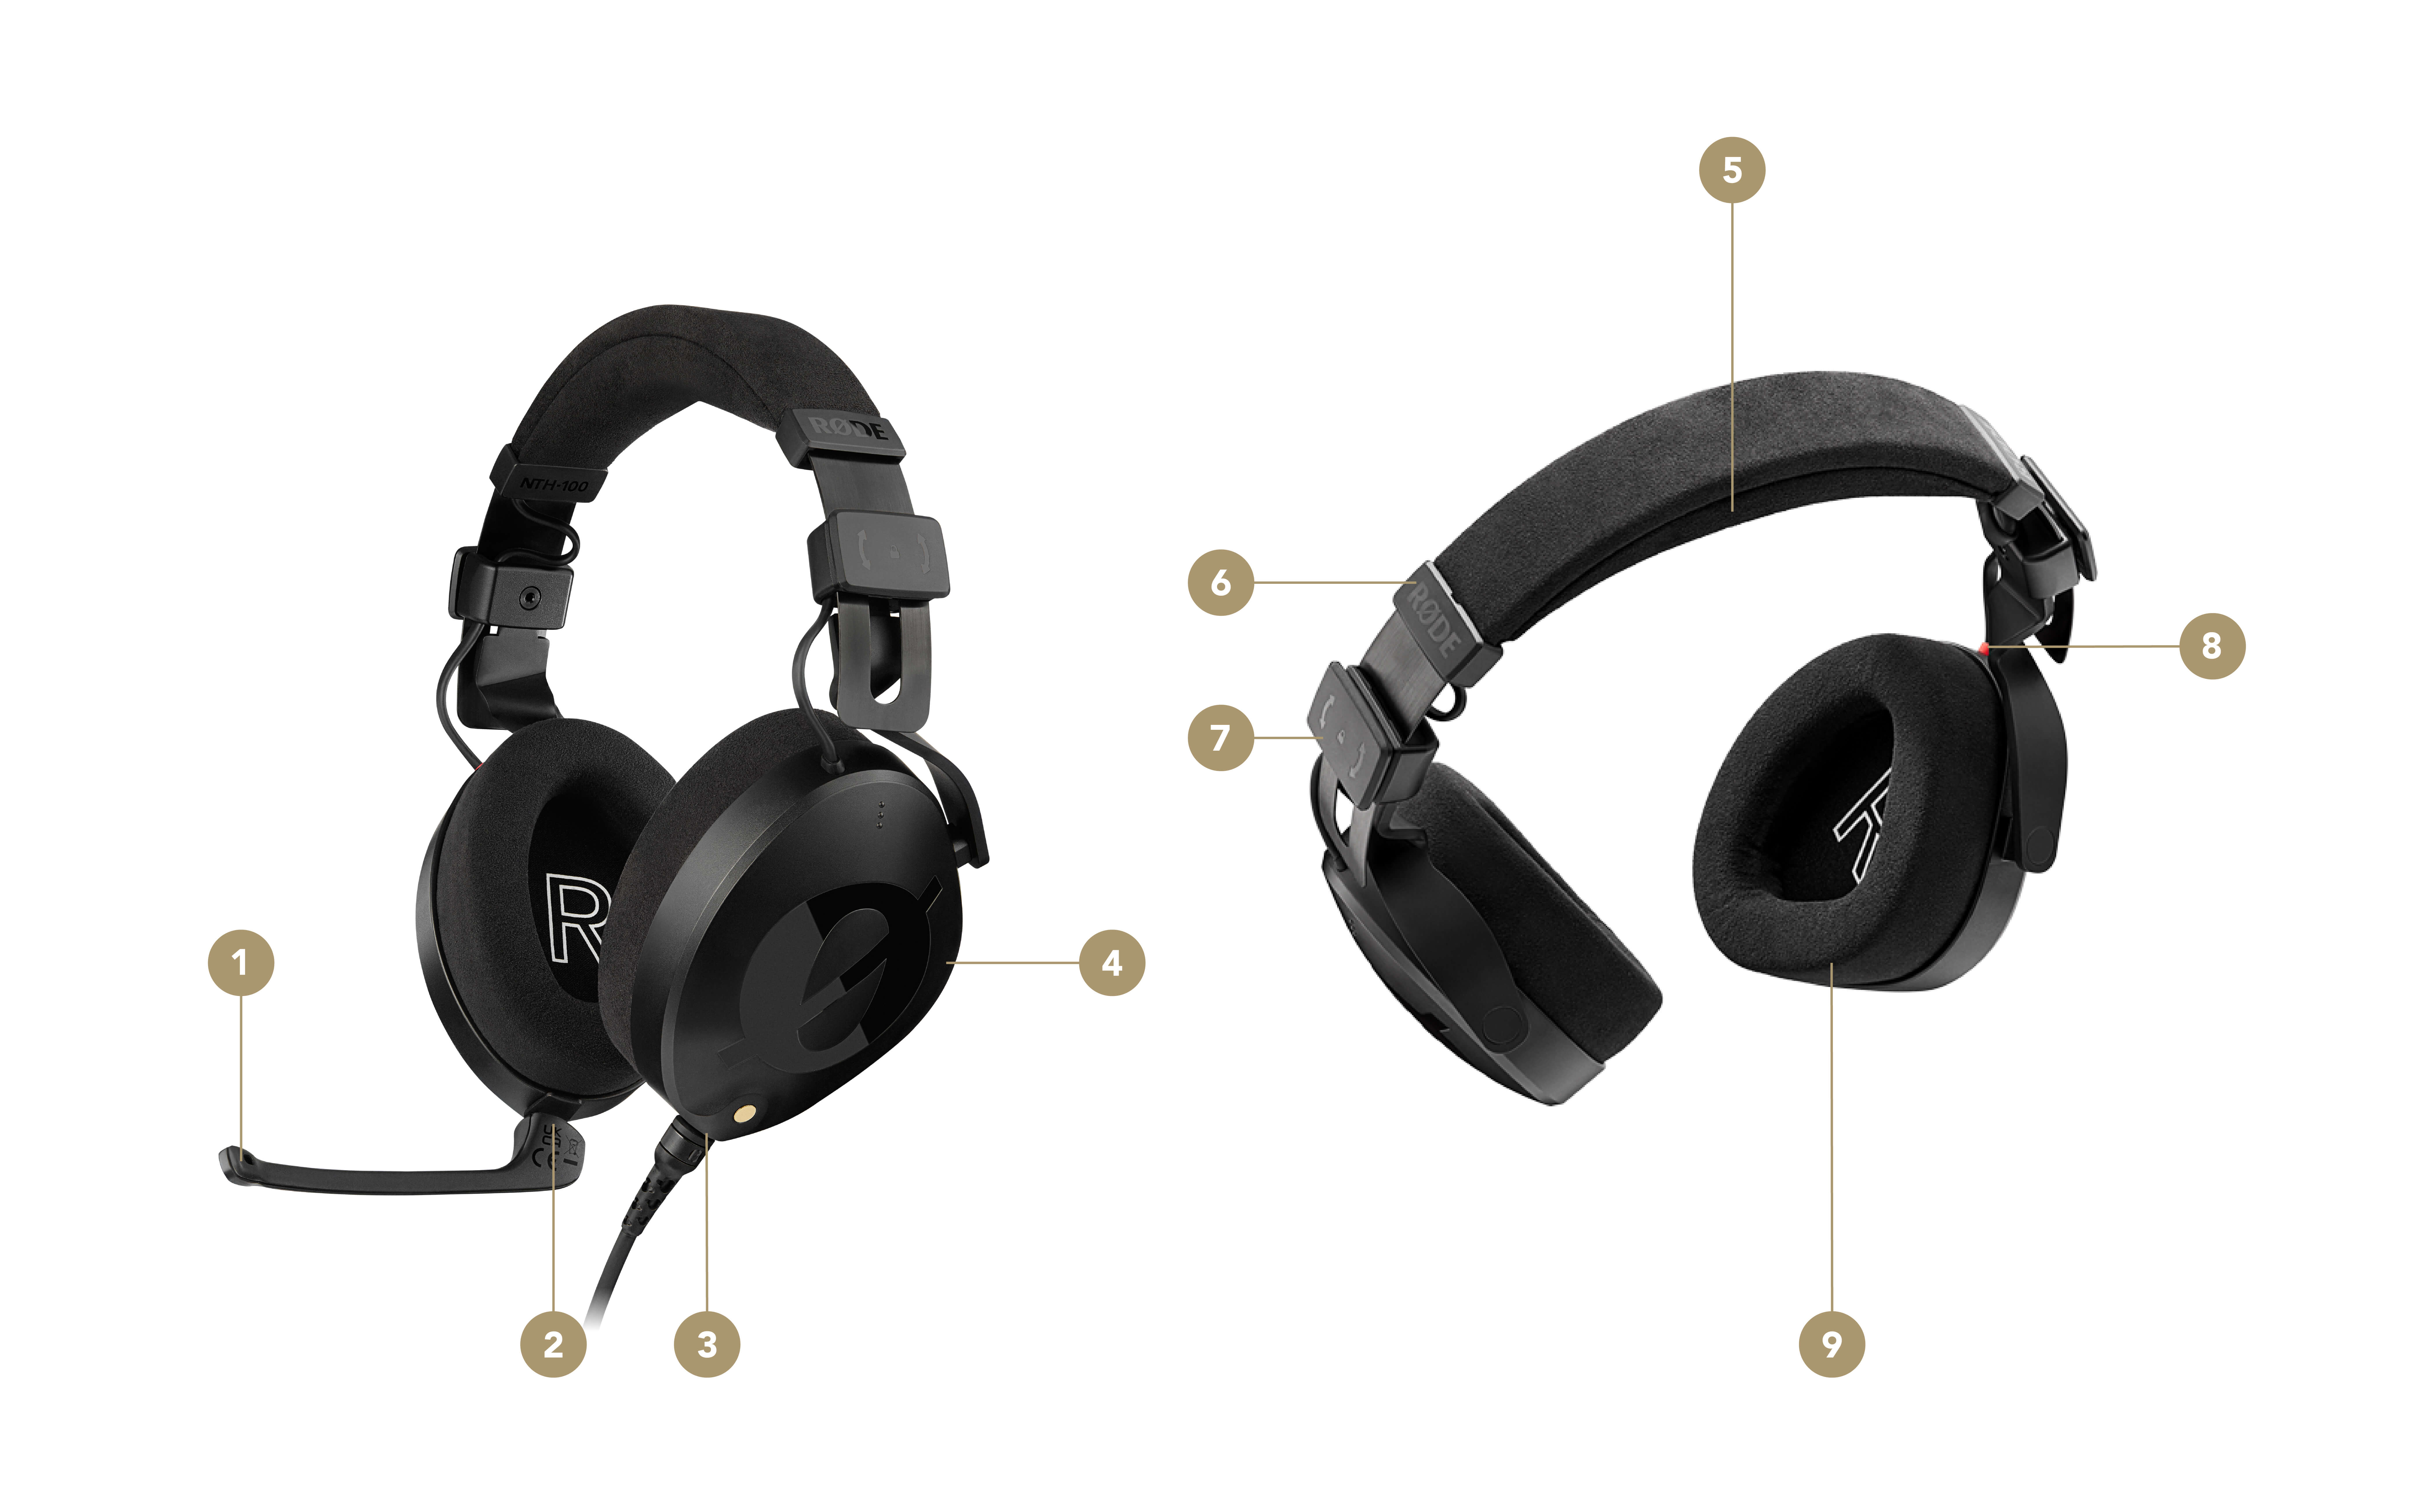
1 NTH-Mic headset microphone
2
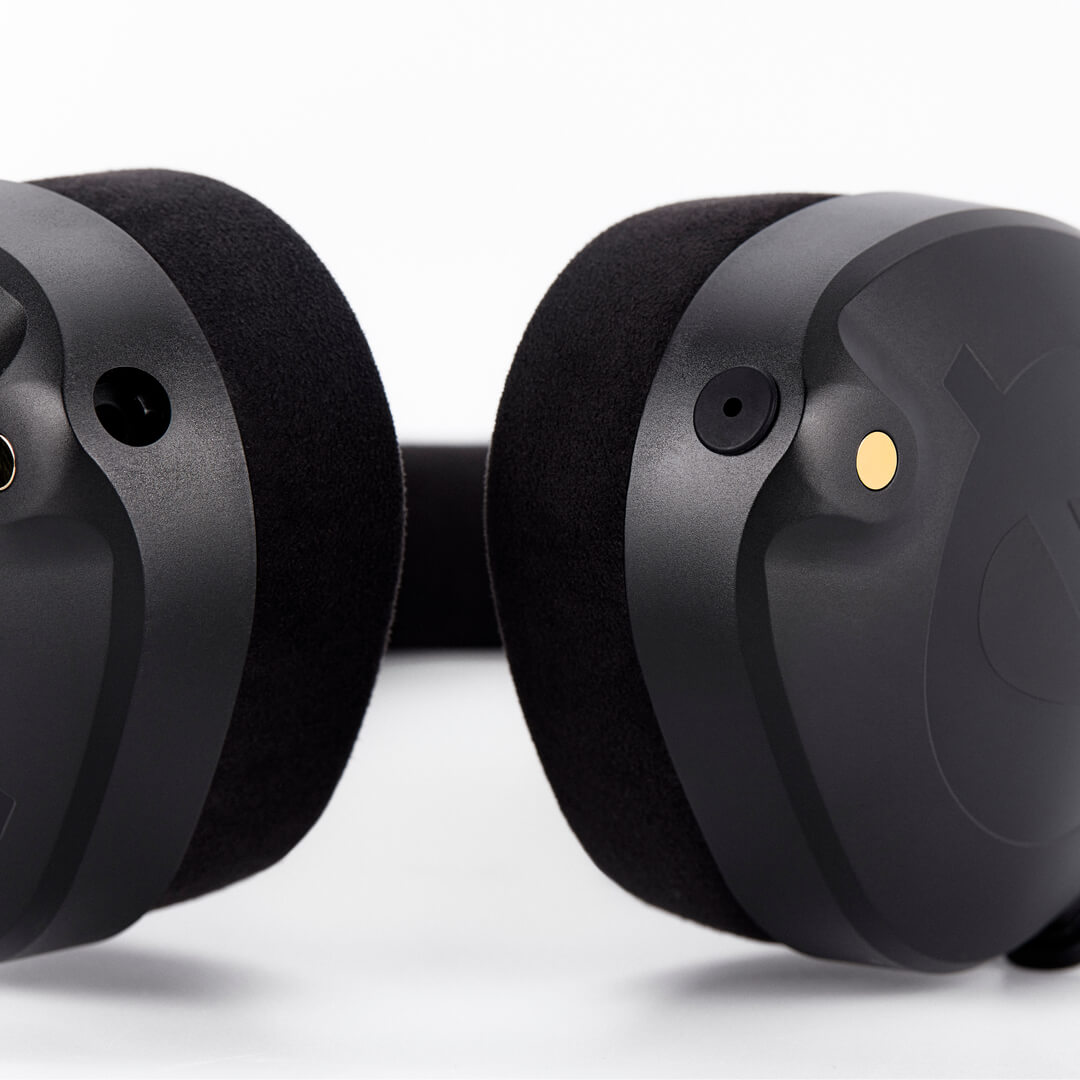
Right microphone attachment socket
Push microphone bayonet into place and turn clockwise to lock
3
Left cable attachment socket
Use this socket for the supplied TRRS cable
4 Ergonomic earcup
5 Removable Alcantara®️ headband cushion
6
Headband cushion locking tabs
Slide locking tabs down on either side to release
7
FitLok™️ locking tab
Twist to lock and unlock headband size adjustment
8 Red indicator for right earcup
9
Removable Alcantara®️ ear cushion
Pull to remove
Connecting the TRRS Cable to the Headset
The cable supplied with your NTH-100M or NTH-Mic features a different type of connector on each end. Insert the jack plug with the bayonet connector and padlock symbol into the left headphone earcup and twist clockwise to lock securely in place. To remove it, simply twist counterclockwise to unlock and pull free.
Note
You’ll need to use the supplied TRRS cable with your NTH-Mic or NTH-100M for the microphone to function correctly.
Connecting and Using the NTH-Mic
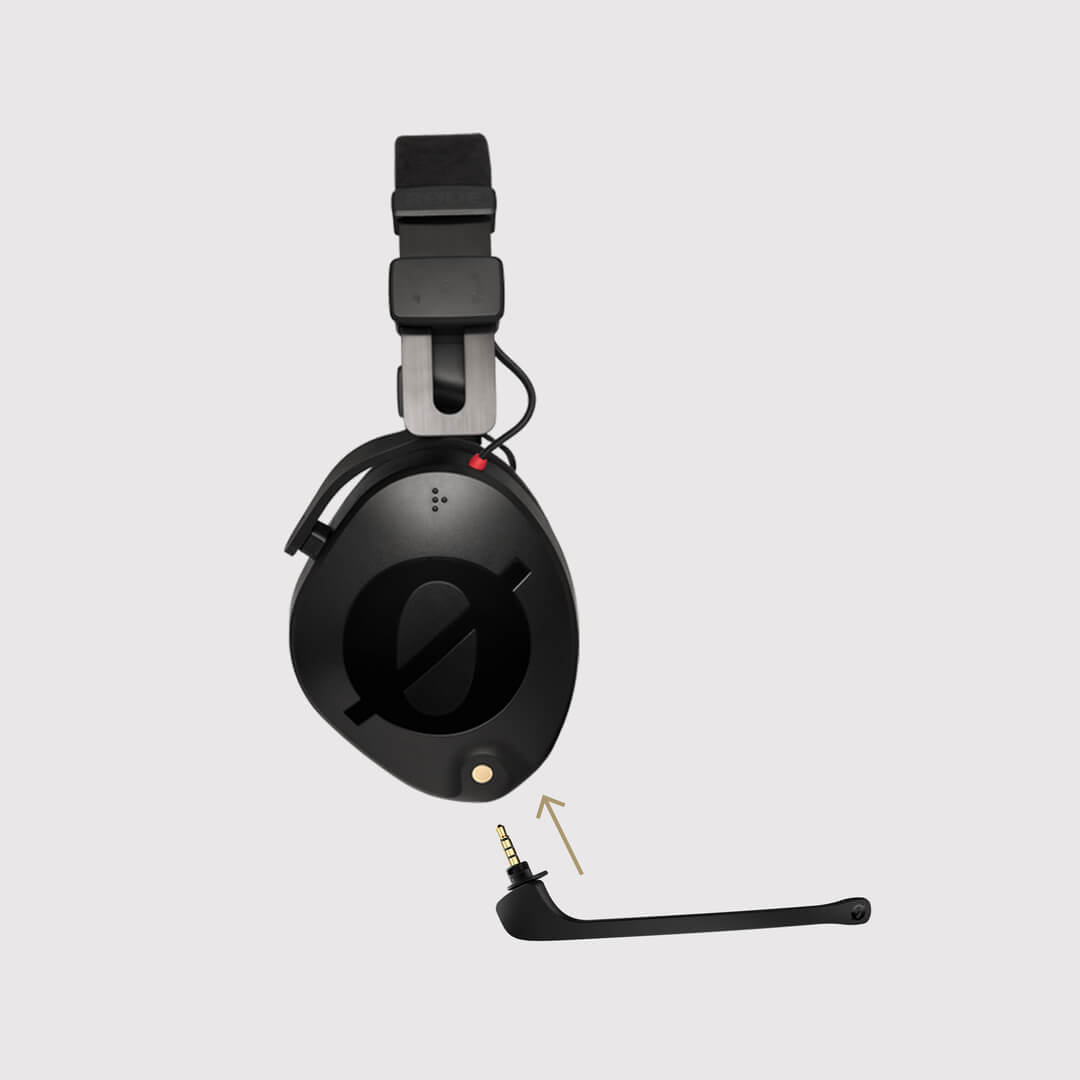
To attach the NTH-Mic to your NTH-100 headphones or NTH-100M headset, simply insert the plastic bayonet end into the right earcup’s socket and twist it clockwise to lock the microphone in place, just like you would with a cable. To detach the microphone, twist counterclockwise to unlock it and then pull the microphone free.
When attached, the microphone is positioned optimally to clearly capture your voice and to reject plosives (short, sharp puffs of air produced when mouthing certain syllables, such as the ‘p’ in ‘plosive’).
Connecting the Headset to your Device
The supplied TRRS cable comes with a standard 3.5mm jack plug for connecting to devices with a 3.5mm output, such as a smartphone or laptop. Also included is a 1/4-inch to 3.5mm adaptor for connecting to professional audio equipment, such as mixers and audio interfaces.
Pro Tip
The NTH-100M is a low-impedance, high-sensitivity headset. This means it can be very loud, even if the volume is low on the connected device. We recommend turning down your volume to zero before plugging in the headset, and then gradually raising the volume to the desired level.
Setting the NTH-100M as Input and Output Device
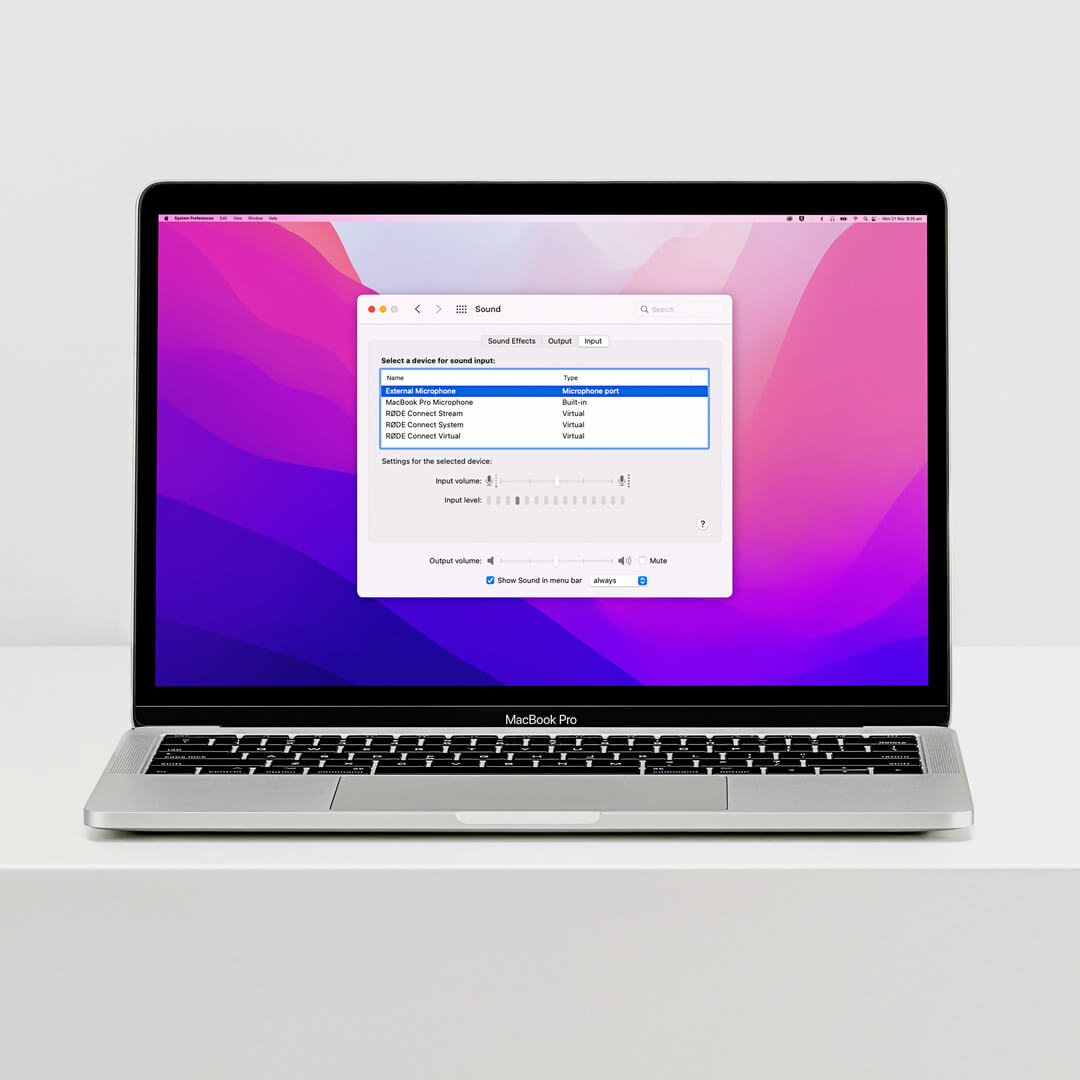
Once connected, the NTH-100M should automatically be recognised and assigned as both the audio output and input device, but if it isn’t, navigate to ‘Sound Preferences’ (on Mac) or ‘Sound Settings’ (on Windows) and select ‘External Headphones’ and ‘External Microphone’ as your output and input device respectively.
If you are using the NTH-100M with a video call app, such as Zoom, Teams, Skype or Discord, make sure that it is set as both your input (also called Microphone) and output (also called Speaker/Headphones) device. Also be sure to turn off any automatic gain adjustment within your app. This option will have a different name depending on your app:
- Zoom: 'Automatically adjust microphone volume' > off
- Discord: 'Automatically determine input sensitivity' > off
- Skype: 'Automatically adjust microphone settings' > off
Setting the System Gain Levels
If you want to change the level of your microphone – for instance if you notice it is distorting during use, is too loud or is too quiet – you can do this by accessing your ‘Sound Preferences’ (on Mac) or ‘Sound Settings’ (on Windows) and adjusting the input volume slider up or down.
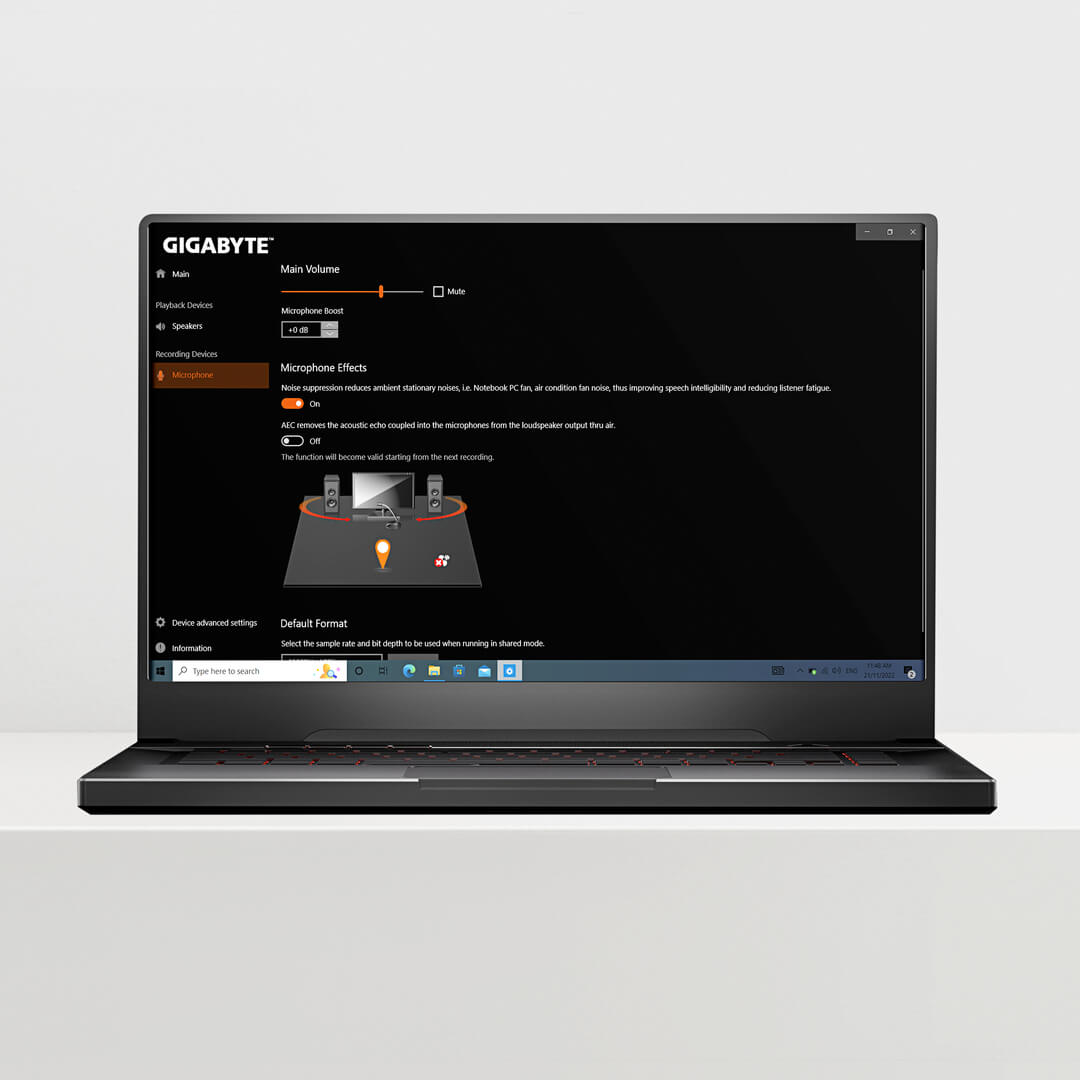
If you’re using a Windows computer, be sure that your audio driver or sound card doesn’t have any extra microphone gain settings enabled. For instance, the Realtek control panel features an option for ‘Microphone Boost' which you want to set to 0dB rather than +10dB or +20dB etc. This is accessed by navigating to 'Sound Settings' > 'Sound Control Panel' (or 'More Sound Settings') > 'Recording' > 'Microphone (Realtek)'.
Using the Splitter Cable
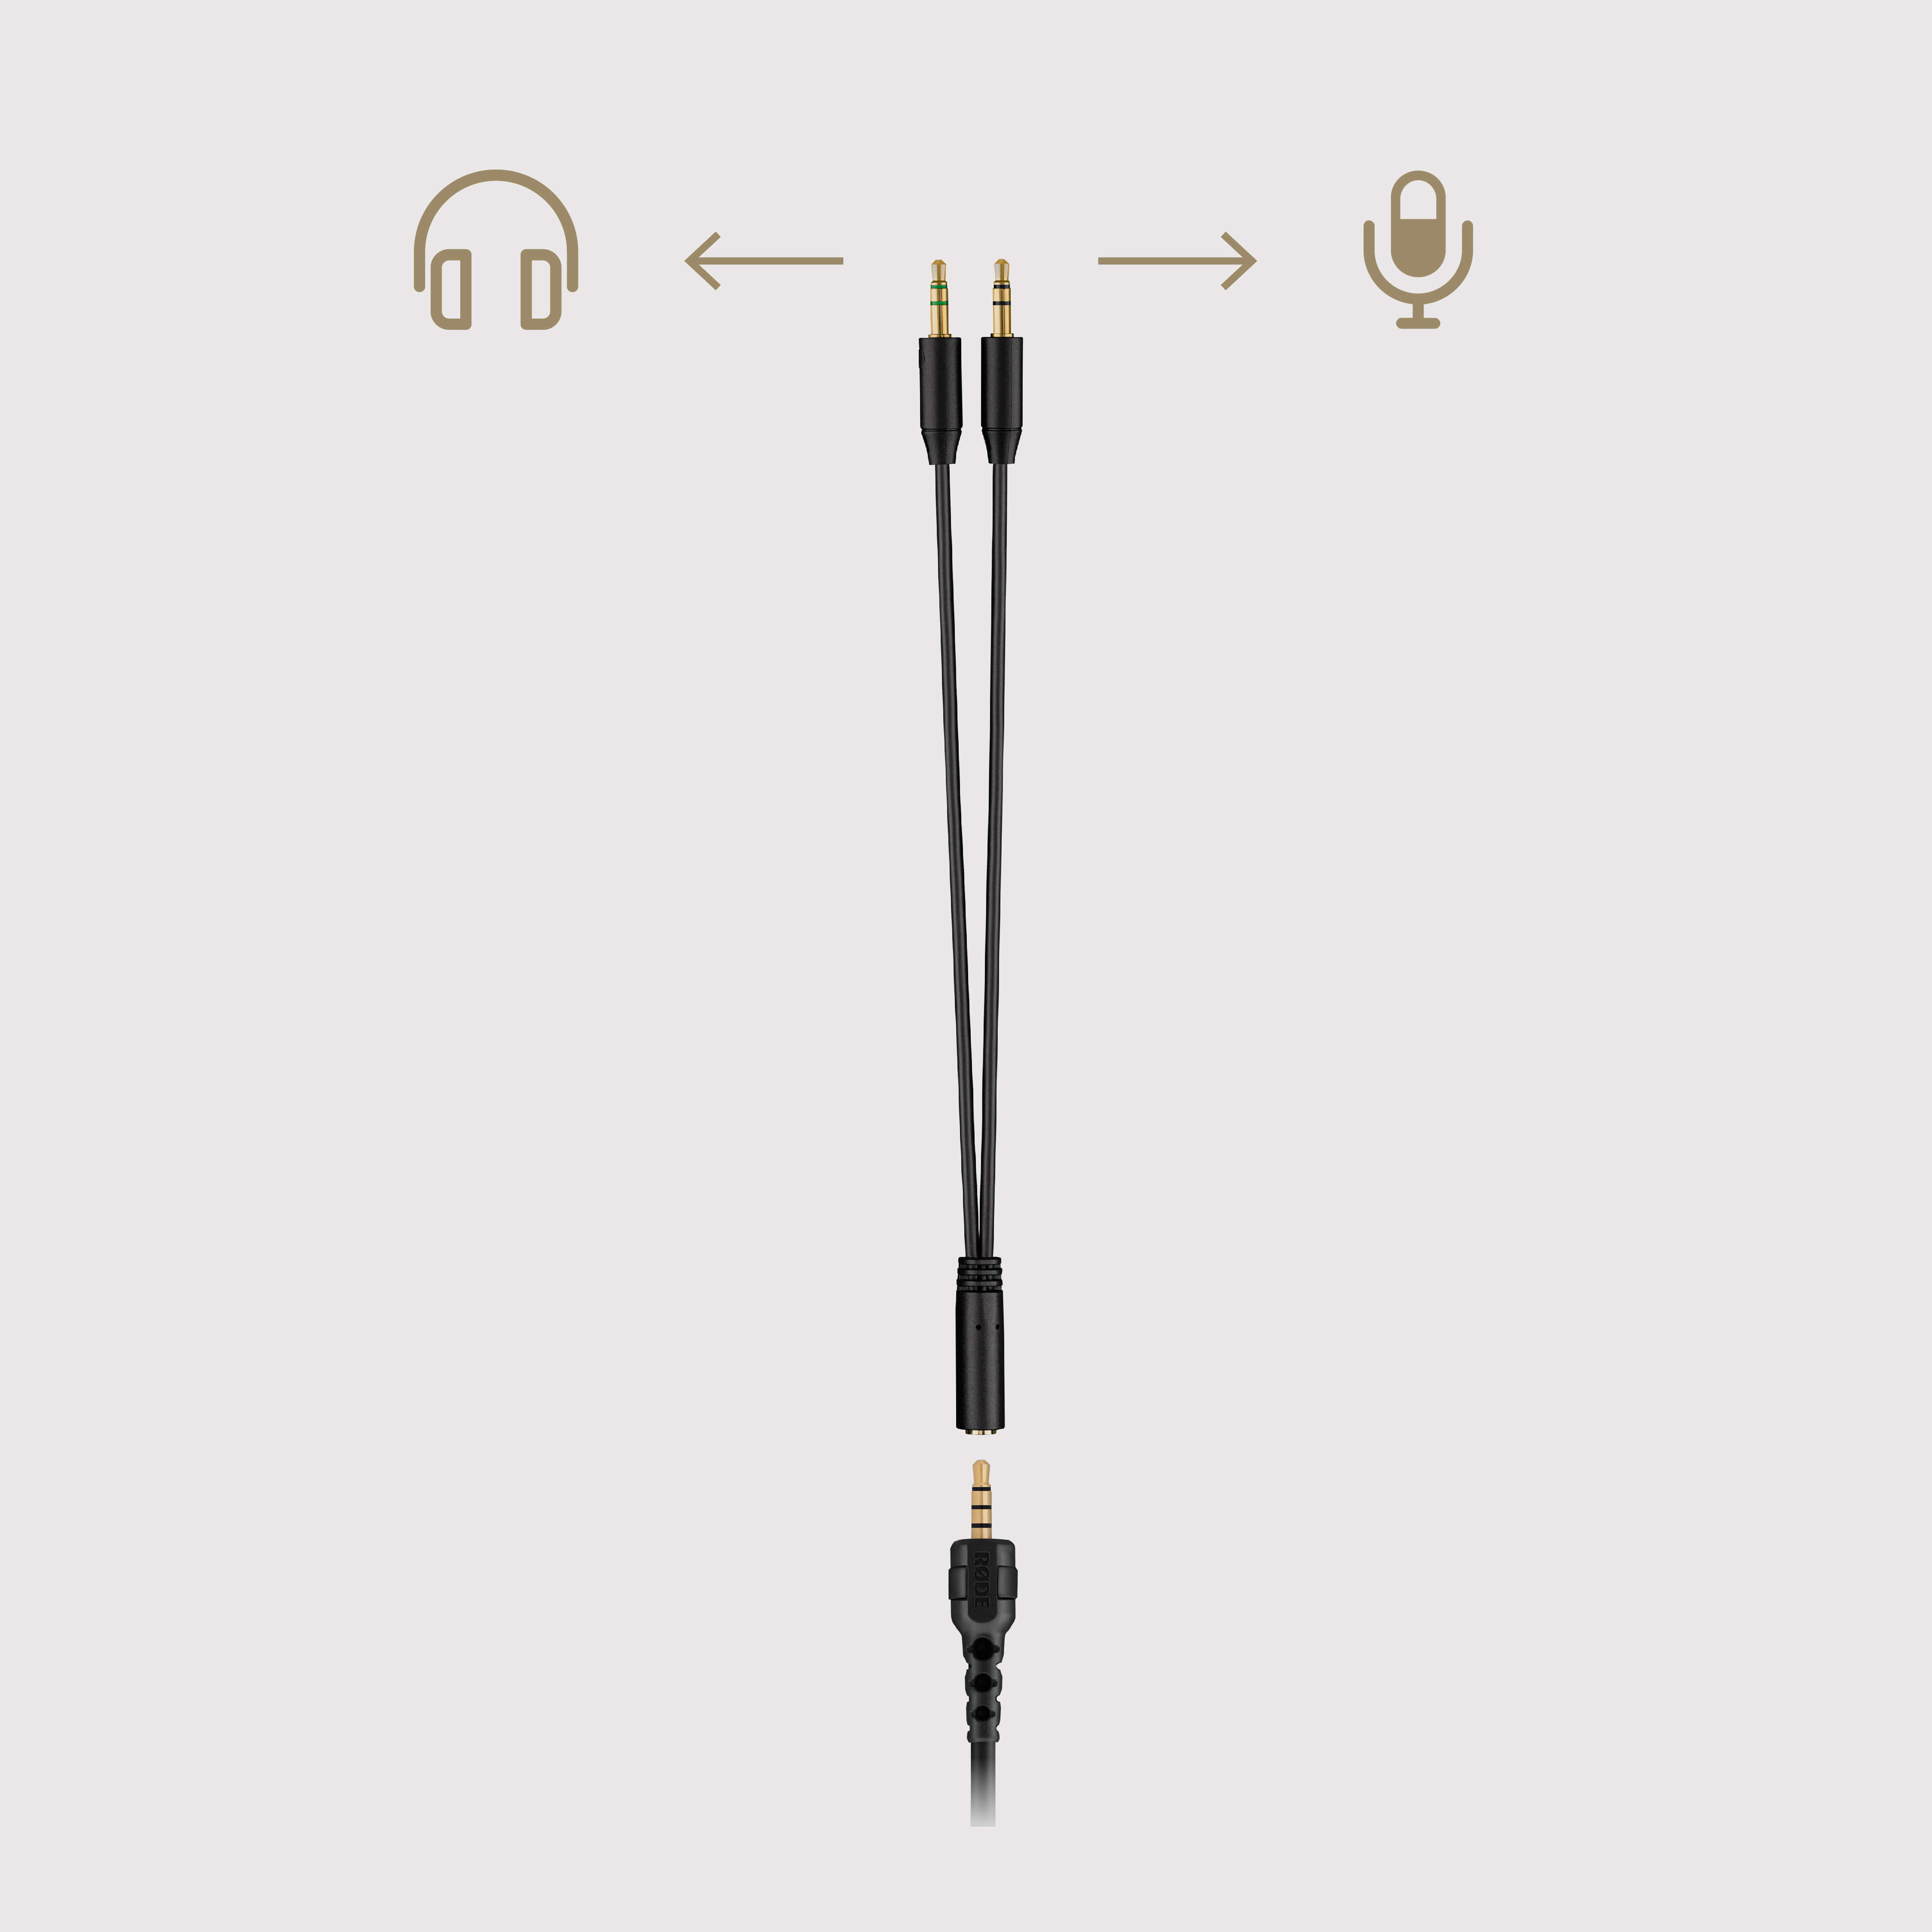
Both the NTH-100M and NTH-Mic come with a splitter cable adaptor that you can use with older laptops and desktop computers or other devices such as the RØDECaster Pro II that feature a separate microphone input and headphone output. Simply plug the single end of the adaptor into your TRRS headset cable, plug the end that features a microphone symbol and black rings into your device’s microphone input, and the end that features a headphones symbol and green rings into your device's headphone output. To connect your NTH-100M to the RØDECaster Pro II, you'll need to use a 1/4-inch adapter (such as the HJA-4) to connect the headphone cable and a VXLR+ or VXLR Pro for the microphone cable.
Using the FitLok™ Locking System
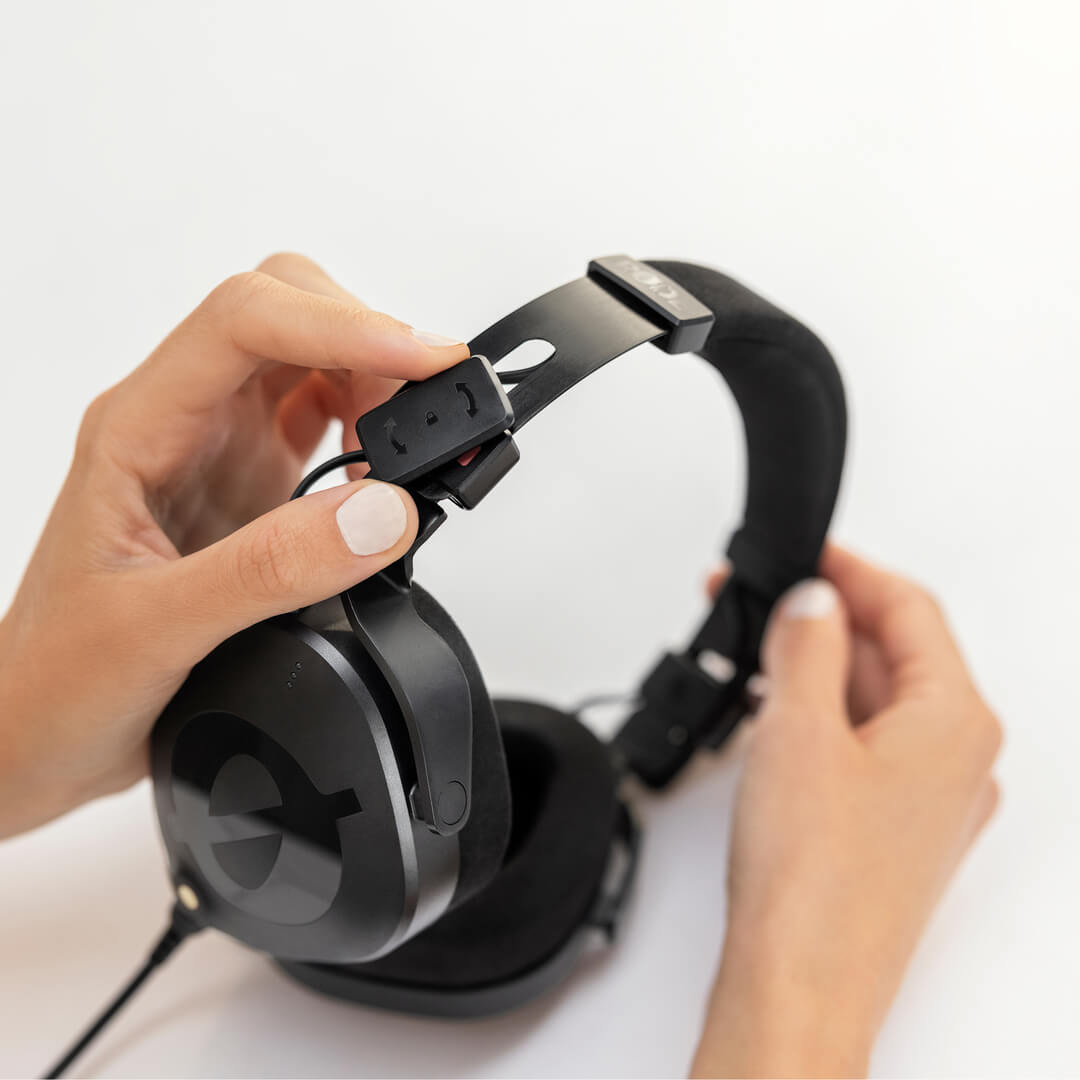
The FitLok™ system allows you to set the NTH-100M headband size to your preferred comfort setting, and then lock this in place, meaning you never have to adjust it again. To unlock the headband adjustment, twist the locking cam on the right earcup clockwise, and twist the cam on the left earcup counterclockwise. The earcups will now slide freely, allowing you to set them to your preferred position. Once you are comfortable, simply rotate the cams to their original position to lock the earcups into place.
Pro Tip
You can unlock and lock the Fitlok™ adjustment whilst wearing the NTH-100M for the optimal fit – perfect for long hours of content creation.
Using the Rubber Seal
Included in the accessory pack is a rubber seal for closing off the earcup socket when the NTH-Mic is not in use. We recommend using this whenever the microphone isn’t connected. Not only will it prevent dirt and debris entering the socket, but it also ensures that the frequency response is perfectly matched between left and right earcups for critical monitoring.
Using the COLOR ID Rings
The NTH-100M comes with a set of eight COLOR ID rings. These can be used for quick identification in setups where multiple headsets are in use. To use them, remove the black ID ring that clips around the body of the plugs at either end of your headset’s cable, and replace it with your preferred colour. Note that the colours match the channel ID colours used by the RØDECaster Pro II and RØDE Connect.
Earpad and Headband Cushion Removal and Cleaning
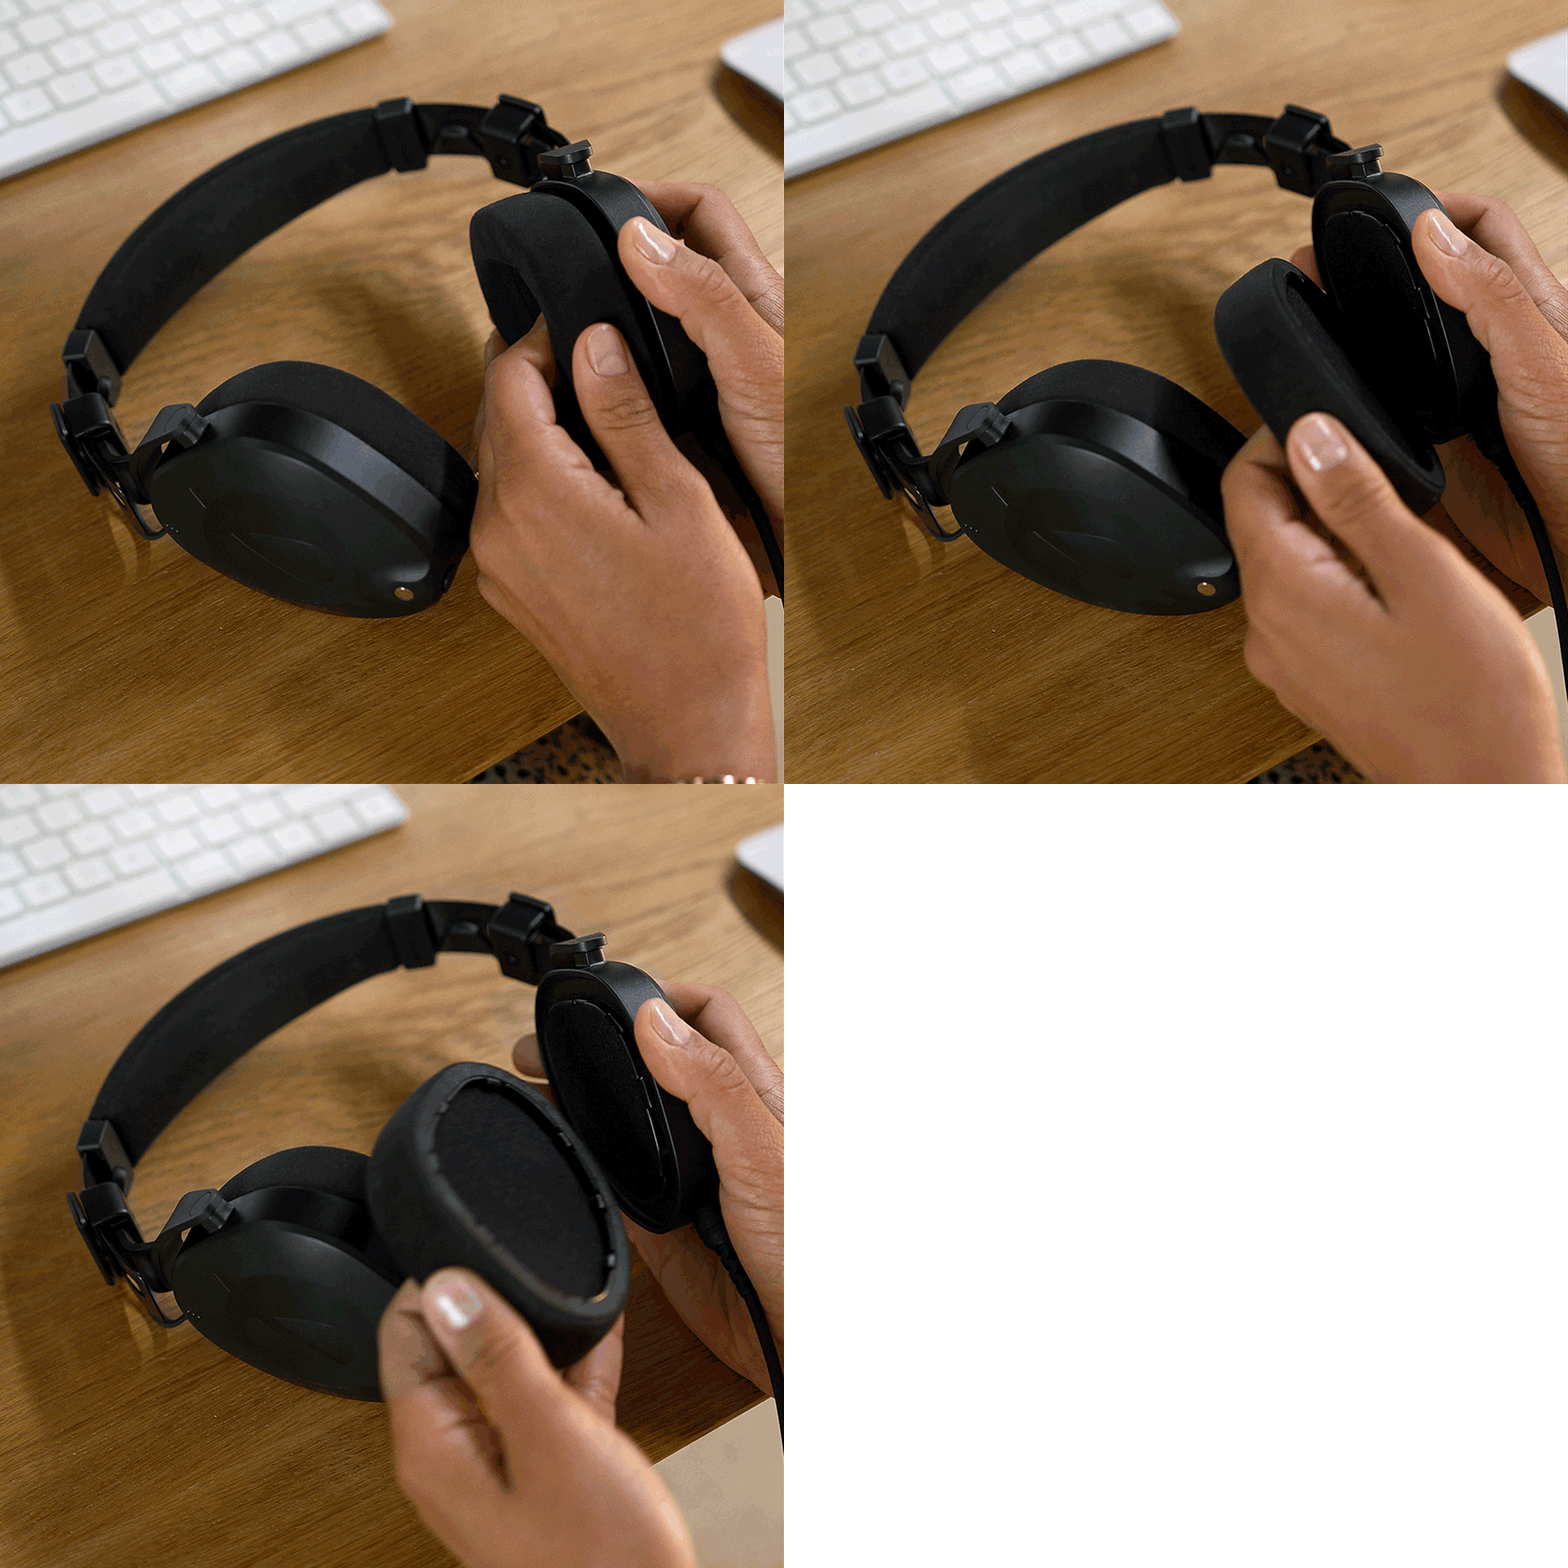
To remove the ear cushions from the headphones, simply pull them away from the earcup. To replace, push them back into place, working around the perimeter to ensure all the tabs are locked into place.
To remove the headband cushion, slide the locking tabs on either side of the headband away from the cushion. You may need to push the locking tab from underneath to facilitate this. Pull off the lower part of the cushion (held in place by Velcro), and then slide off the upper one. To replace, reverse the steps, ensuring that the locking clips are correctly positioned over the top of the ends of the cushions before sliding them into place, then make sure they click as they lock into position.
To clean the cushions, simply wipe with a damp cloth. Do not immerse the cushions in water, or use leather or suede cleaning products, as this may damage the cushion. Replacement cushions are available – please contact our service centre if you’re in need of replacements.