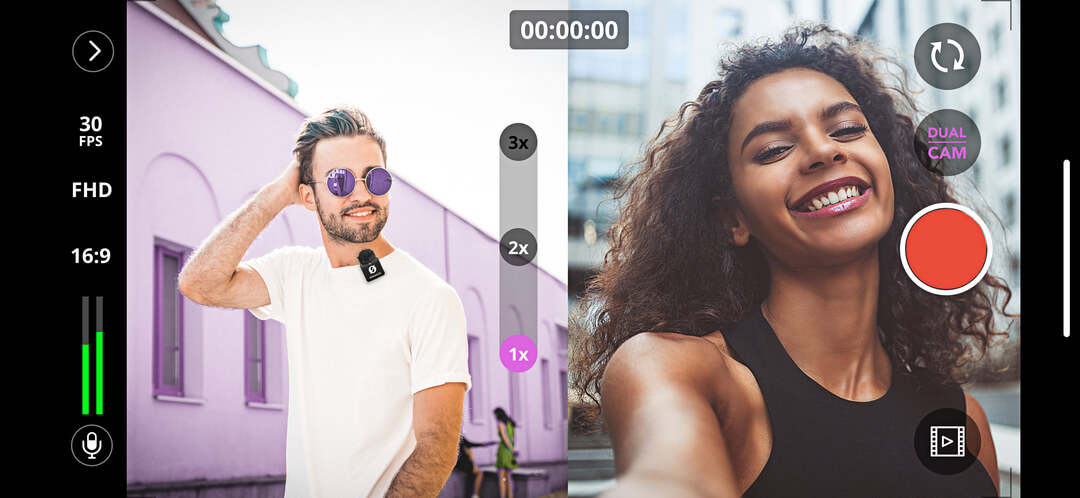
RØDE Capture
RØDE Capture is an intuitive video app with unique creative features that unlock the full potential of your RØDE microphone for capturing professional video and audio.
Learn everything you need to know about RØDE Capture here.
Features
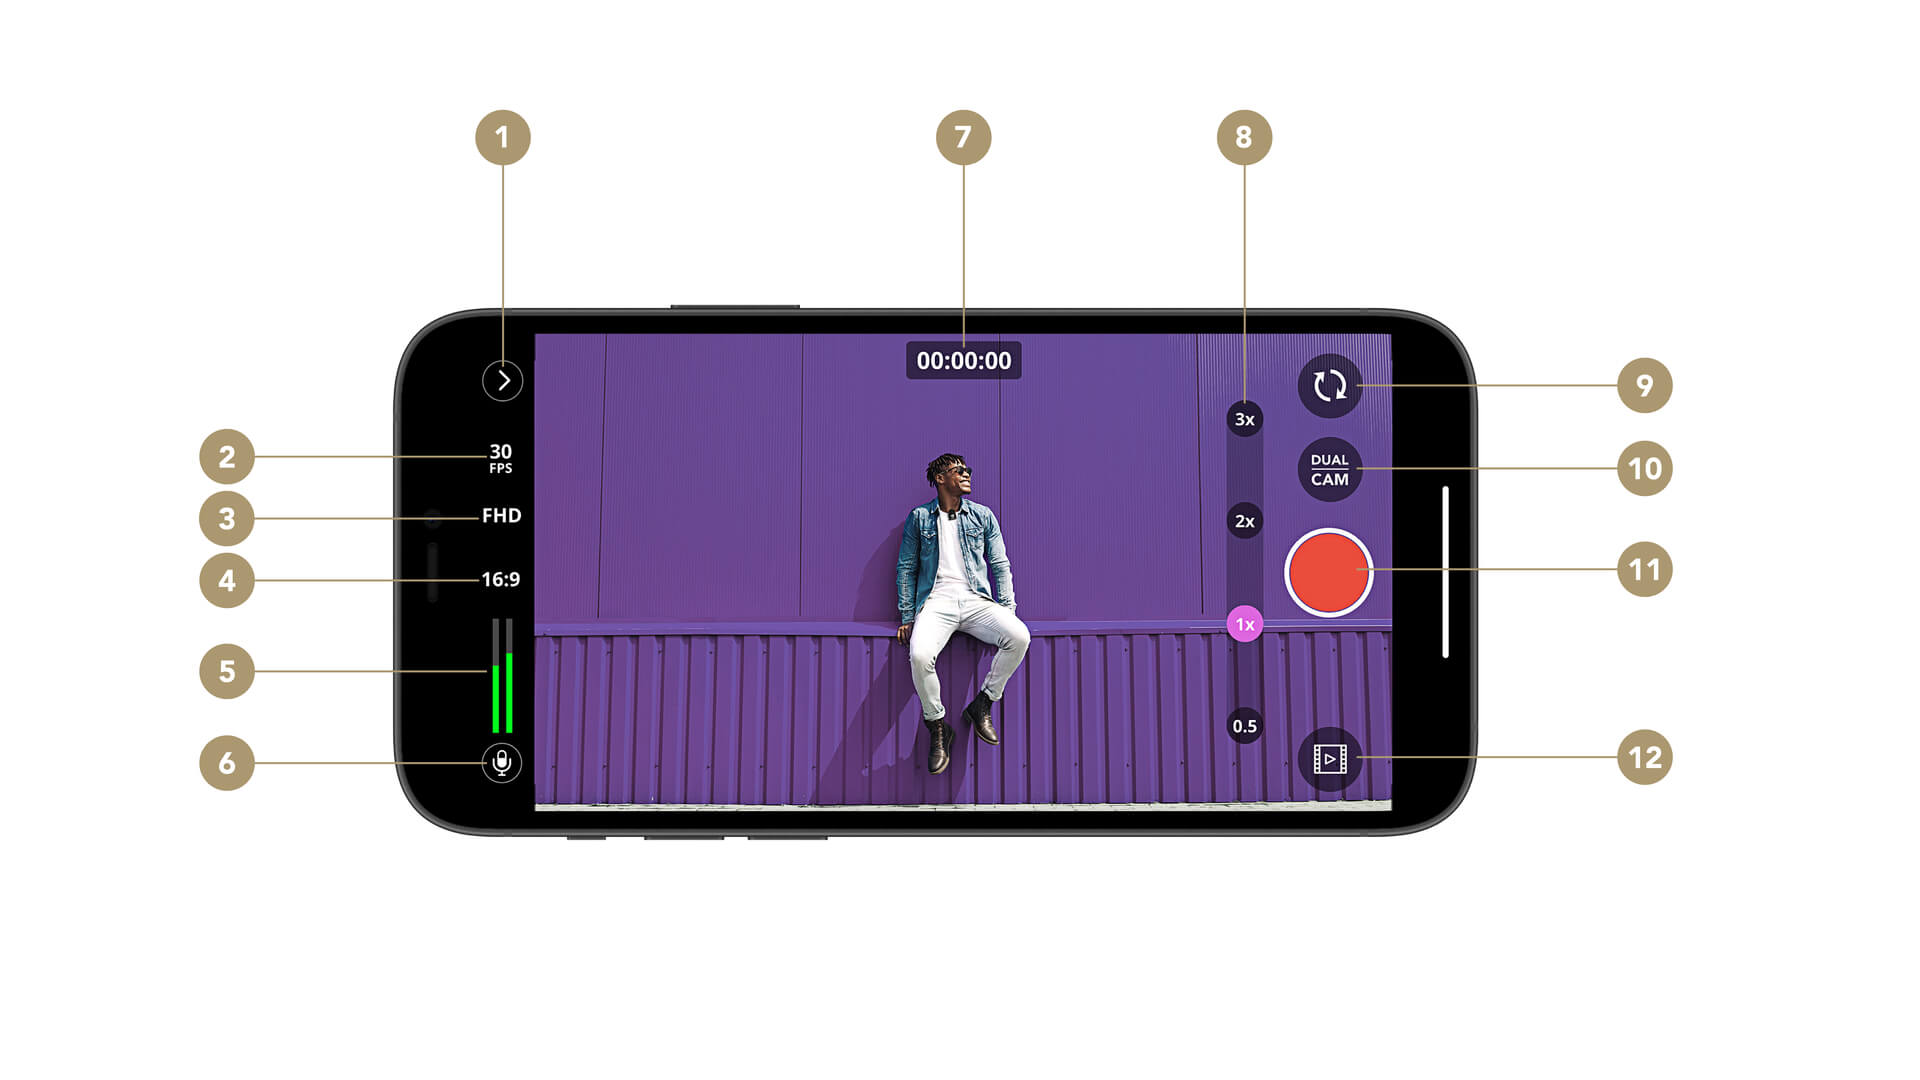
1Toolbox
2Framerate Settings
3Recording Resolution
4Aspect Ratio
5Audio Level Meter
6Microphone Menu
7Record Timer
8Zoom Level
9Swap Camera
10Dual Camera Menu
11Record Button
12Camera Roll
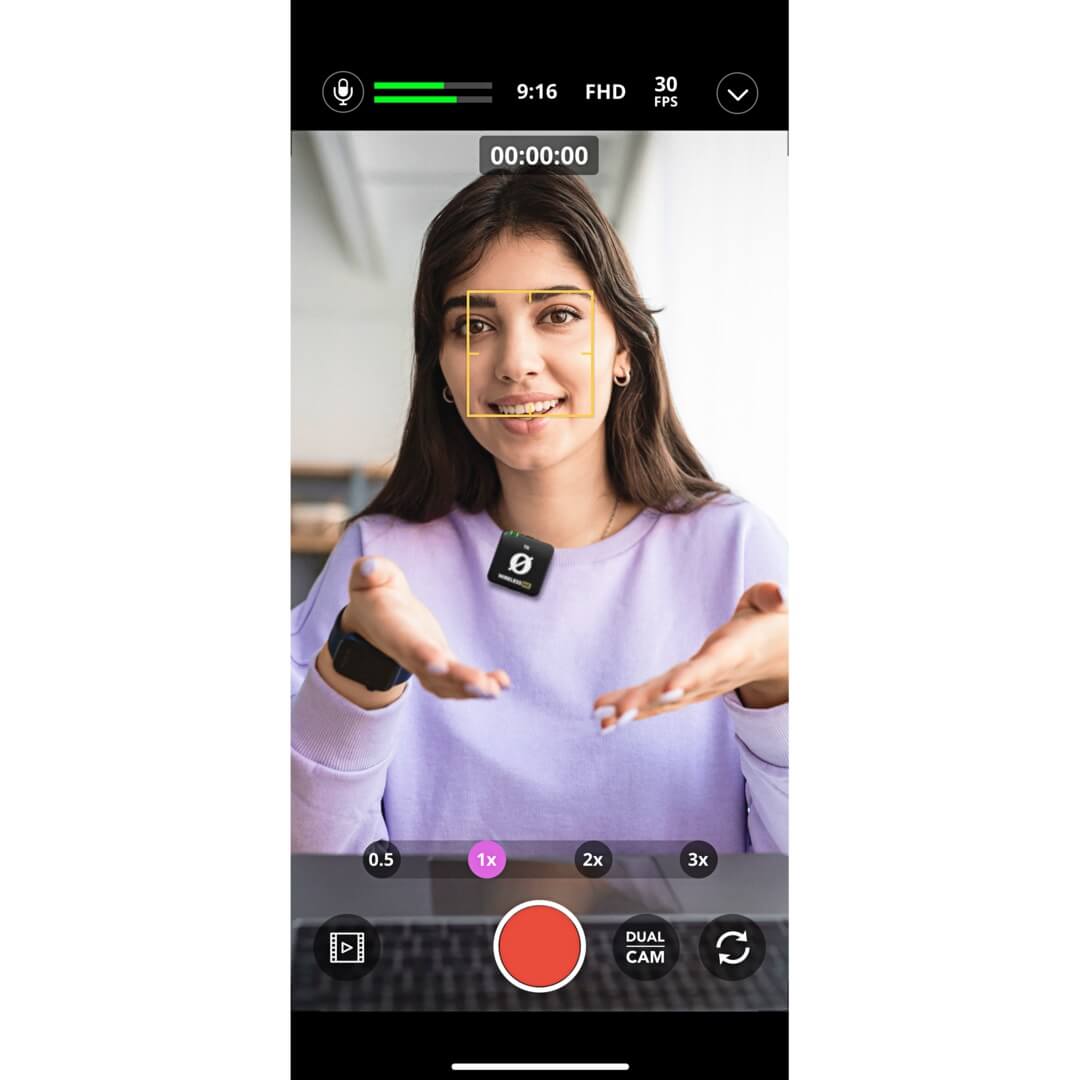
Viewfinder Screen
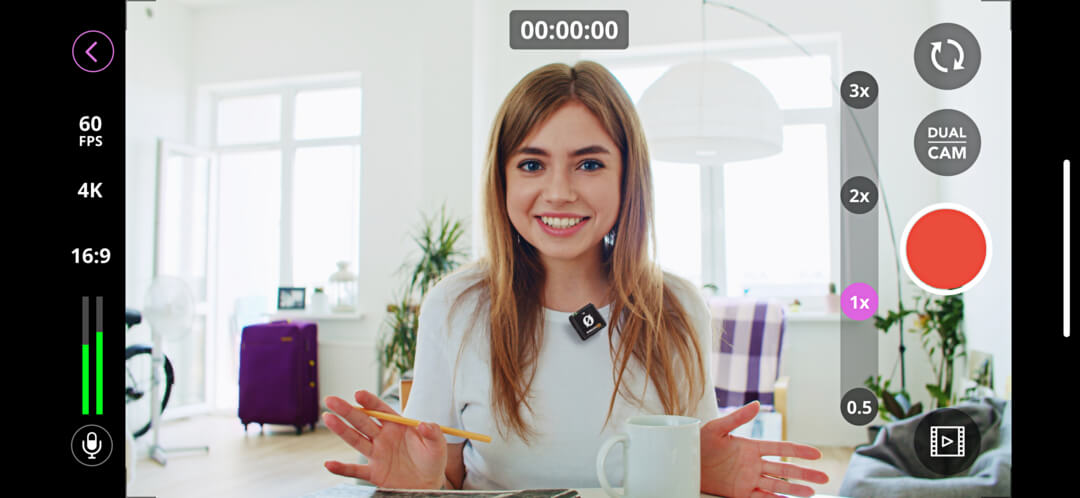
The RØDE Capture viewfinder screen features the video preview at its centre, allowing you to tap on a point in your frame to focus on it and automatically adjust brightness and exposure settings, just like your phone's default camera app. You can also pinch to zoom or use the ‘0.5x’, ‘1x’, ‘2x’ and ‘3x’ controls to quickly jump to a preset zoom level.
Certain models of iPhone and iPad may not support the full zoom range.
Swap Camera
You can switch between your phone’s primary camera and its selfie camera using the swap camera button (indicated by the pair of clockwise arrows).
Recording
Tap the big red record button to begin your recording and tap it again to end it, automatically saving your recording to your camera roll.
Camera Roll
Tapping this button (indicated by the play arrow) will open your camera roll where you can view, delete or share your recordings.
The camera roll will also contain any photos and videos you’ve taken in your phone’s native camera app.
Toolbox
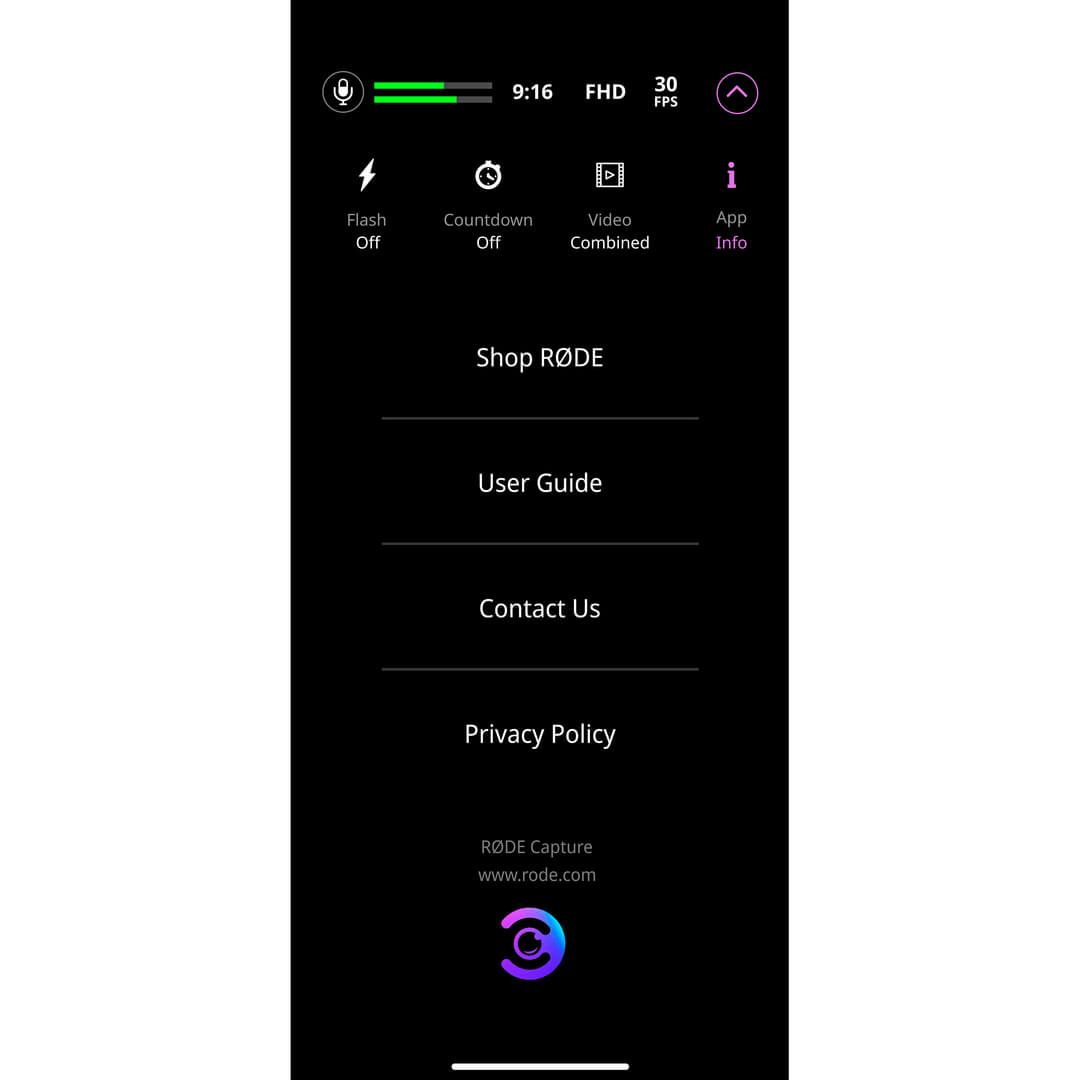
Tapping the Toolbox menu (indicated by the arrow) will expand it to reveal further menu options.
Flash
Toggle this setting in order to use your phone’s torch to light up dark scenes or subjects. When in Auto mode, the flash will engage as soon as you hit record if the scene you’re shooting is dark enough, but it won’t engage if the scene gets darker while you’re already recording.
Countdown Timer
With this feature, you’re able to set a timer that will delay your recording by a set amount from when you hit the record button – this is ideal for situations where you need time to set yourself up before the recording starts. Tap this setting to cycle between 3, 5 or 10 second delays, or turning the timer off.
Combined or Separate Files
When in dual camera mode (see below), you’re able to record footage from each of your cameras into separate files or a single combined file.
Information
In this tab, you can access app information, help, and other resources such as the privacy policy.
Video Settings
RØDE Capture features a number of toggle controls for quickly changing the quality and size of your footage. All of these settings will affect the video quality, aspect ratio and file size for both cameras.
Framerate
Tap this control to toggle between 24fps, 30fps and 60fps (frames per second). Generally speaking, shooting in 60fps will help reduce blur when you have a fast-moving subject and can produce ‘smoother’-looking footage, but lower framerates save on storage space and also have their own ‘look’ (24fps is the cinematic standard used in most feature films, for instance).
Recording Resolution
Tap this control to toggle between High Definition (720 x 1280 pixels), Full High Definition (1080 x 1920 pixels) and 4K (2160 x 3840 pixels). HD is perfectly acceptable if you only plan to view or present your footage on mobile devices, but recording in FHD (or even 4K) is recommended for content that may be viewed on larger computer monitors, TVs and other displays.
Aspect Ratio
Tap this control to toggle between 1:1 (square), 3:4 and 16:9 aspect ratios. This setting changes the shape of your video and affects both cameras in dual camera mode (see below).
Note
Due to hardware limitations, 4K60fps recording is only available on iPhone 12 and later devices. Some iPads and other iOS devices may not support all resolutions and framerates.
Audio Meter and Microphone Settings
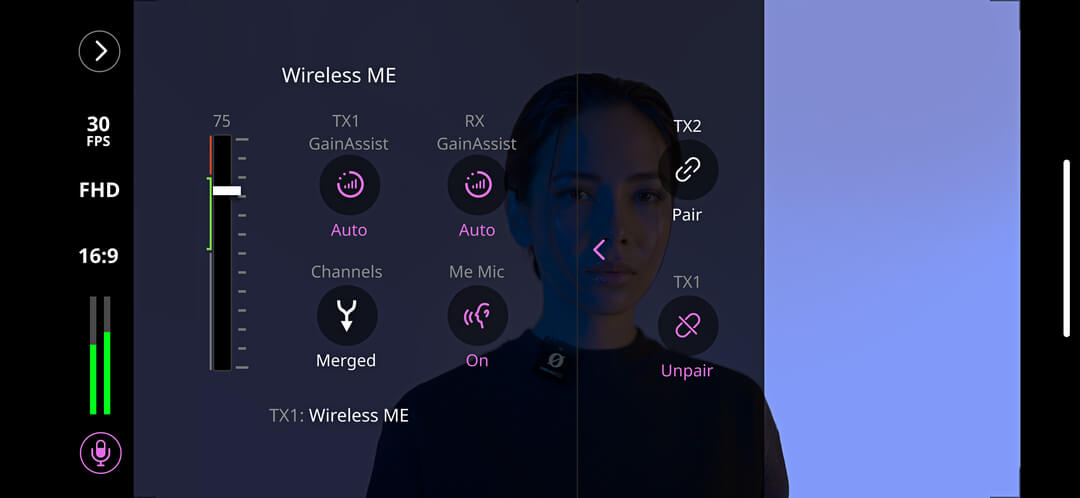
The audio level meter gives you an indication of your microphone input volume. Try to keep your levels around the 75% mark and in the green – if you notice them jumping into the orange or red occasionally, you’ll want to lower the input volume (see below) to avoid recording distorted audio.
Microphone Settings
Tapping the microphone icon will give you complete control over your connected RØDE microphone. Depending on which product you're using, this can include settings such as input level, high-pass filter, pad, split or merged recording, GainAssist and more. You can also access advanced settings (if your microphone offers them) by tapping the arrow. These include the high-frequency boost, compressor, noise gate and the APHEX®️ Aural Exciter™️ and Big Bottom™️ processors. Compatible RØDE microphones include:
Note
If you are using a device not listed above, this menu will just offer control over input level.
Dual Camera Mode
Tapping on the ‘Dual Cam’ button allows you to select either of the dual camera modes – split or PiP (picture-in-picture) – as well as ‘off’ to return to single camera mode.
Split Mode
When in split mode, your primary and selfie cameras are shown in a side-by-side configuration, with each one taking up half of the overall frame. If you’re recording to separate files, each recording will be in the chosen aspect ratio (16:9, for instance) despite how it’s presented on-screen.
Picture-in-Picture Mode
Picture-in-Picture mode places the selfie camera in a small window in one of the four corners of your primary viewfinder. You can tap-and-drag this small window to relocate it to any of the four corners, even while recording.
Camera Swap
When in both split and picture-in-picture modes, tapping the swap camera button will change the position of the rear and selfie cameras.
Note
Due to hardware limitations, certain models of iOS devices, such as earlier iPads, don’t support dual camera mode.